Email configuration
Choose how your organization sends email, such as notifications and messages from your systems. You can connect an SMTP server, Gmail, Office 365 or AWS SES, test the connection, and pick which one is used by default.
Before you start
- You need to be the organization owner, or have permission to view Email Configuration.
- Have the sign-in details for your email service ready: server, port, email and password for SMTP, Gmail or Office 365, or the access key, secret key, region and sender email for AWS SES.
- The Email Configuration menu is not shown on local installations.
Steps
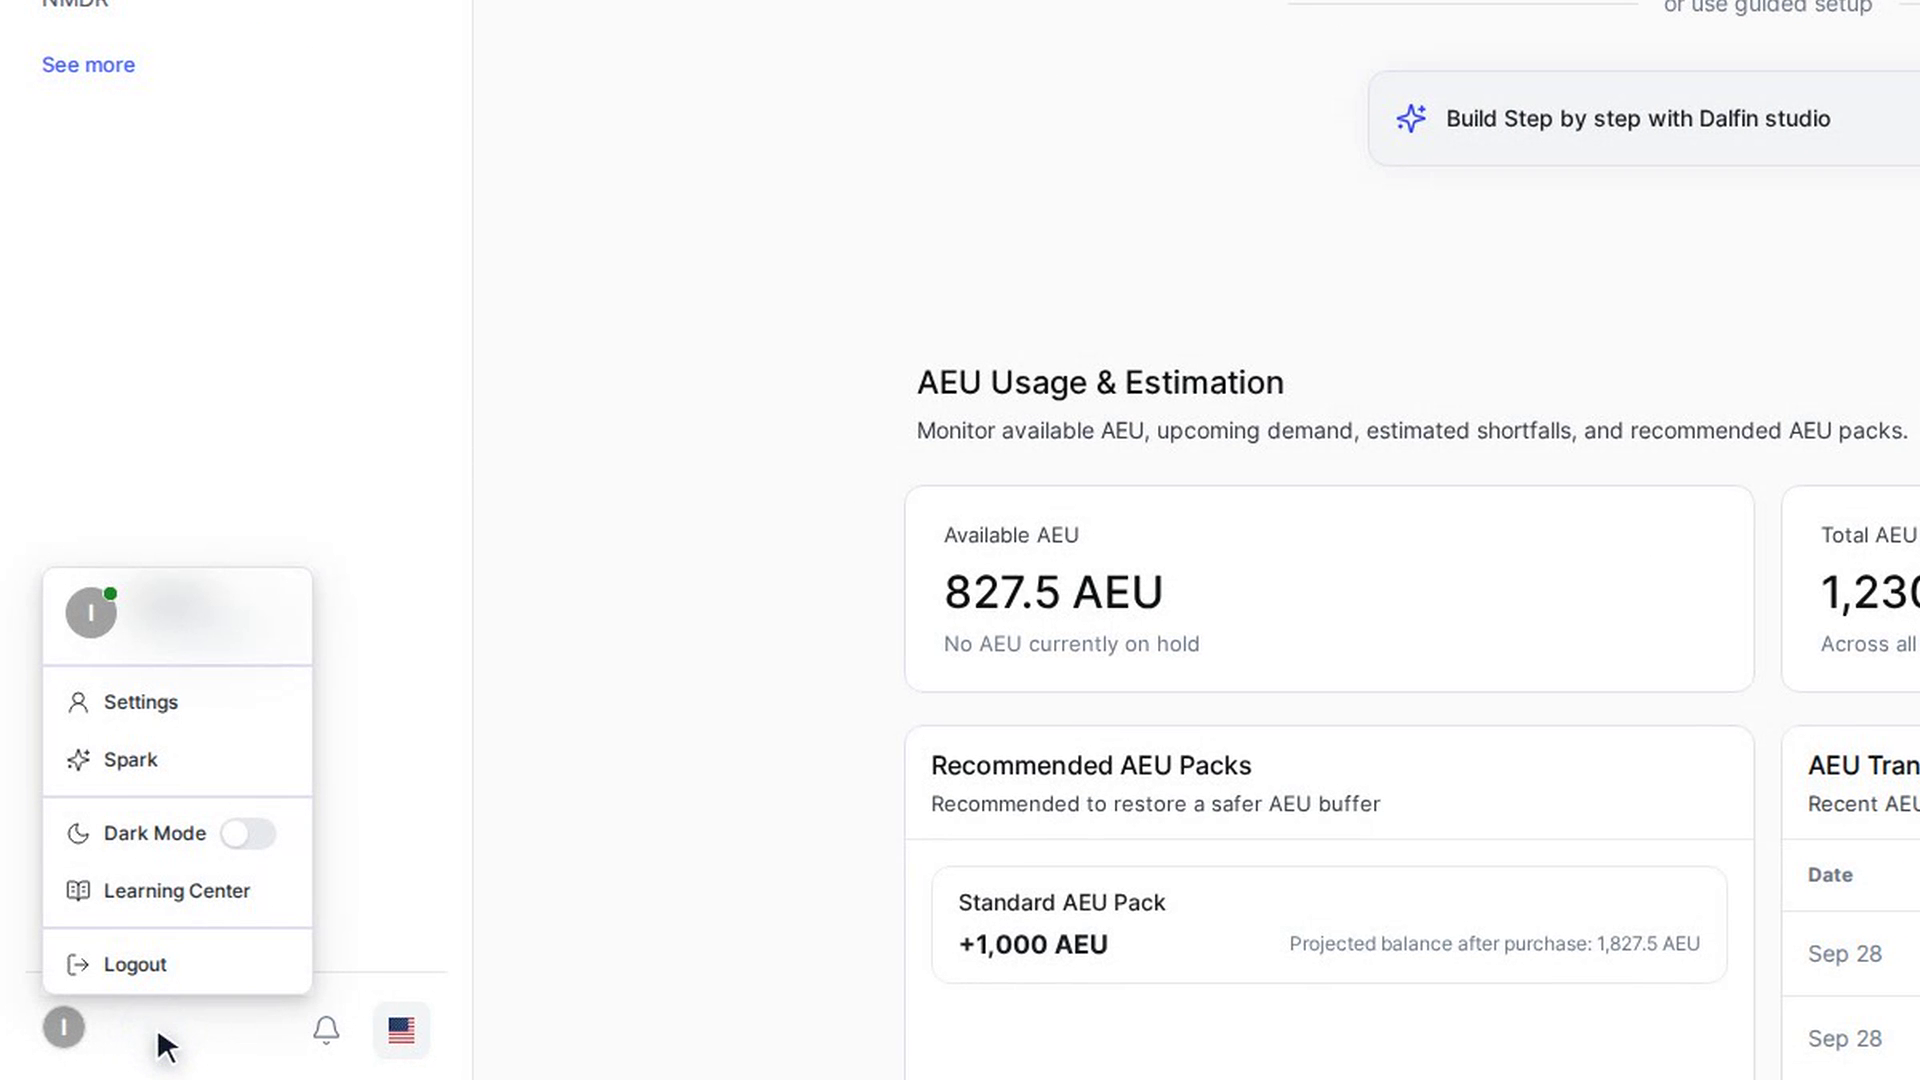
Open Email Configuration
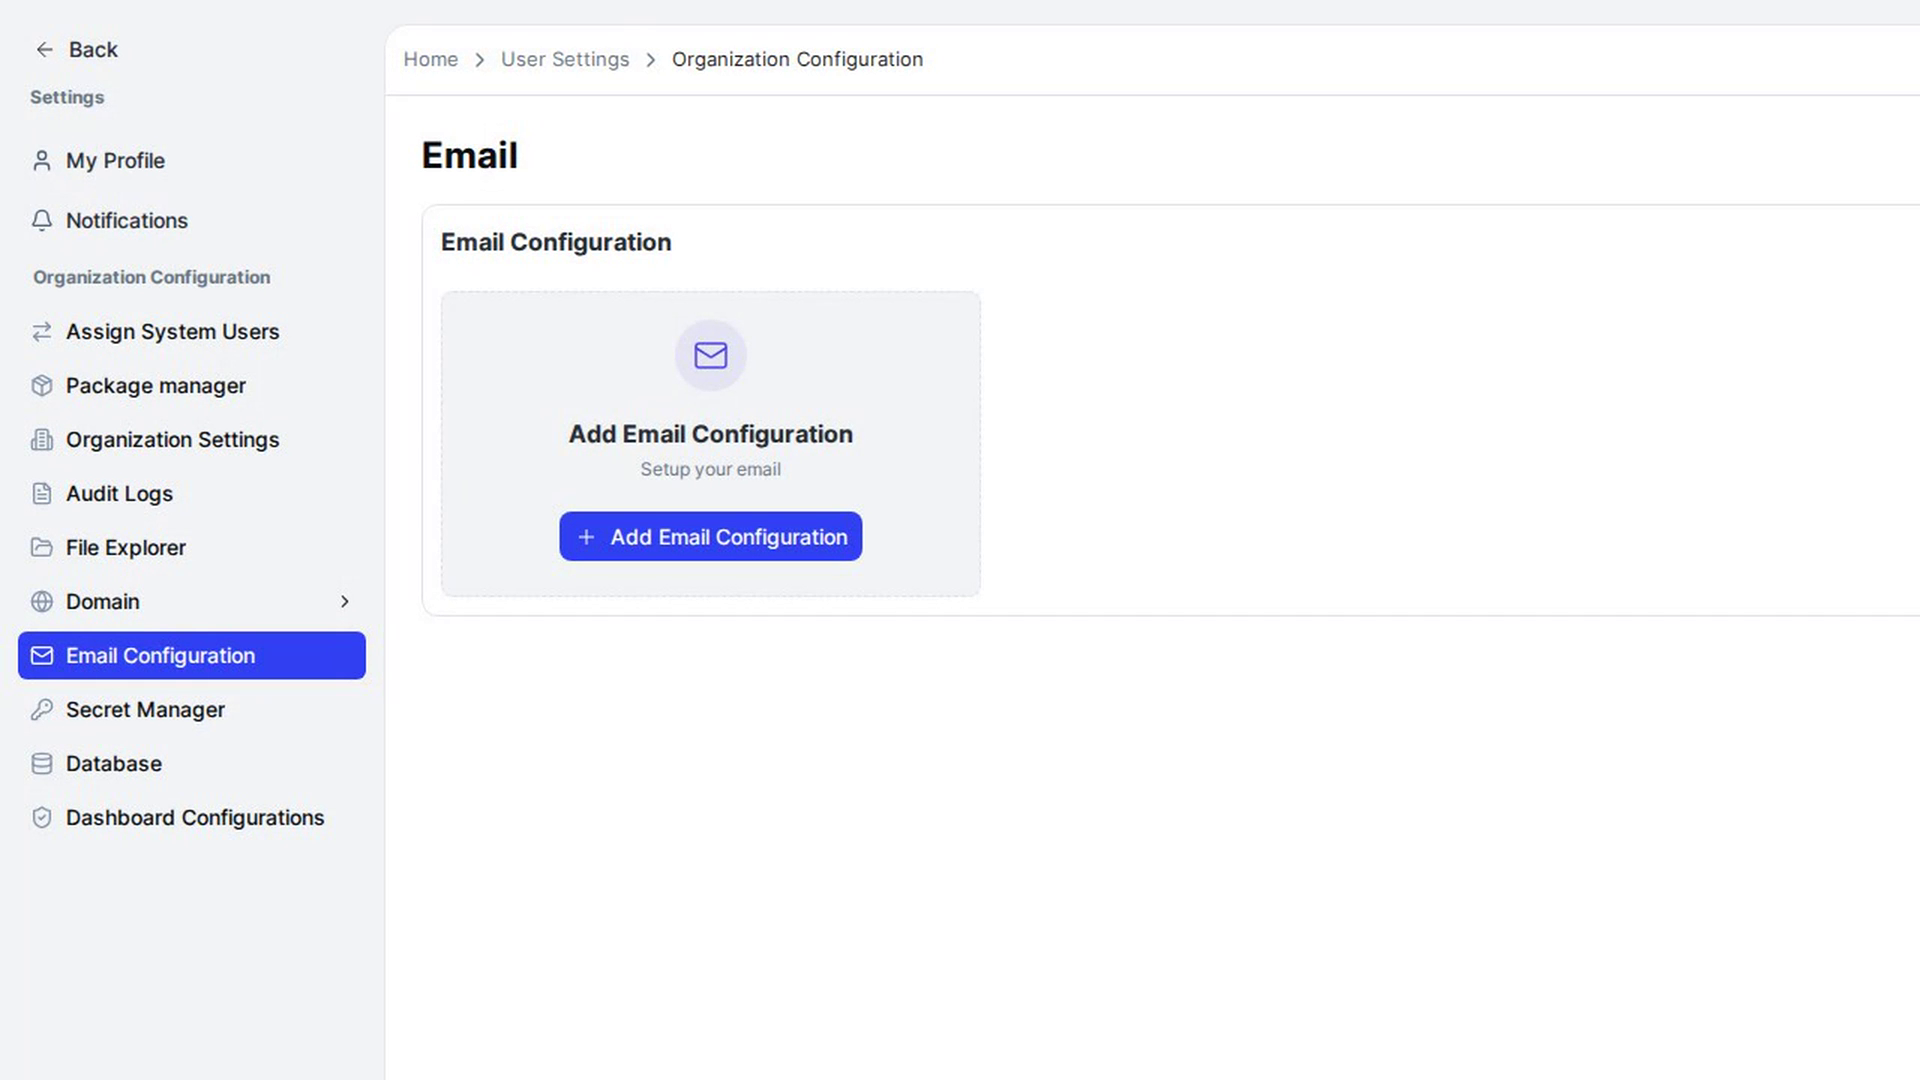
Select your name and picture at the bottom left of the Dalfin sidebar and choose Settings. In the Settings sidebar, open Organization Configuration and select Email Configuration.
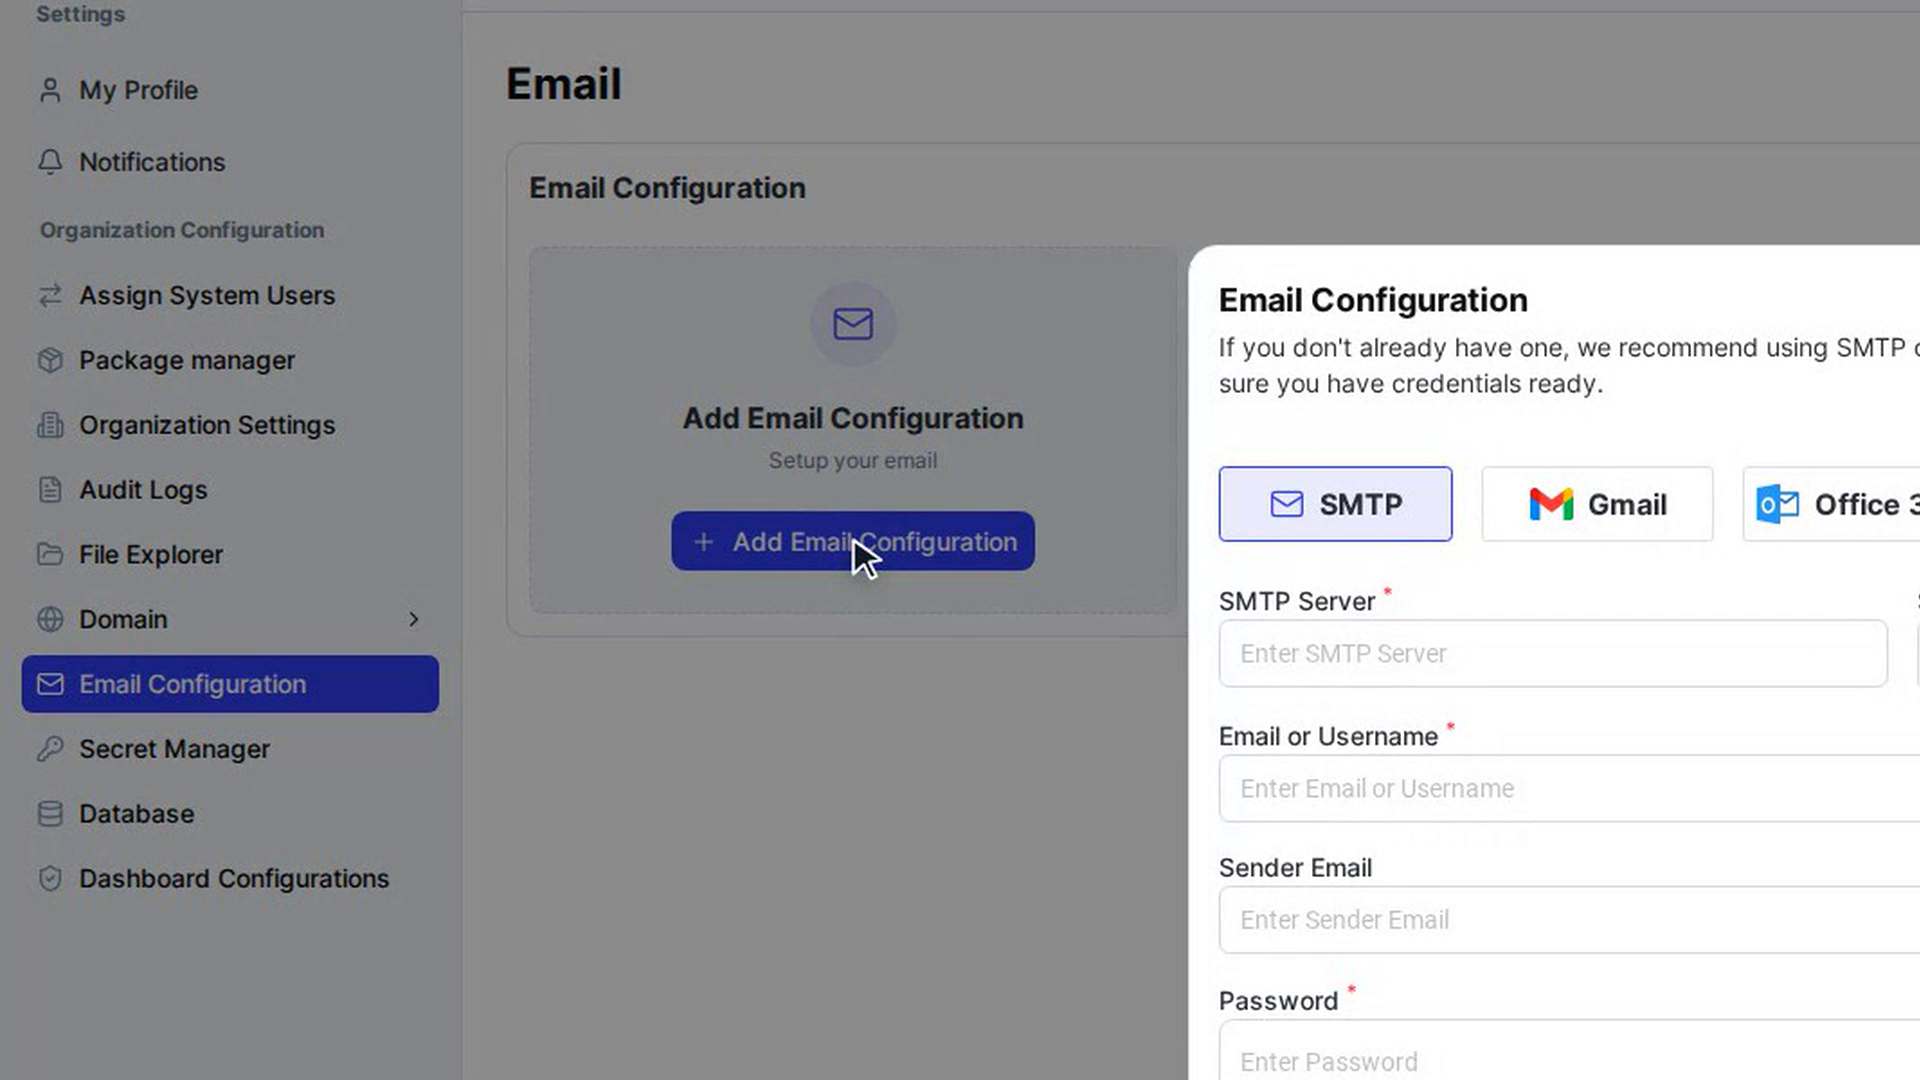
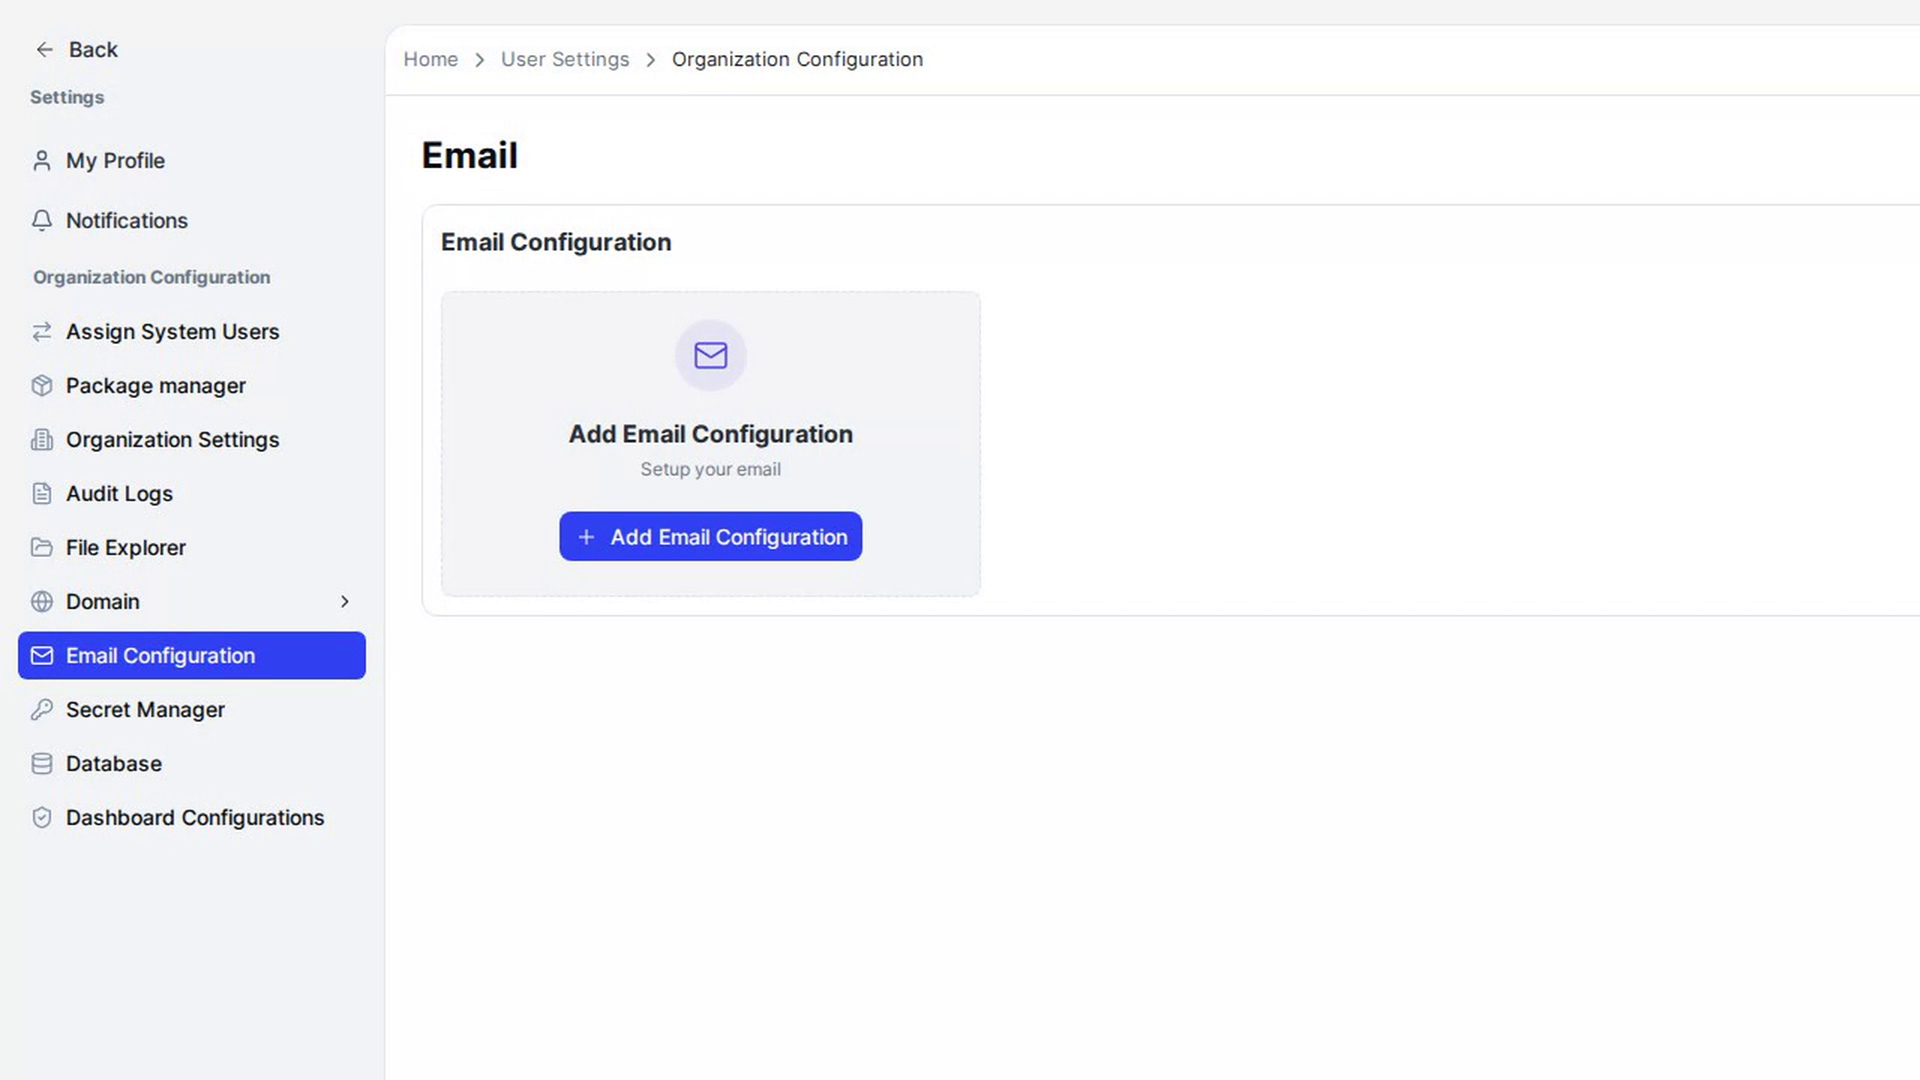
The page is headed Email. You see a card for each email setup you have added, plus an Add Email Configuration card.
Start a new configuration
On the Add Email Configuration card, select Add Email Configuration. The Email Configuration window opens.
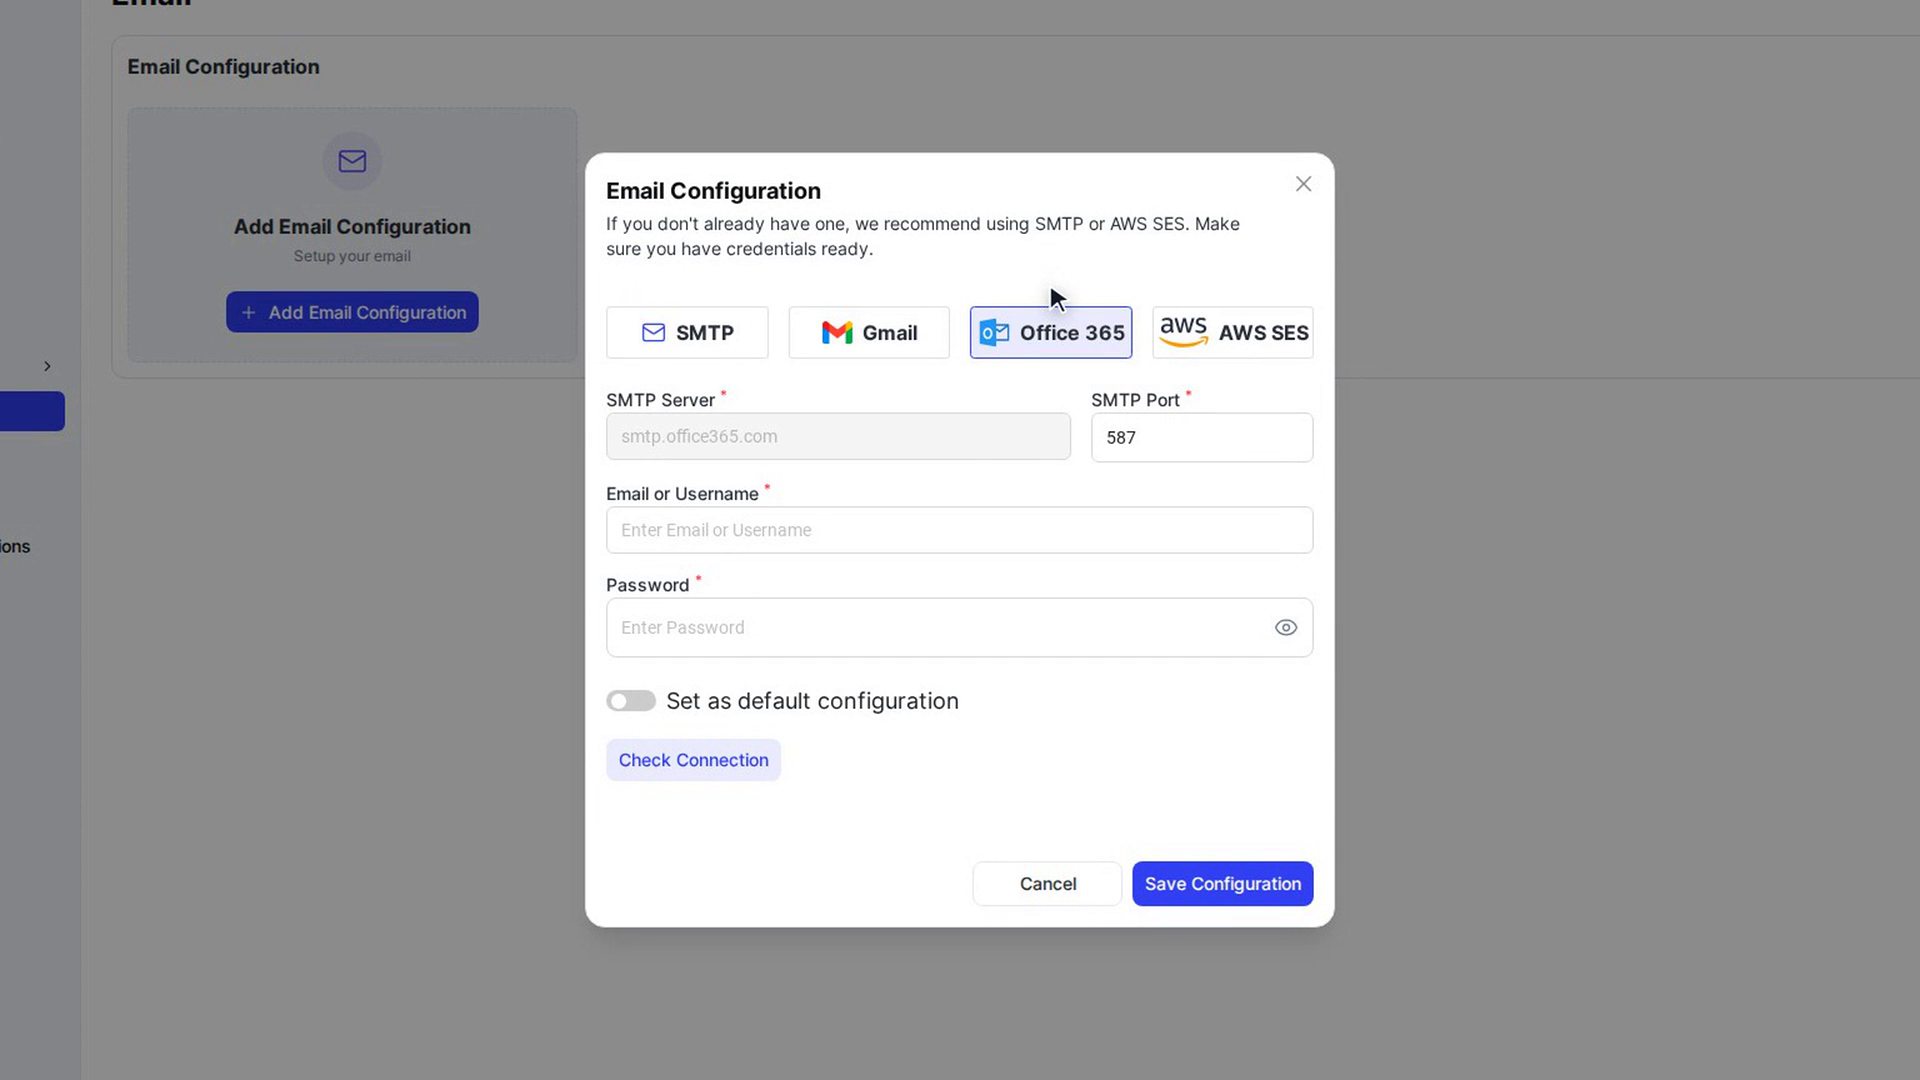
Pick your email provider
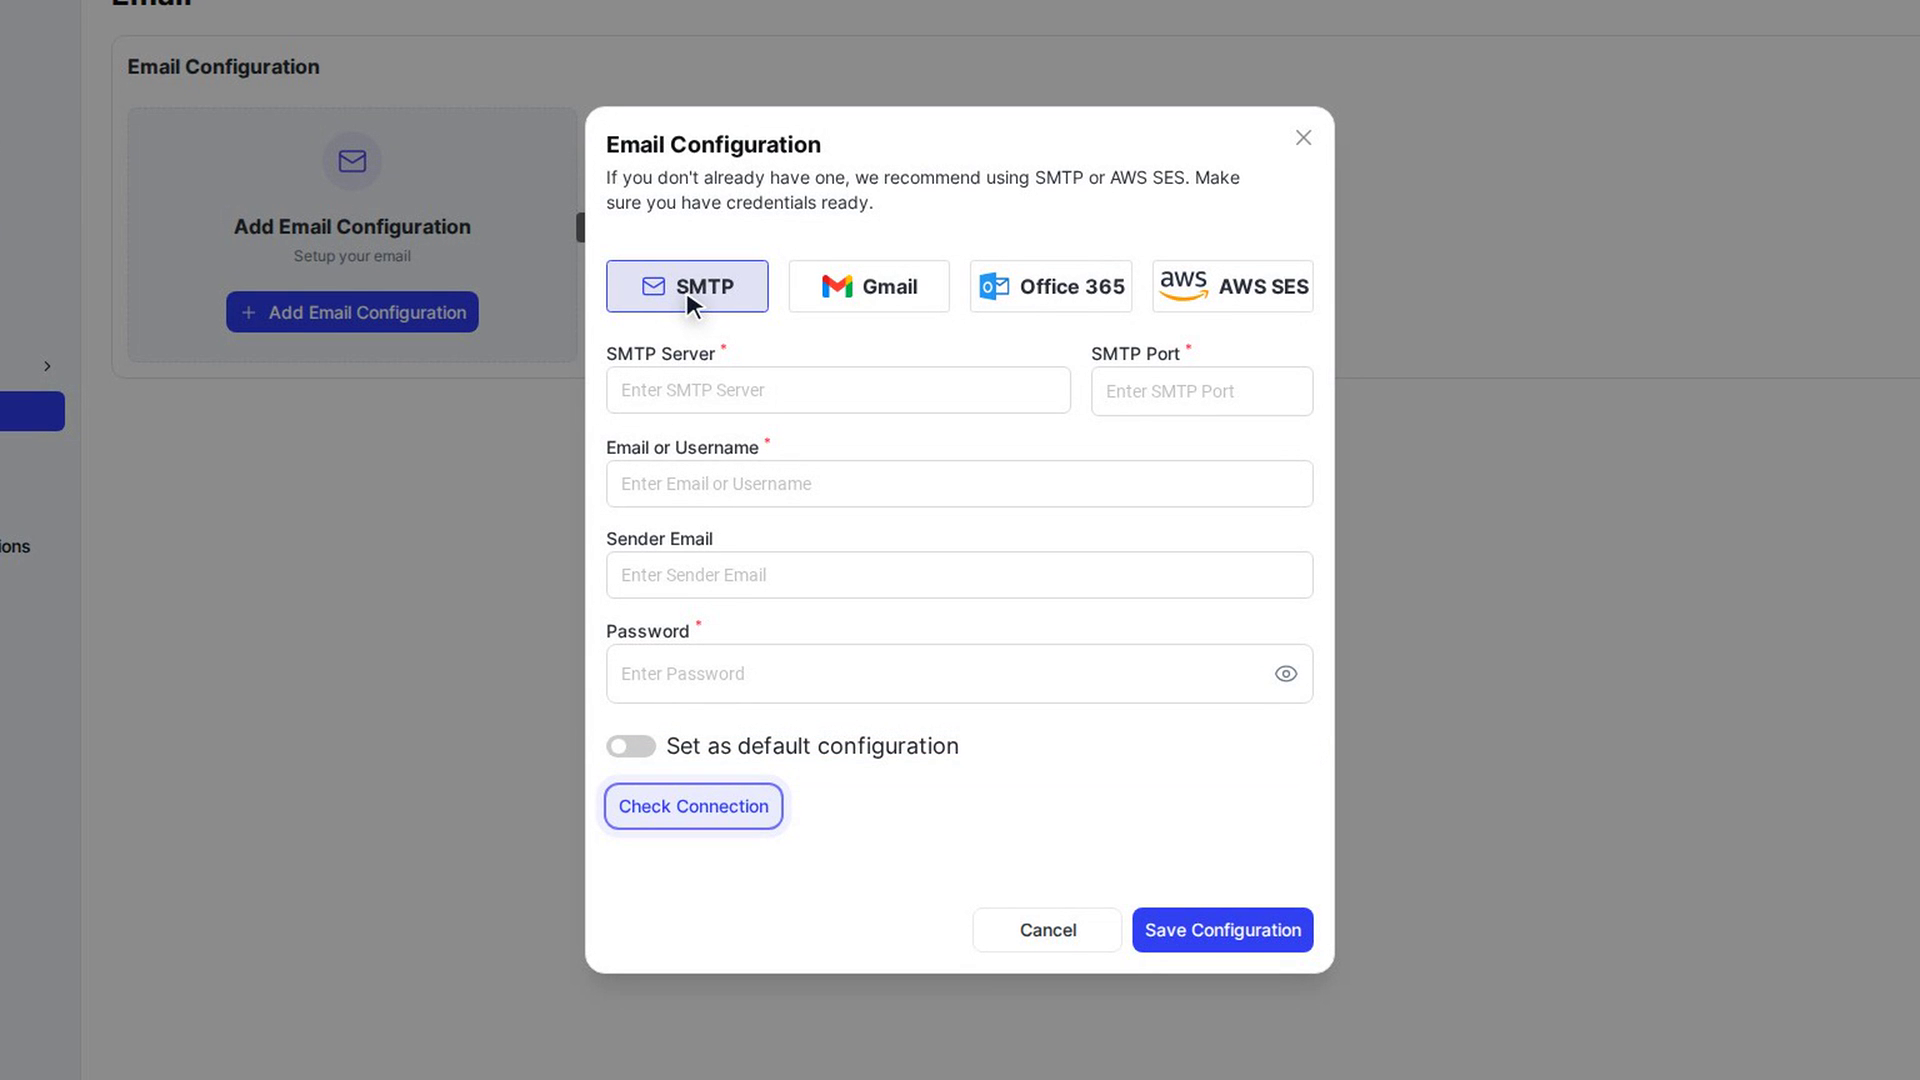
Select one of the provider cards: SMTP, Gmail, Office 365 or AWS SES. The fields below change to match.
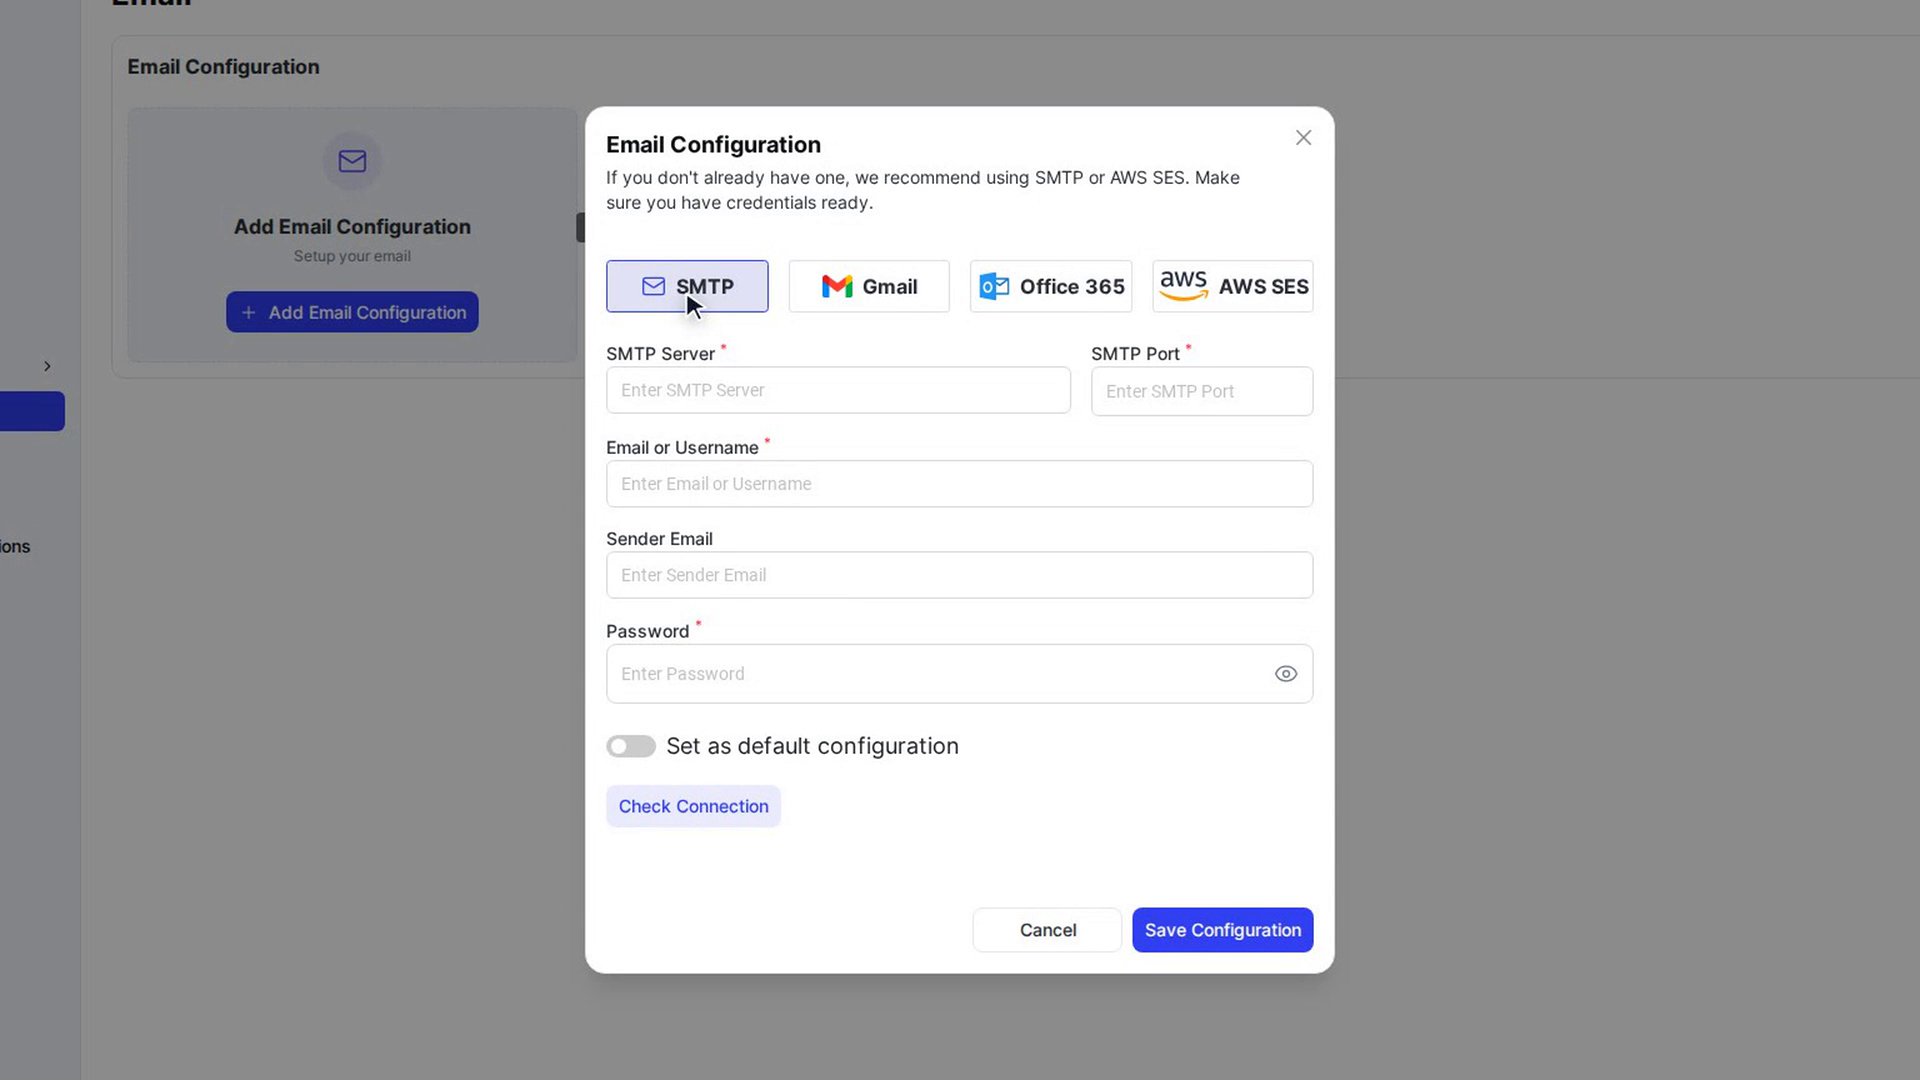
Fill in the connection details
- SMTP: SMTP Server, SMTP Port, Email or Username, Sender Email and Password.
- Gmail or Office 365: SMTP Port, Email or Username and Password. The SMTP Server is filled in for you.
- AWS SES: Aws Access Key Id, Aws Secret Access Key, Region Name and Sender Email.
Turn on Set as default configuration if this should be the one your organization uses.
Test the connection
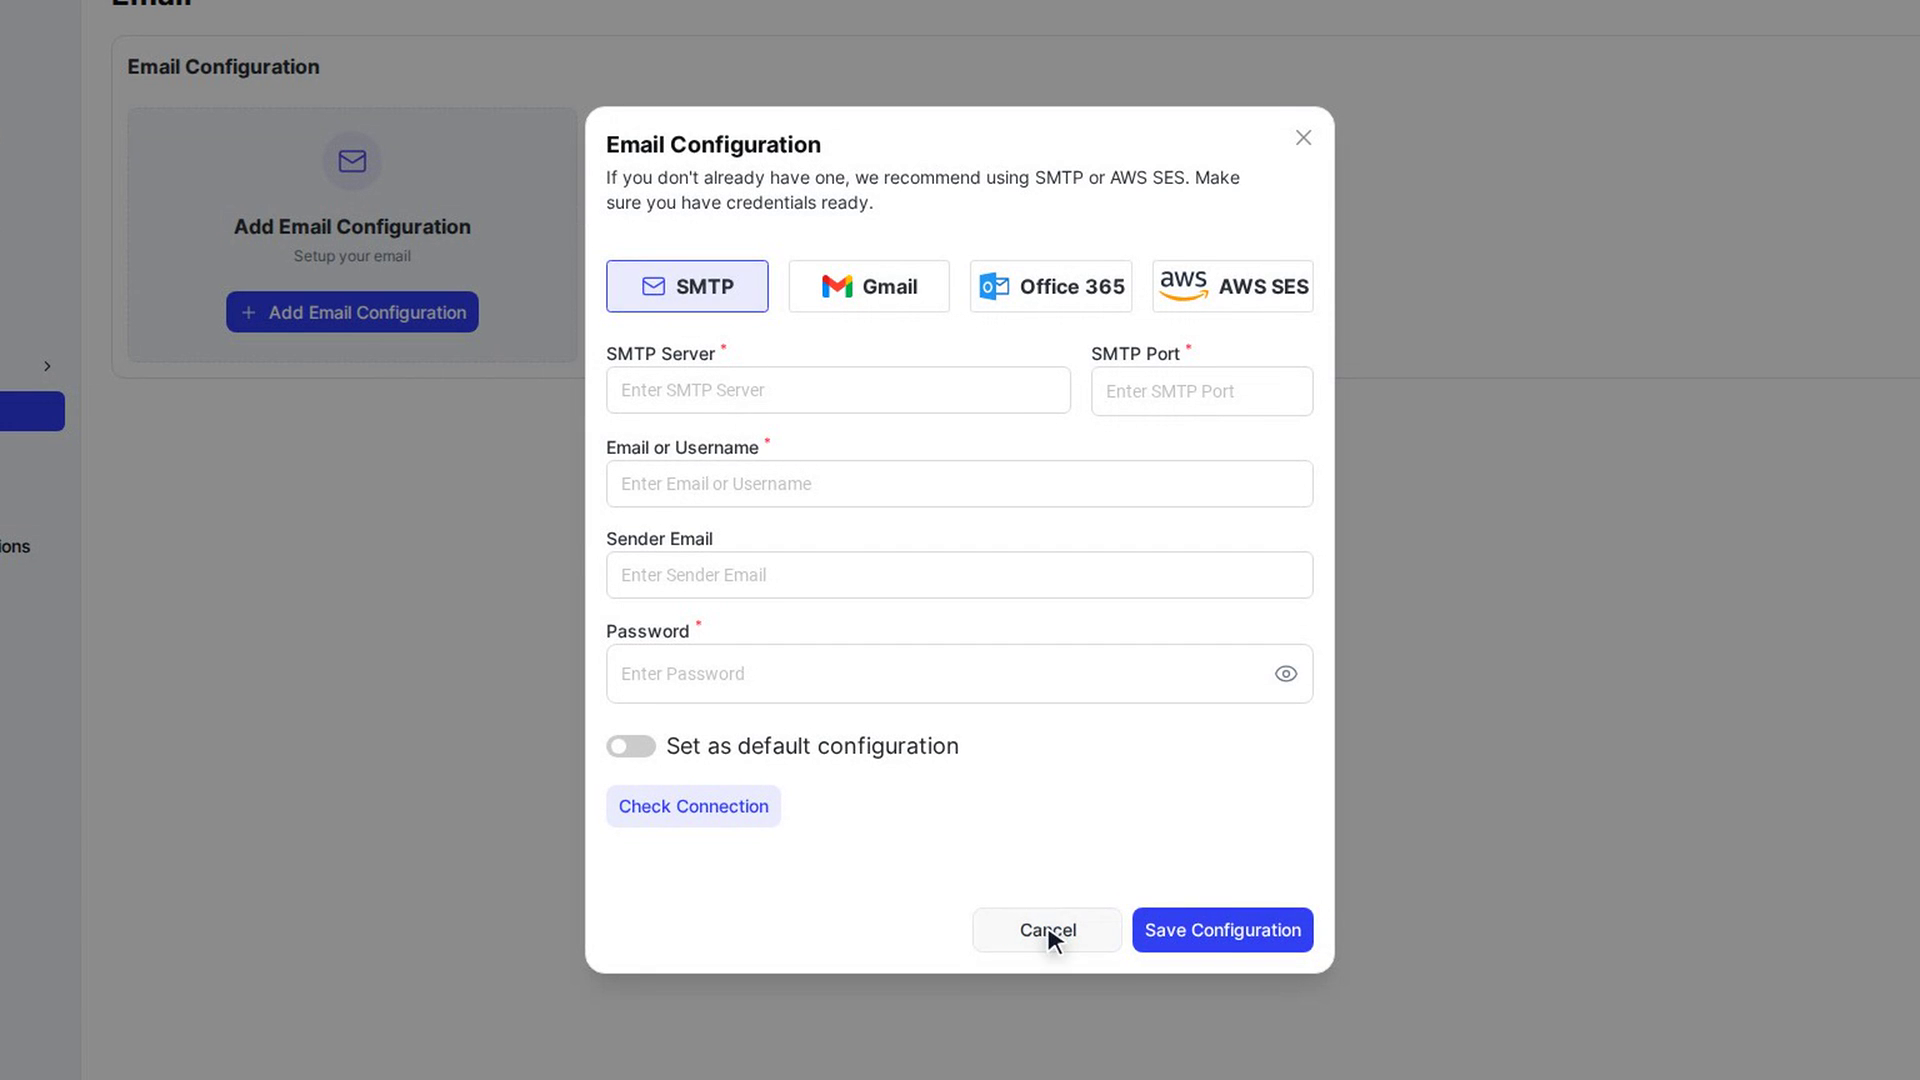
Select Check Connection. If a required field is empty or wrong, you see Ensue all the data is correctly filled and the fields to fix are marked. Otherwise a message tells you whether the connection worked.
Save
Select Save Configuration. The window closes and the new configuration appears as a card showing the provider, the date it was added and its email address.
Choose the default configuration
The configuration in use shows an In Use badge. To switch, select Set as Default on another card. Confirm with Yes, Set As Default!. From then on, all outgoing email uses that configuration.
View or edit a configuration
Select the ⋮ menu on a configuration's card. It offers View, Edit and Delete (you only see the ones your permissions allow).
- View opens the Email Configuration window with the fields read-only.
- Edit opens the same window with the fields unlocked. Change what you need and select Save Configuration.
- Delete removes the configuration after you confirm.
Screenshots
Step 1: Open Email Configuration
Step 2: Start a new configuration
Step 3: Pick your email provider
Step 4: Fill in the connection details
Step 5: Test the connection
Step 6: Save
Step 7: Choose the default configuration
Step 8: View or edit a configuration
Watch how
Tip: If you don't already have an email service, the platform recommends SMTP or AWS SES. Select the email address on a card to copy it.