Page and element access
Choose which roles can see a page of your app, or a single button, section or menu item on it. Use this when some people should not see everything, for example to hide an Add button from read-only staff.
Before you start
- You need to be able to open your app's Customize tab (usually a team admin).
- The roles you want to use must already exist. Roles are created and managed on the Roles and Permissions screen, which you can open from the editor's left rail or from the link at the top of the Access tab.
- Open the page you want to work on from the Pages list on the left.
Steps
Open the Access tab
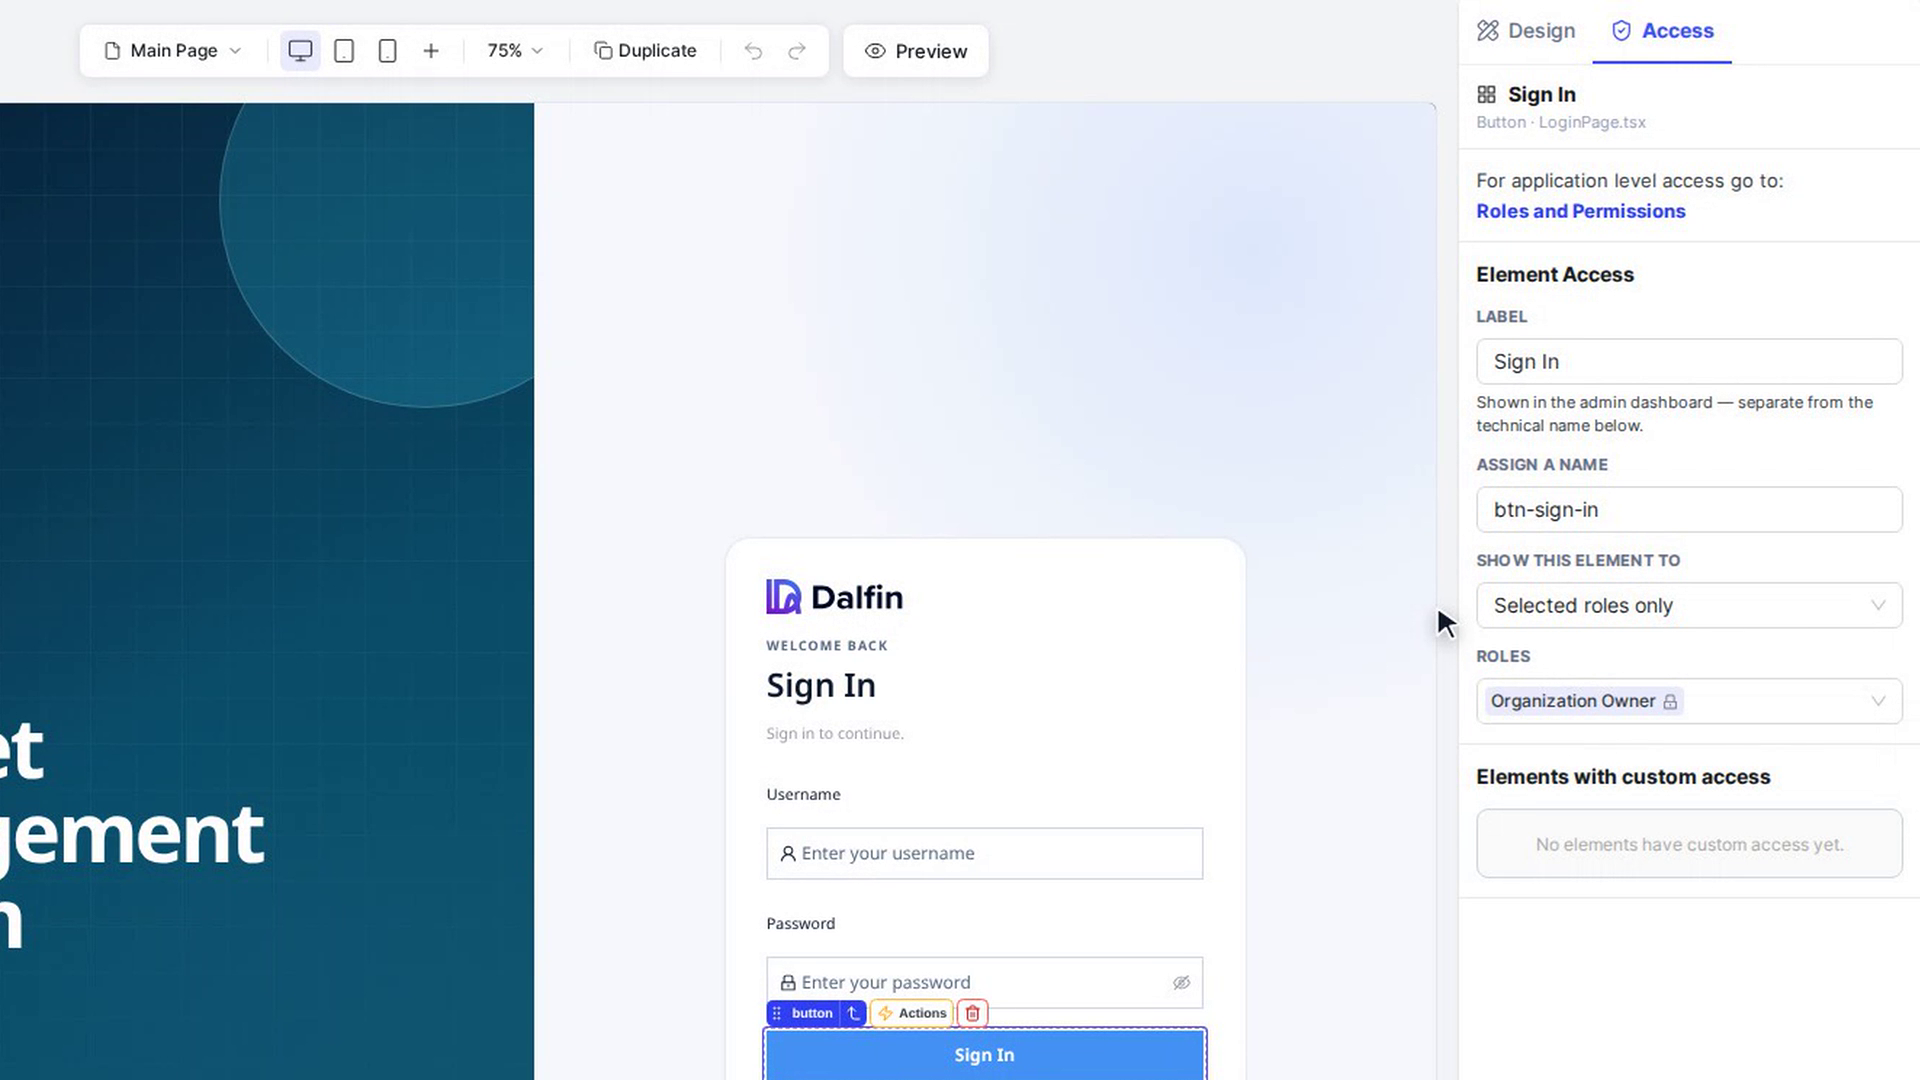
In the panel on the right of the editor, select Access. The canvas switches to access mode. At the top of the panel you see For application level access go to: Roles and Permissions. Below it, with nothing selected, you see the Page Access card and the text Click any element in the canvas to configure its visibility.
Choose who can see the page
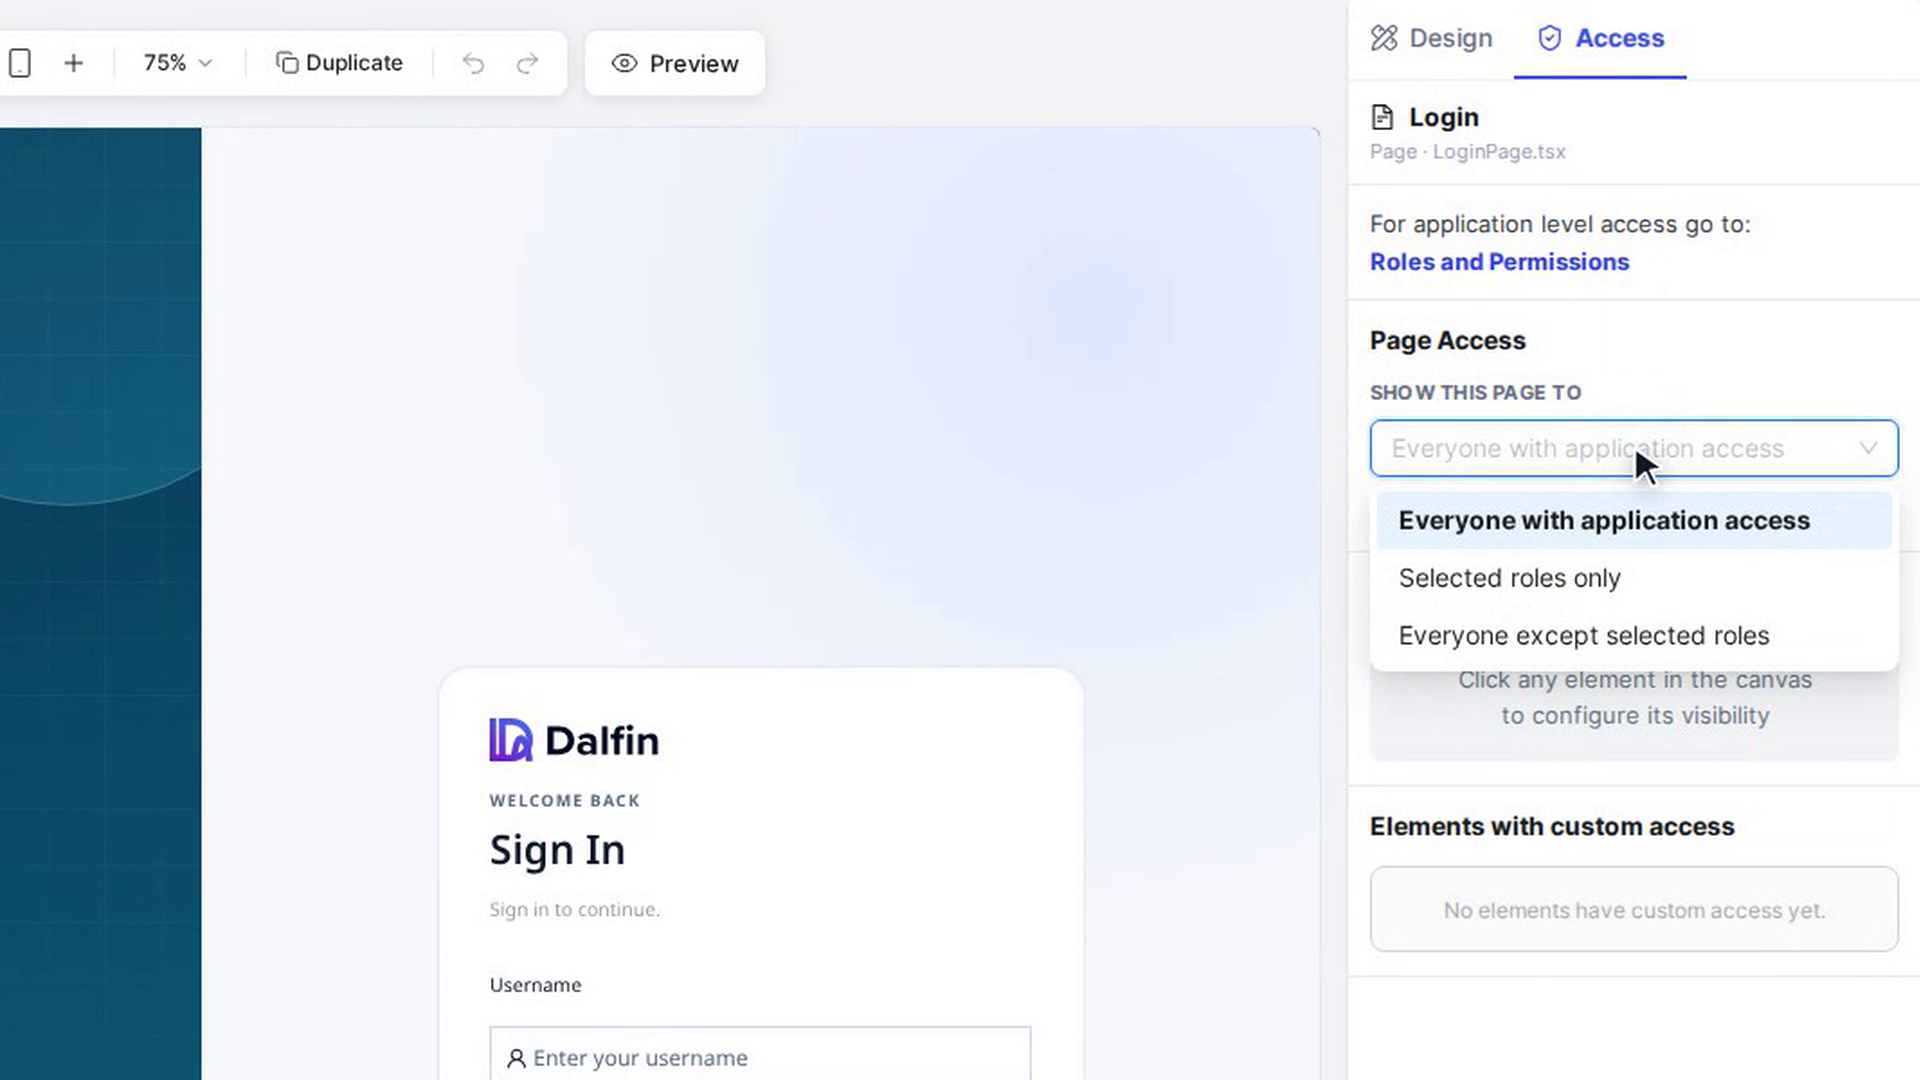
In Page Access, open Show this page to and pick one of:
- Everyone with application access – nobody is restricted.
- Selected roles only – only the roles you pick can see the page.
- Everyone except selected roles – every role except the ones you pick can see it.
If you picked one of the last two, choose the roles in Roles. A line underneath sums up the rule, for example "This page is visible only to Managers." Select Save Access. The Save Access button only appears once you have changed something. A message confirms Access saved for the page.
Select an element on the canvas
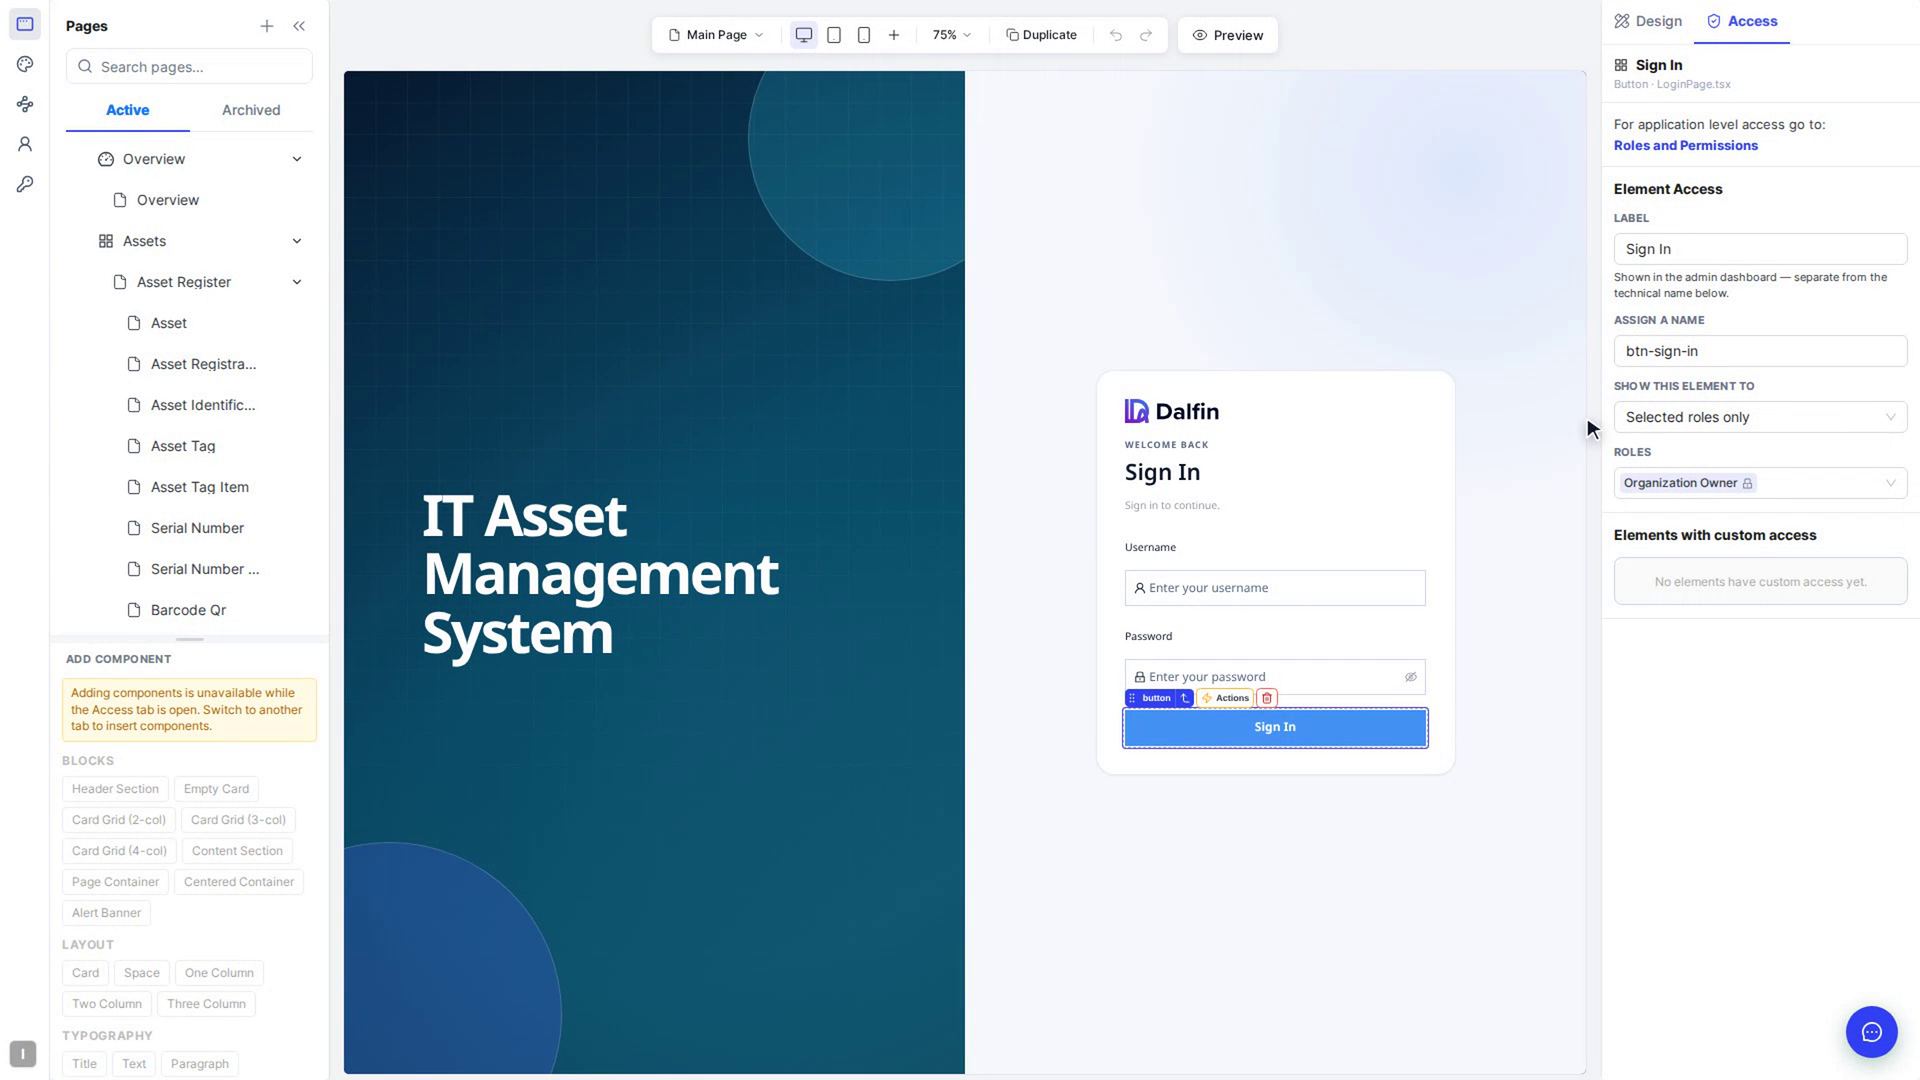
Click a button, field or section on the canvas. You can also select an element while on the Design tab and choose Set Access in the small toolbar that appears above it; this opens the Access tab with that element already selected.
The Page Access card is replaced by Element Access for the element you clicked.
Name the element and set who can see it
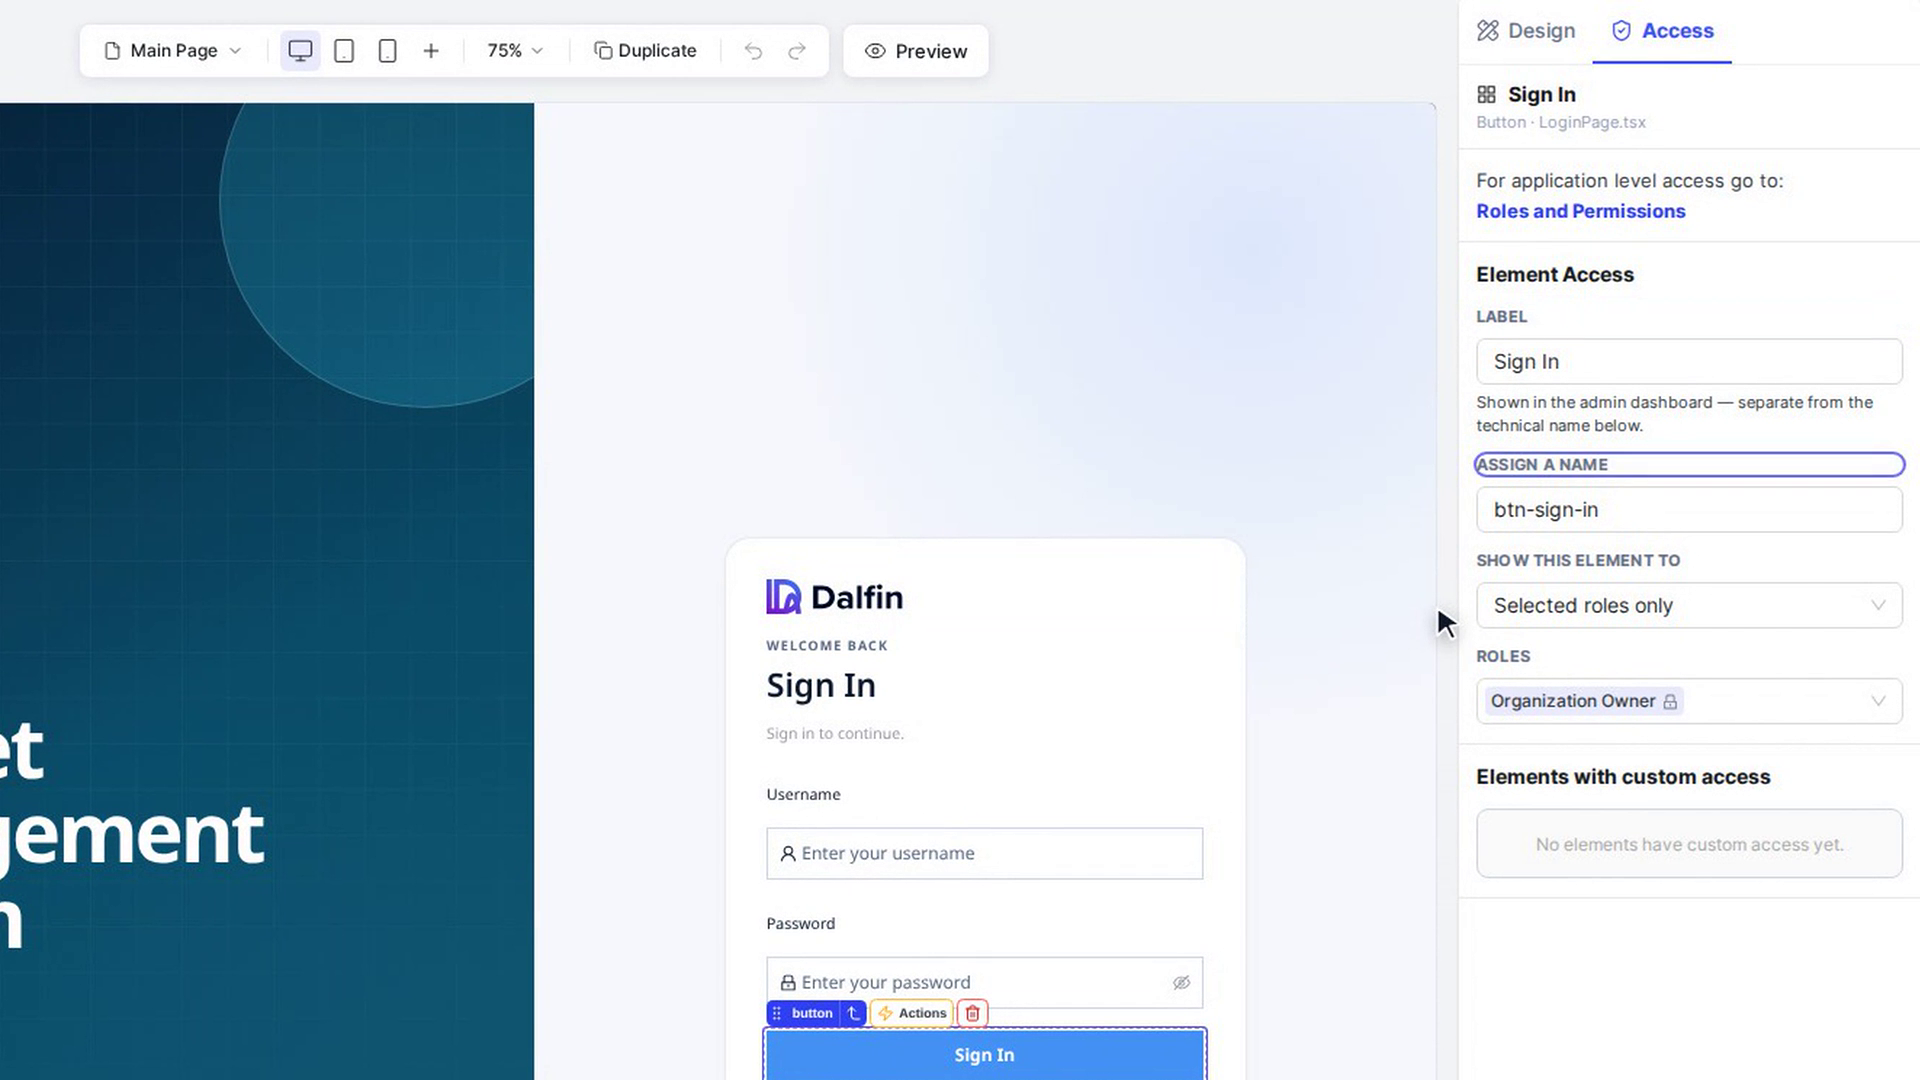
In Element Access, fill in:
- Label – a readable name shown in the admin dashboard, for example "Add Class Type". It is filled in for you from the element's text.
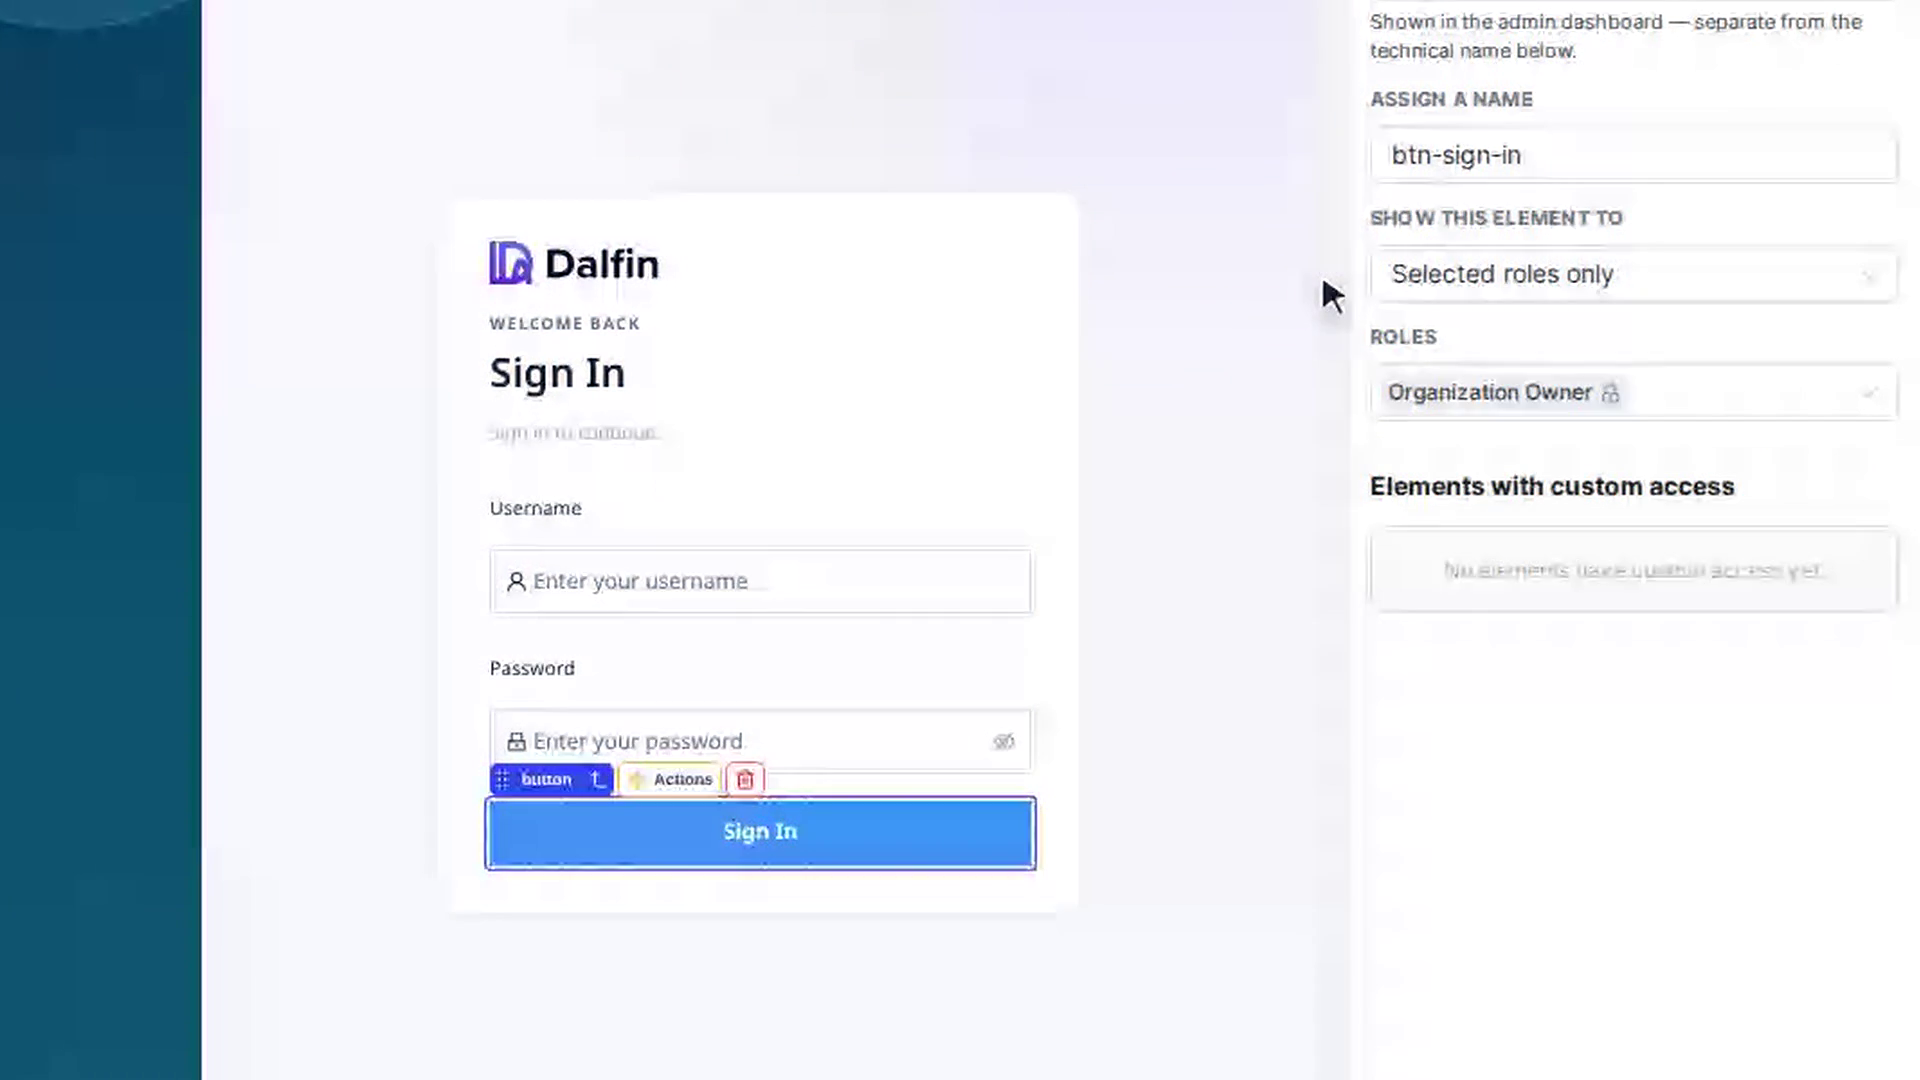
- Assign a name – a short unique name for the element, for example "btn-add-asset". If the name is already used, you see Element name is already taken on this page. or Element name is already in use on some page in this system.
- Show this element to – Selected roles only or Everyone except selected roles.
- Roles – the roles the rule applies to. A role that can't open the page is greyed out, with a note such as "… cannot access this element because they do not have access to the page."
Select Save Access. A message confirms Element registered (first time) or Access saved. The element now appears in the Elements with custom access list lower down the panel.
Set access for items in a list or menu
Some parts of a page repeat, such as the items in a menu or a set of tabs. These are listed under Hidden Elements. Expand a group to see its items, then select Set access for this item next to the item you want. In the small window, enter a Name, choose Show this element to and Roles, and select Save. Only that one item is affected.
If you click one of these items directly on the canvas, the panel says This is 1 of N items rendered from …, because access is set per item, not on the whole group. It tells you which item it matched and offers Configure "…" or Choose which item, so you set access for the right one.
Change or remove a rule
Elements with custom access lists every element on the page that has its own rule. The dot in front of each one shows the kind of rule: green means it's visible only to the selected roles, red means it's hidden from the selected roles, and grey means it has a name but no rule yet. Hover over the dot to see this in words. Select a row to select and outline that element on the canvas.
Select Edit access (the pencil) next to an element to change its name, audience or roles. To remove a rule, select Remove perm-id (the bin) and confirm with Remove. This removes the element's name and all its visibility rules, so everyone can see it again.
Check what a role sees
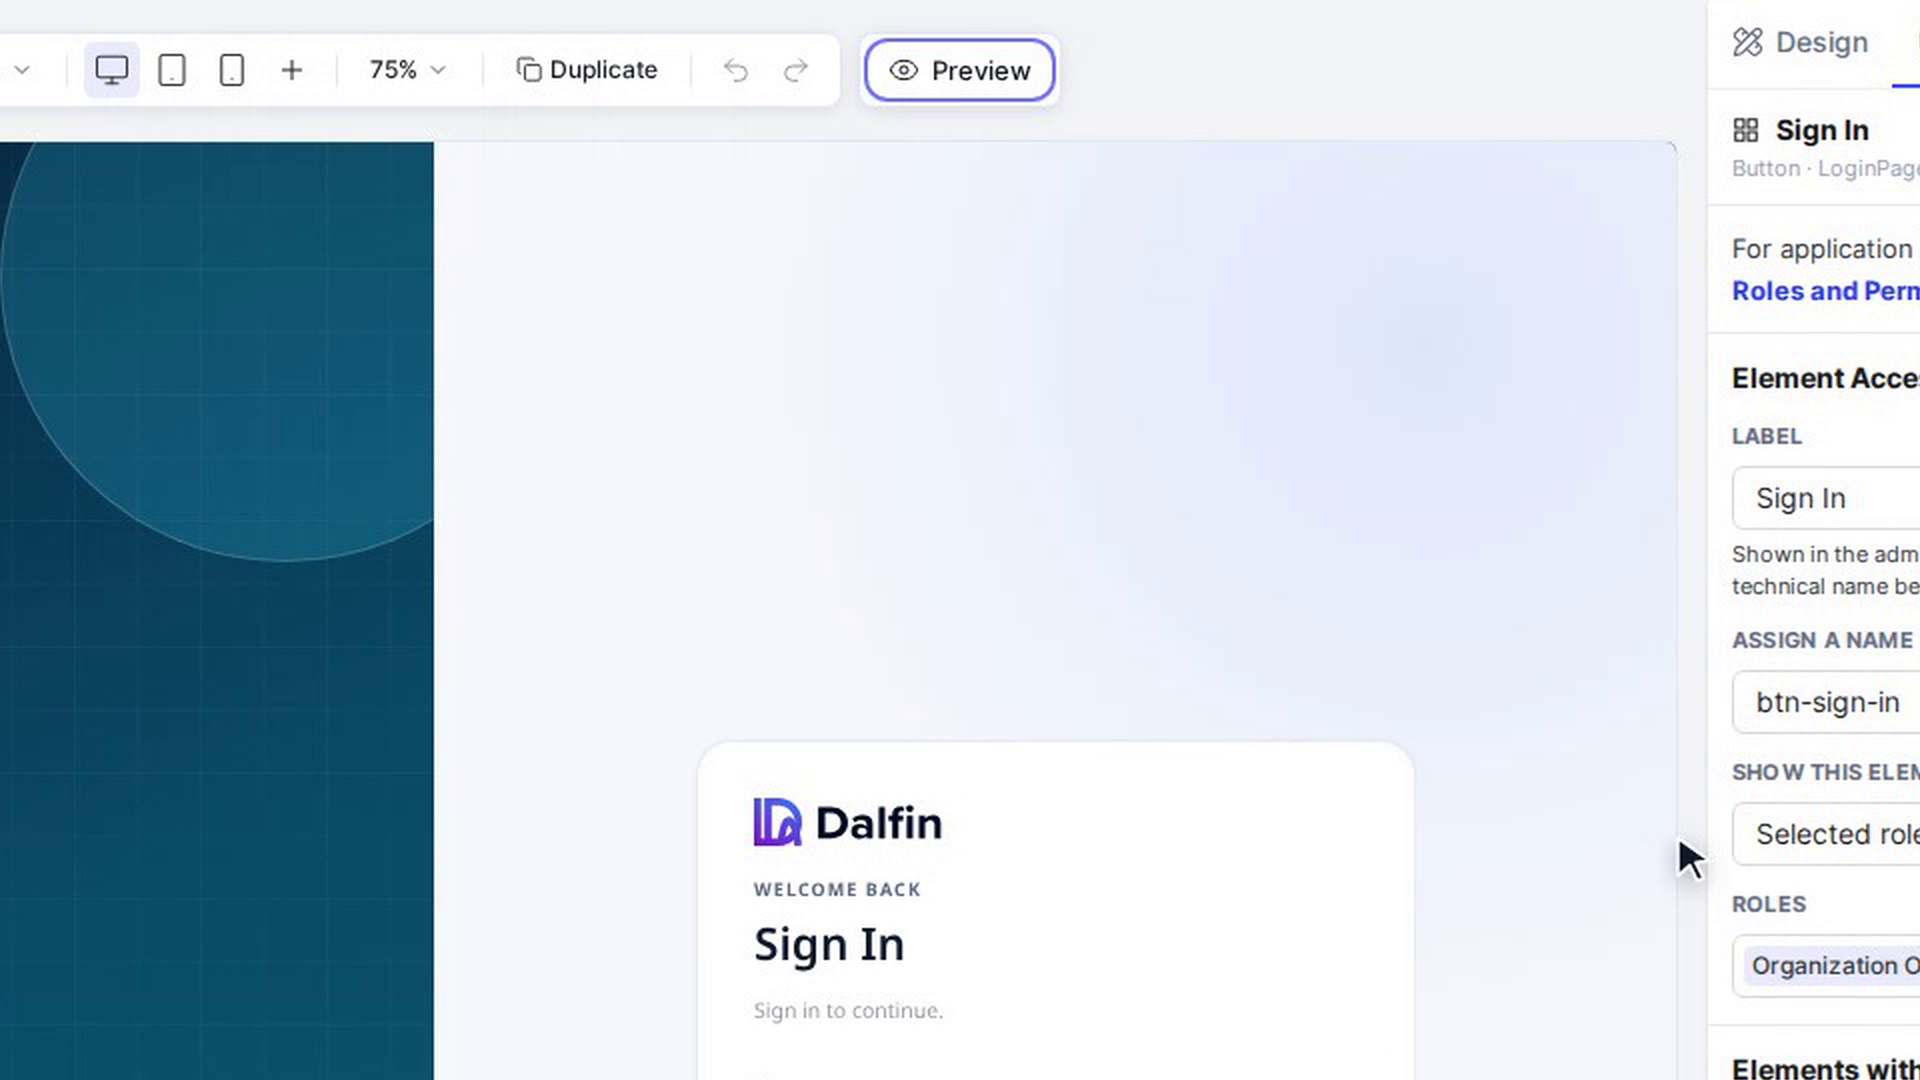
Select Preview above the canvas. In preview, the Access tab becomes Preview as role; choose a role from the list. The canvas hides whatever that role is not allowed to see, and the Access panel shows how many elements are Hidden and Visible for that role. You can switch pages from the sidebar and the chosen role stays selected. Select Exit Preview to go back to editing.
Screenshots
Step 1: Open the Access tab
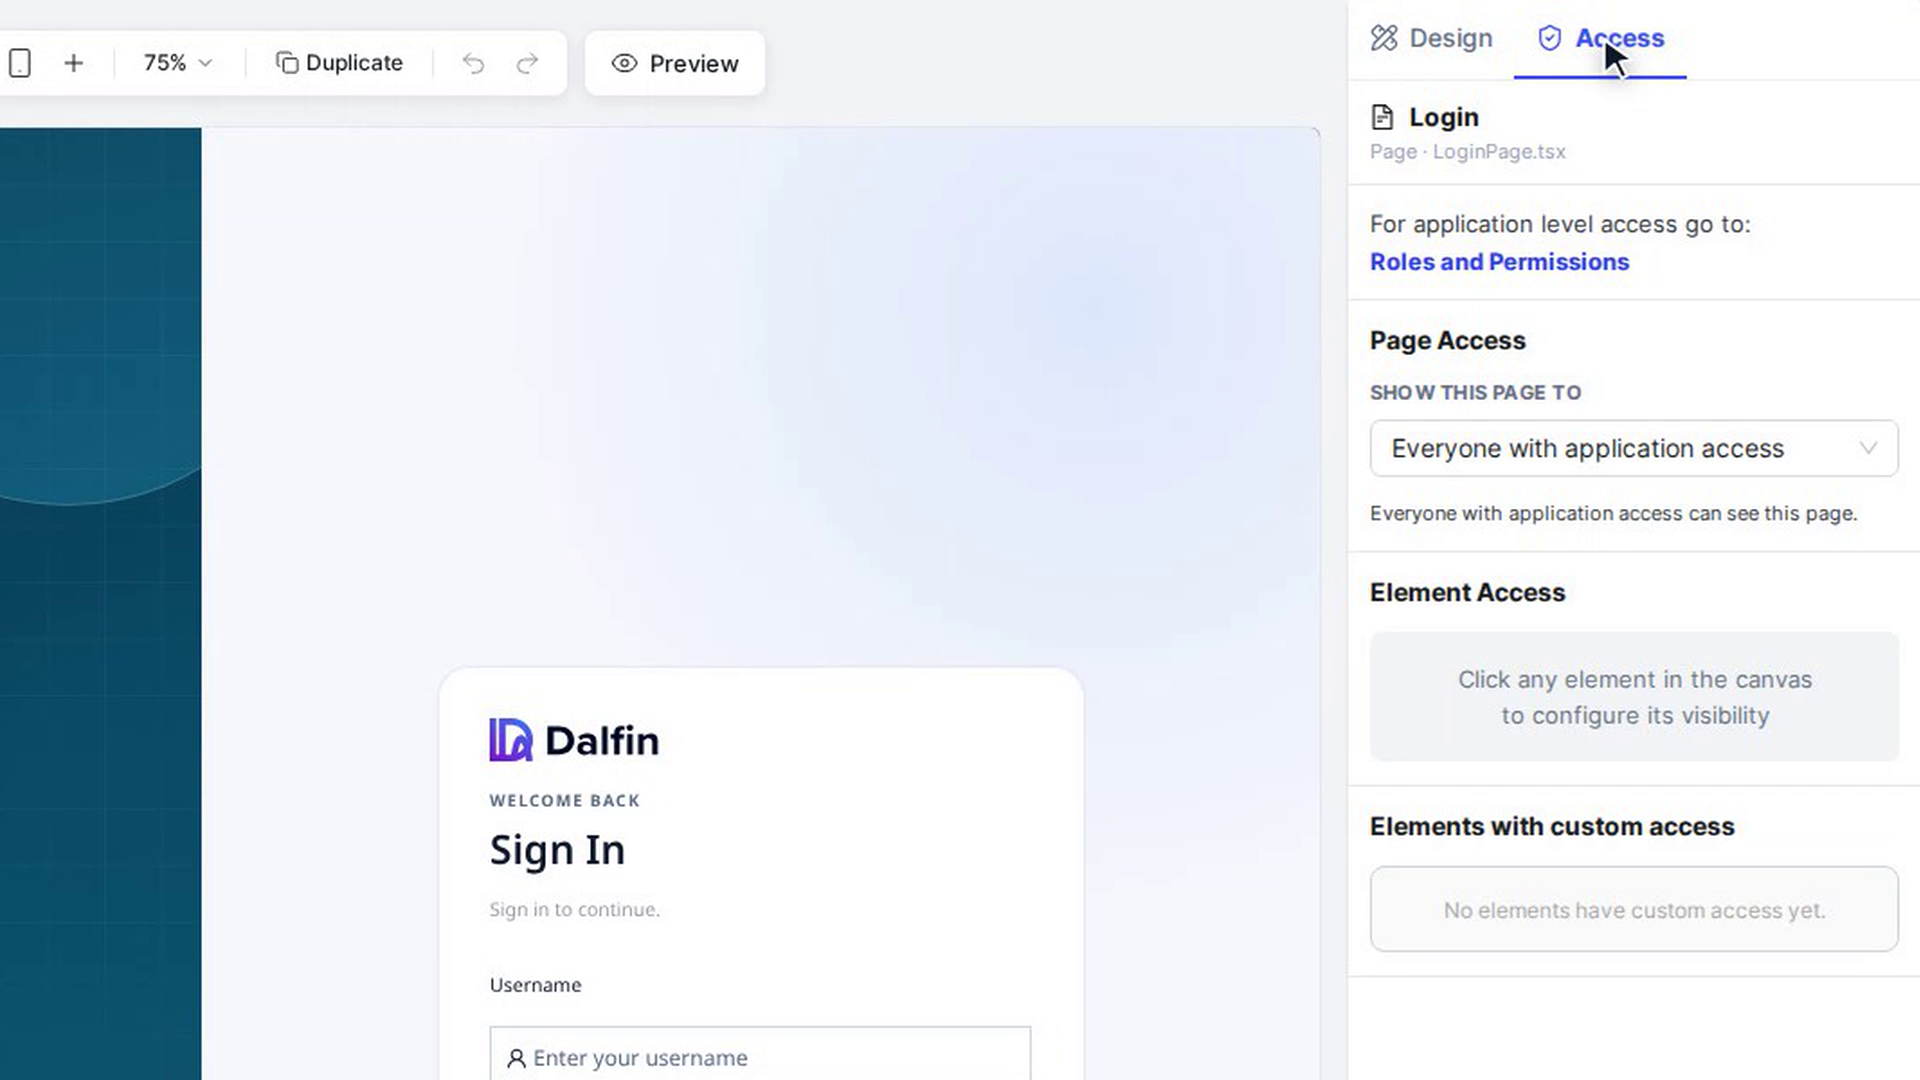
Step 2: Choose who can see the page
Step 3: Select an element on the canvas
Step 4: Name the element and set who can see it
Step 5: Set access for items in a list or menu
Step 6: Change or remove a rule
Step 7: Check what a role sees
Watch how
Tip: The Organization Owner role can always see everything. It is shown locked in the Roles box and cannot be removed.
Rules to remember:
- Organization Owner always sees everything. It stays locked in the Roles list and can't be excluded.
- A role that can't open the page can't be given access to an element on it; it's greyed out in the Roles list.
- For items repeated from a list, such as one card of many, access is set per item.
Access rules are about who can see a page or element. There are no separate read, write, edit or manage levels here. Removing a rule with Remove perm-id makes the element visible to everyone again.