Roles and permissions
A role is a named set of permissions, for example Admin, Manager or User. You give people roles in User Management; on the Roles and Permissions screen you decide what each role can see: which pages appear in the app, and which protected elements, such as a button, are shown.
Before you start
- You need to be able to open your app's Customize tab (usually a team admin).
- To limit a single element, such as a button, give it a name first on the editor's Access tab (see Page and element access). Only named elements appear under a page here.
Steps
Open Roles and Permissions
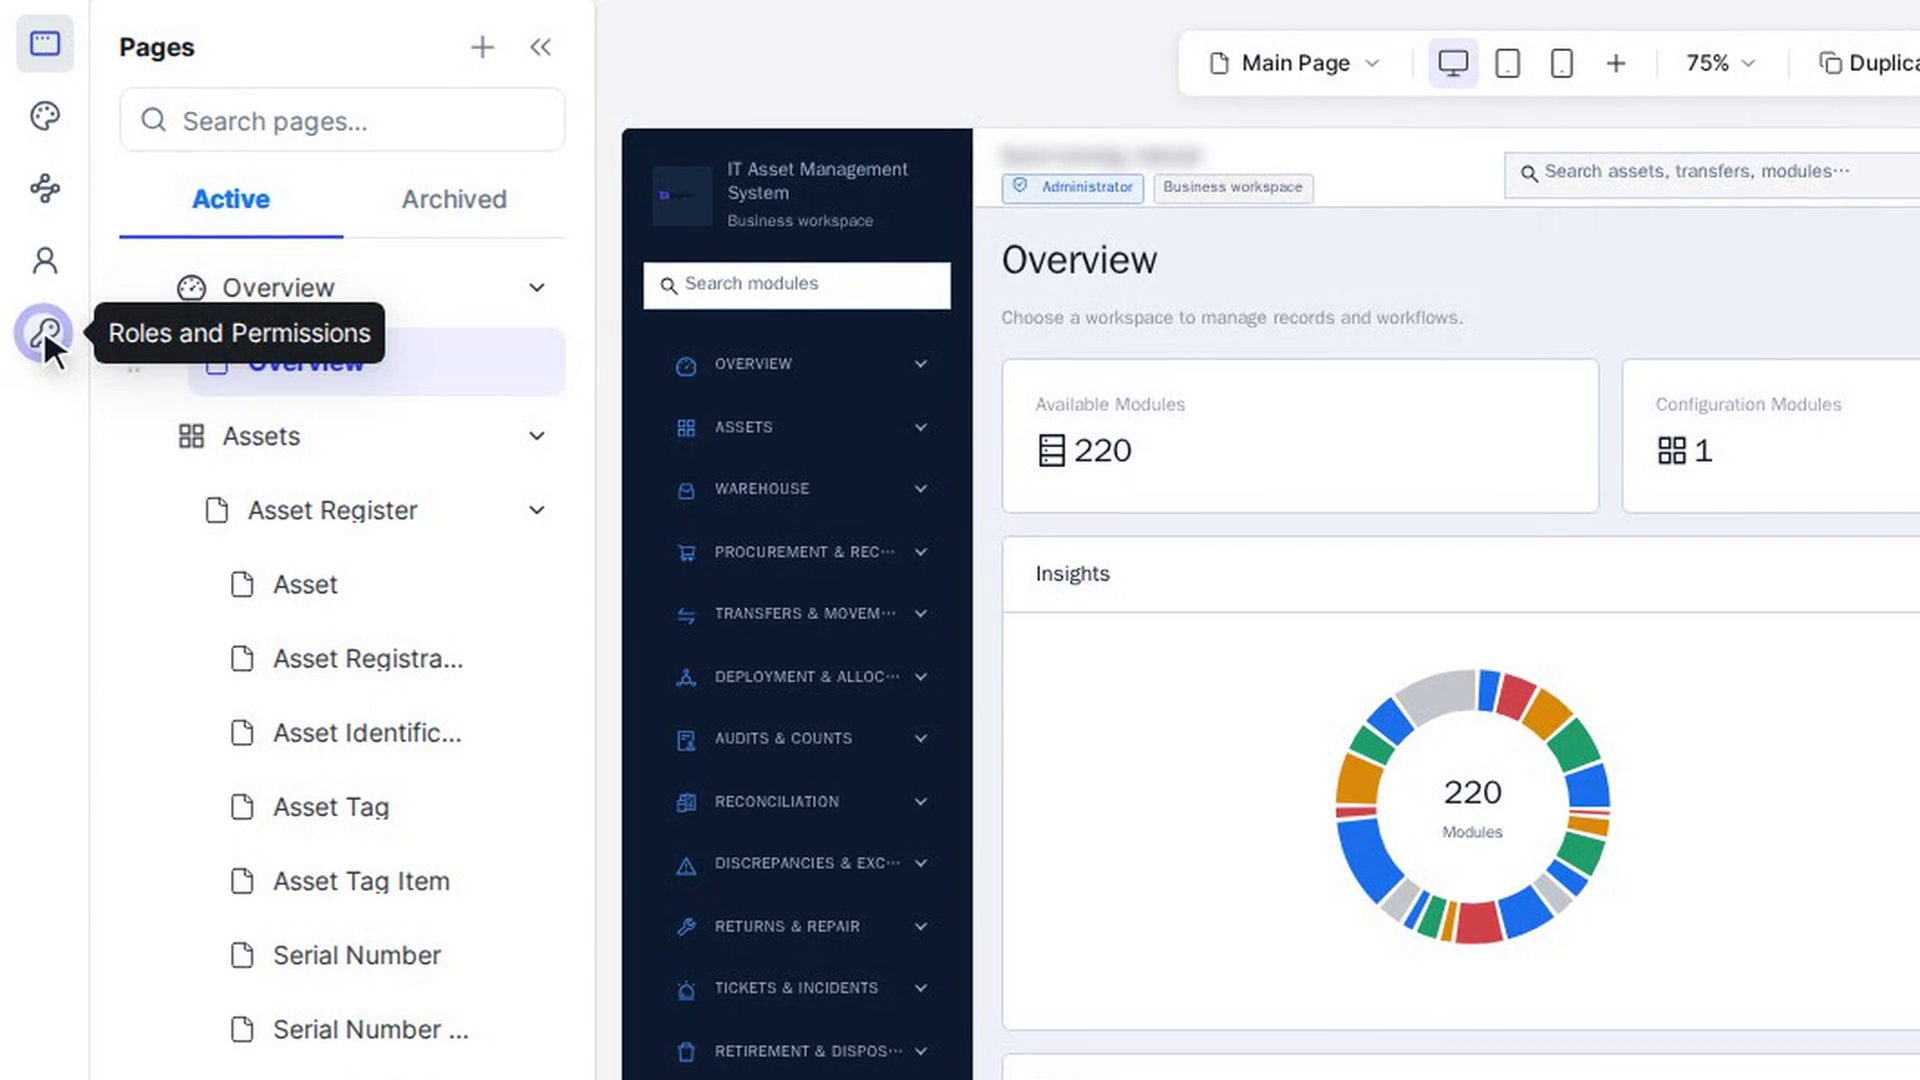
In the Customize tab, select Roles and Permissions (the key icon) in the narrow icon bar on the far left. The link Roles and Permissions at the top of the editor's Access tab opens the same screen.
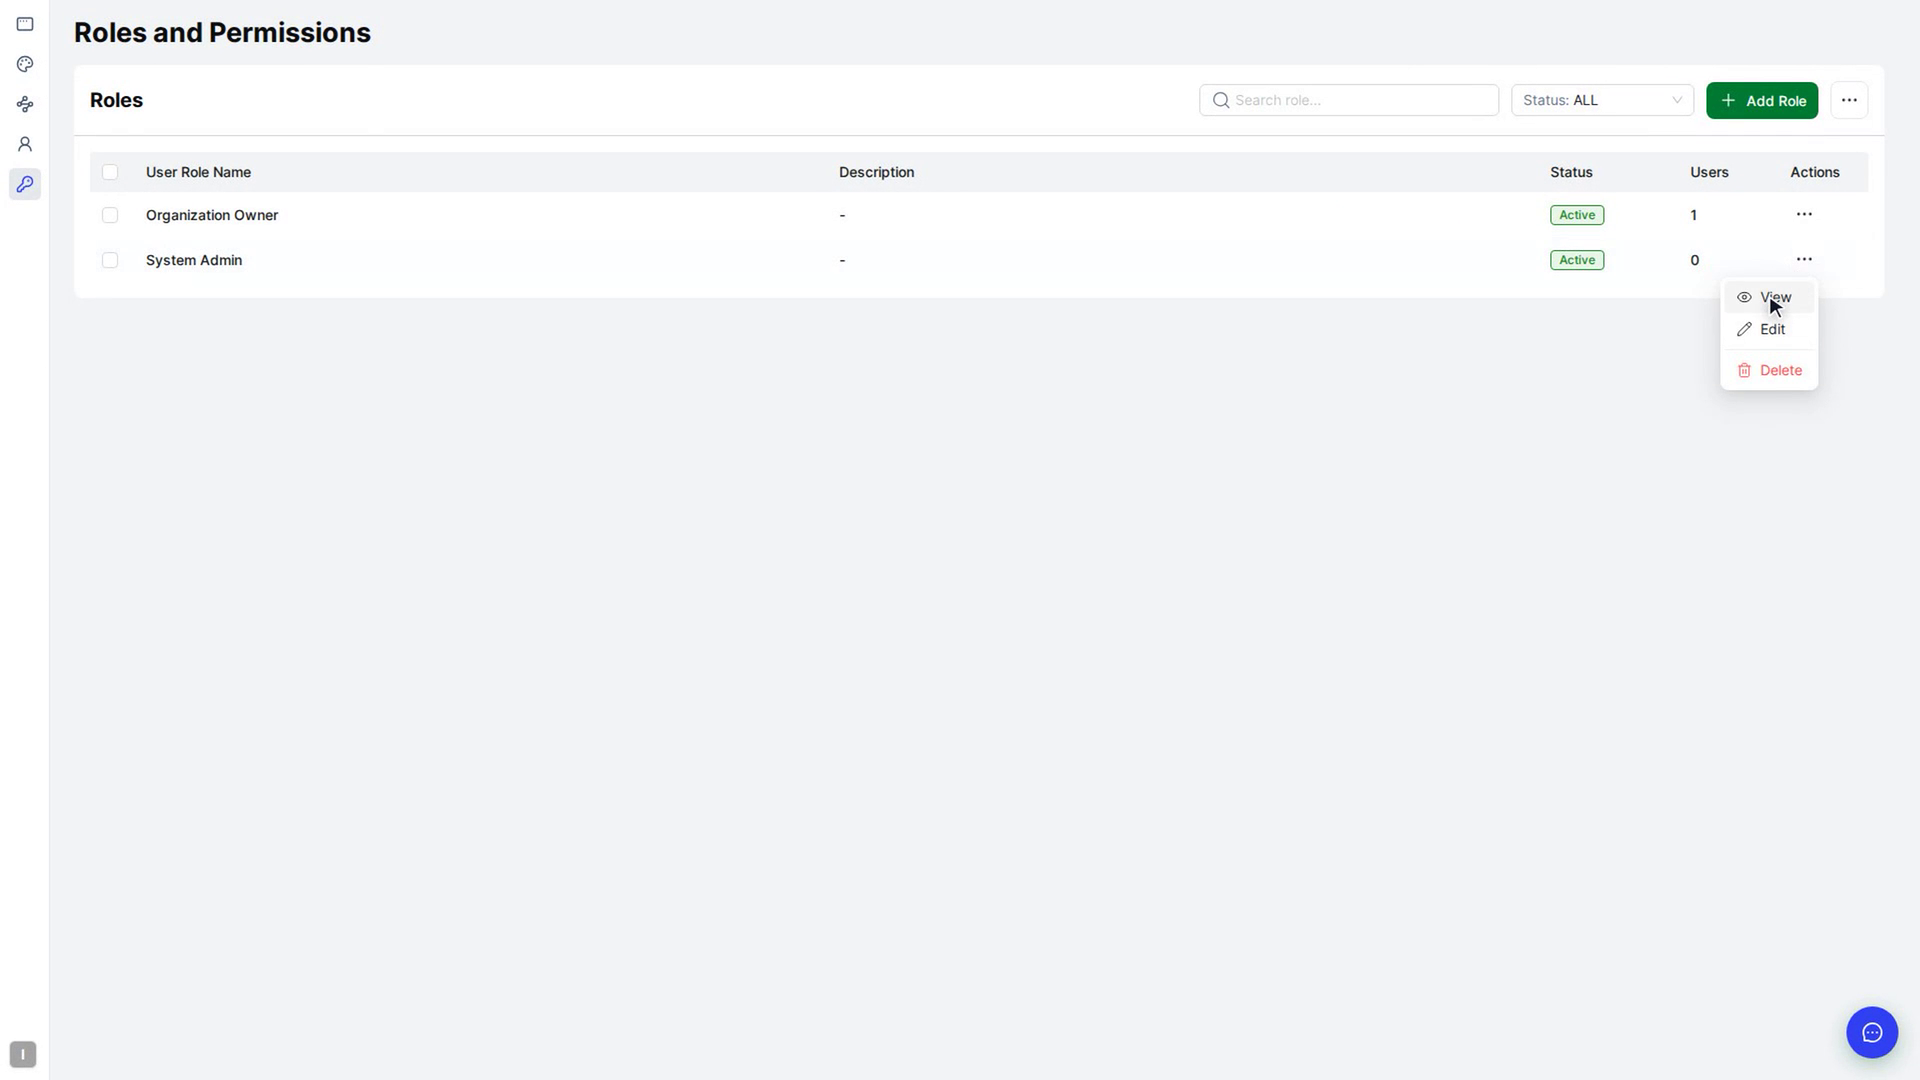
The Roles list shows each role's User Role Name, Description, Status (Active or Inactive) and Users (how many people have the role).
Find a role
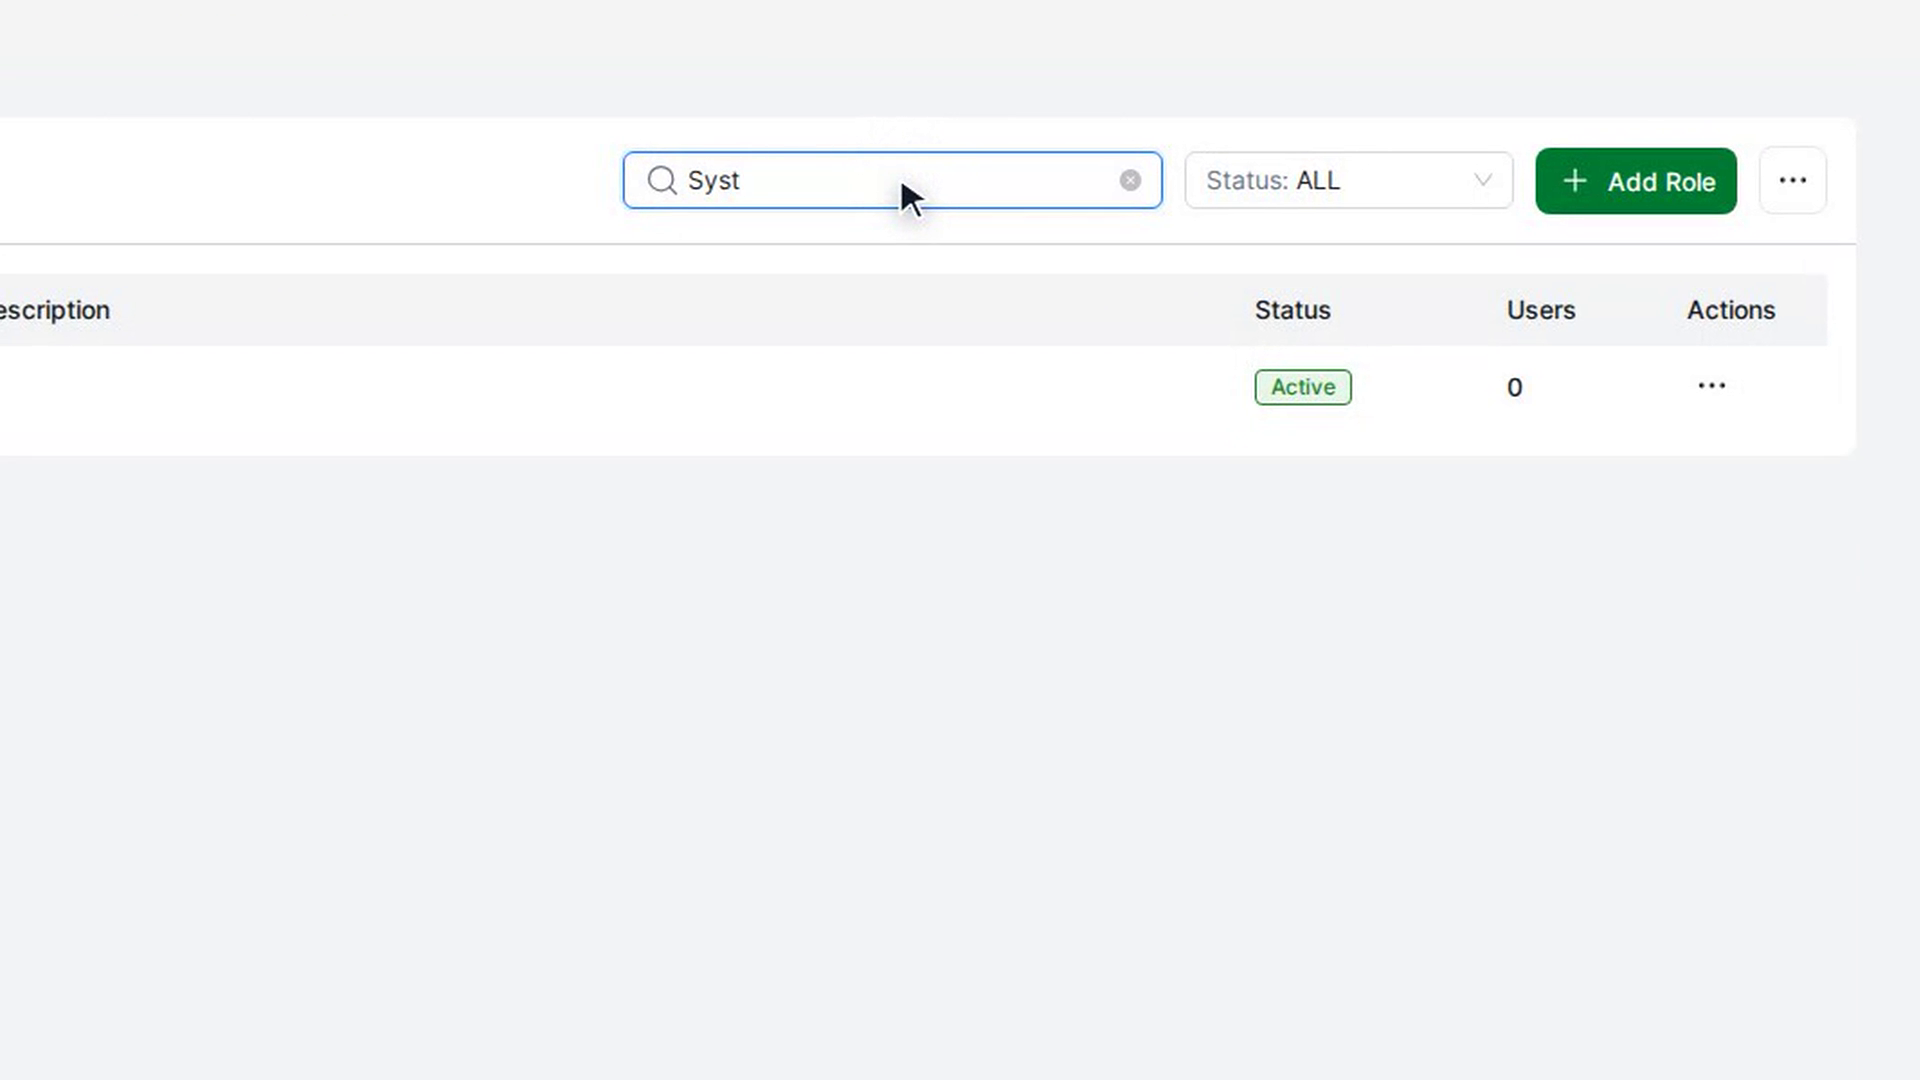
Type in Search role... to narrow the list, and use the Status list to show ALL, Active or Inactive roles. The More actions menu (the ⋯ button) offers Show archived, Export to CSV and Refresh.
Each role's ⋯ menu offers View (open the role's permissions), Edit (change its name and description) and Delete. Delete moves the role to the archive; you can bring it back from More actions → Show archived with Restore. Roles the platform created for you are locked: Edit and Delete are greyed out.
Create a role
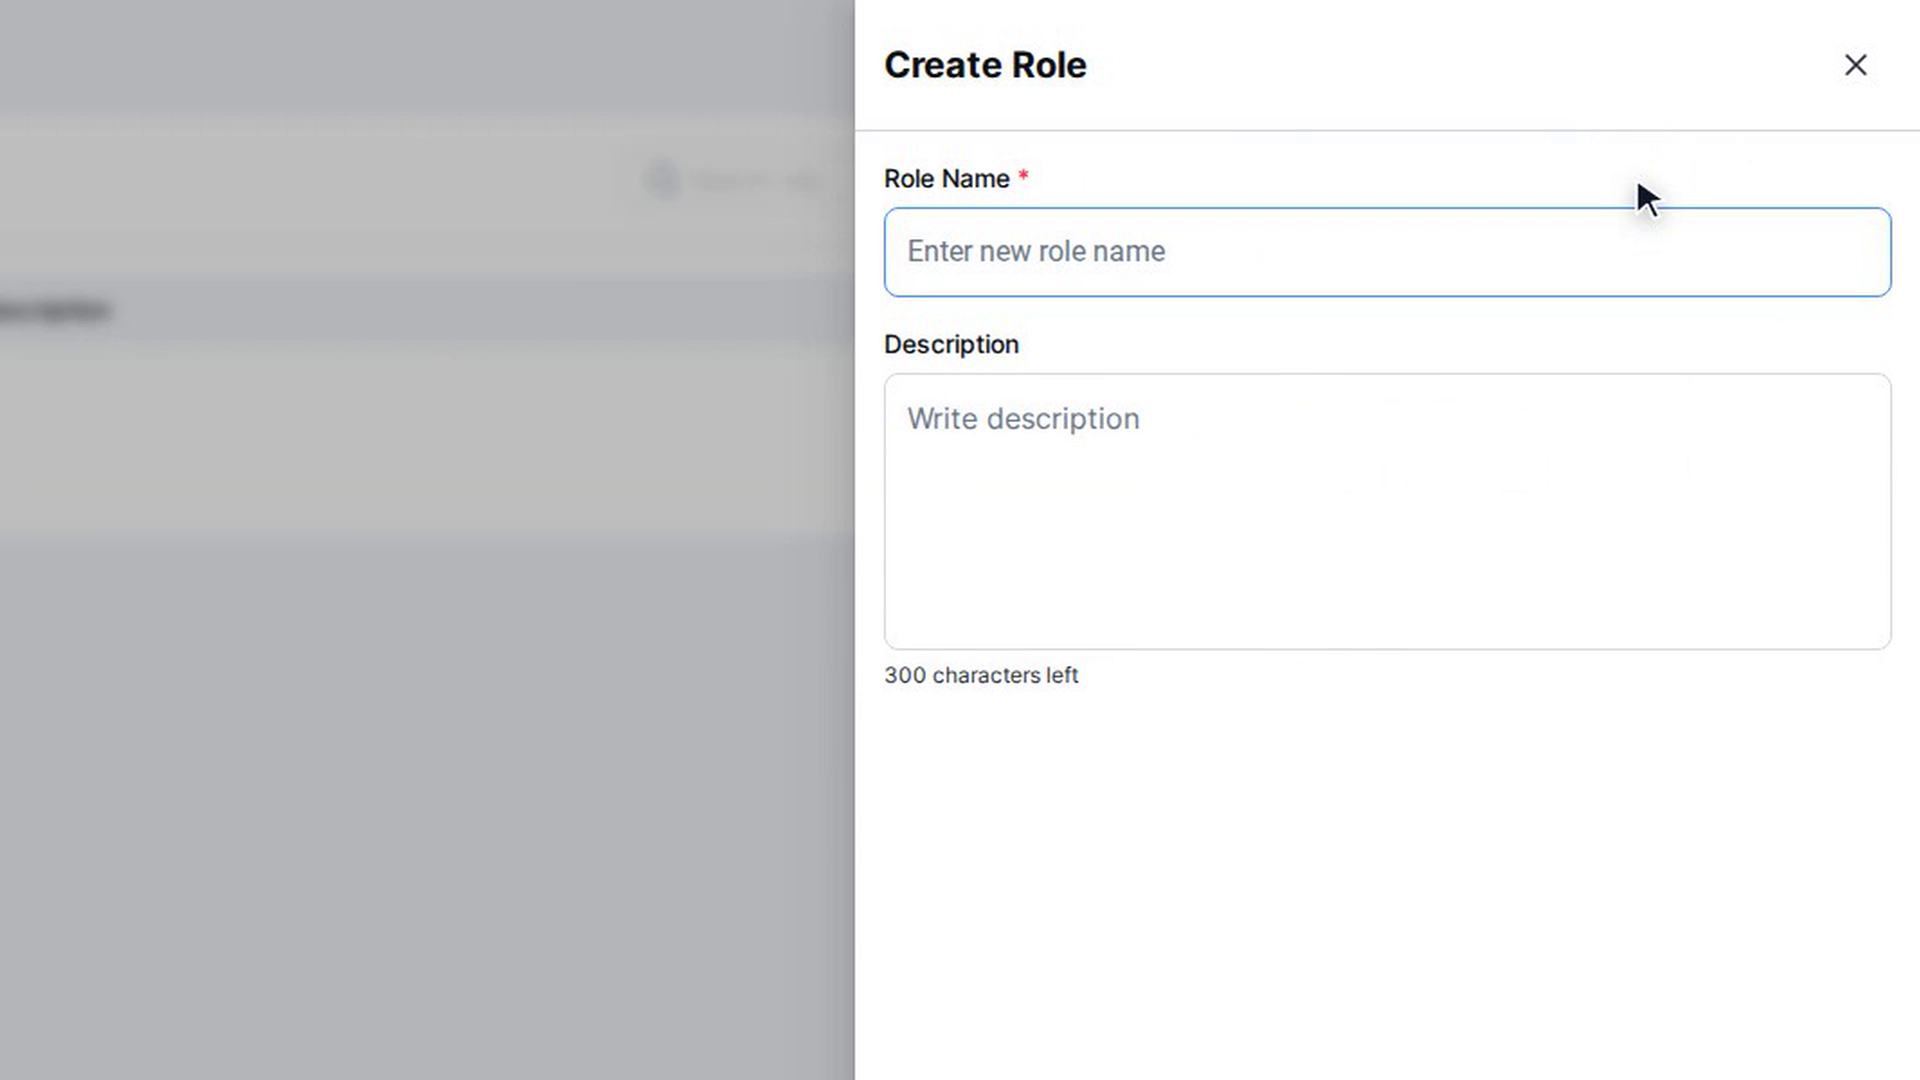
- Select Add Role. The Create Role panel opens.
- Enter a Role Name (required).
- If you like, write a Description of up to 300 characters. The counter shows how many characters are left.
- Select Save. The new role appears in the list. Select Cancel to close without adding it.
Open a role's permissions
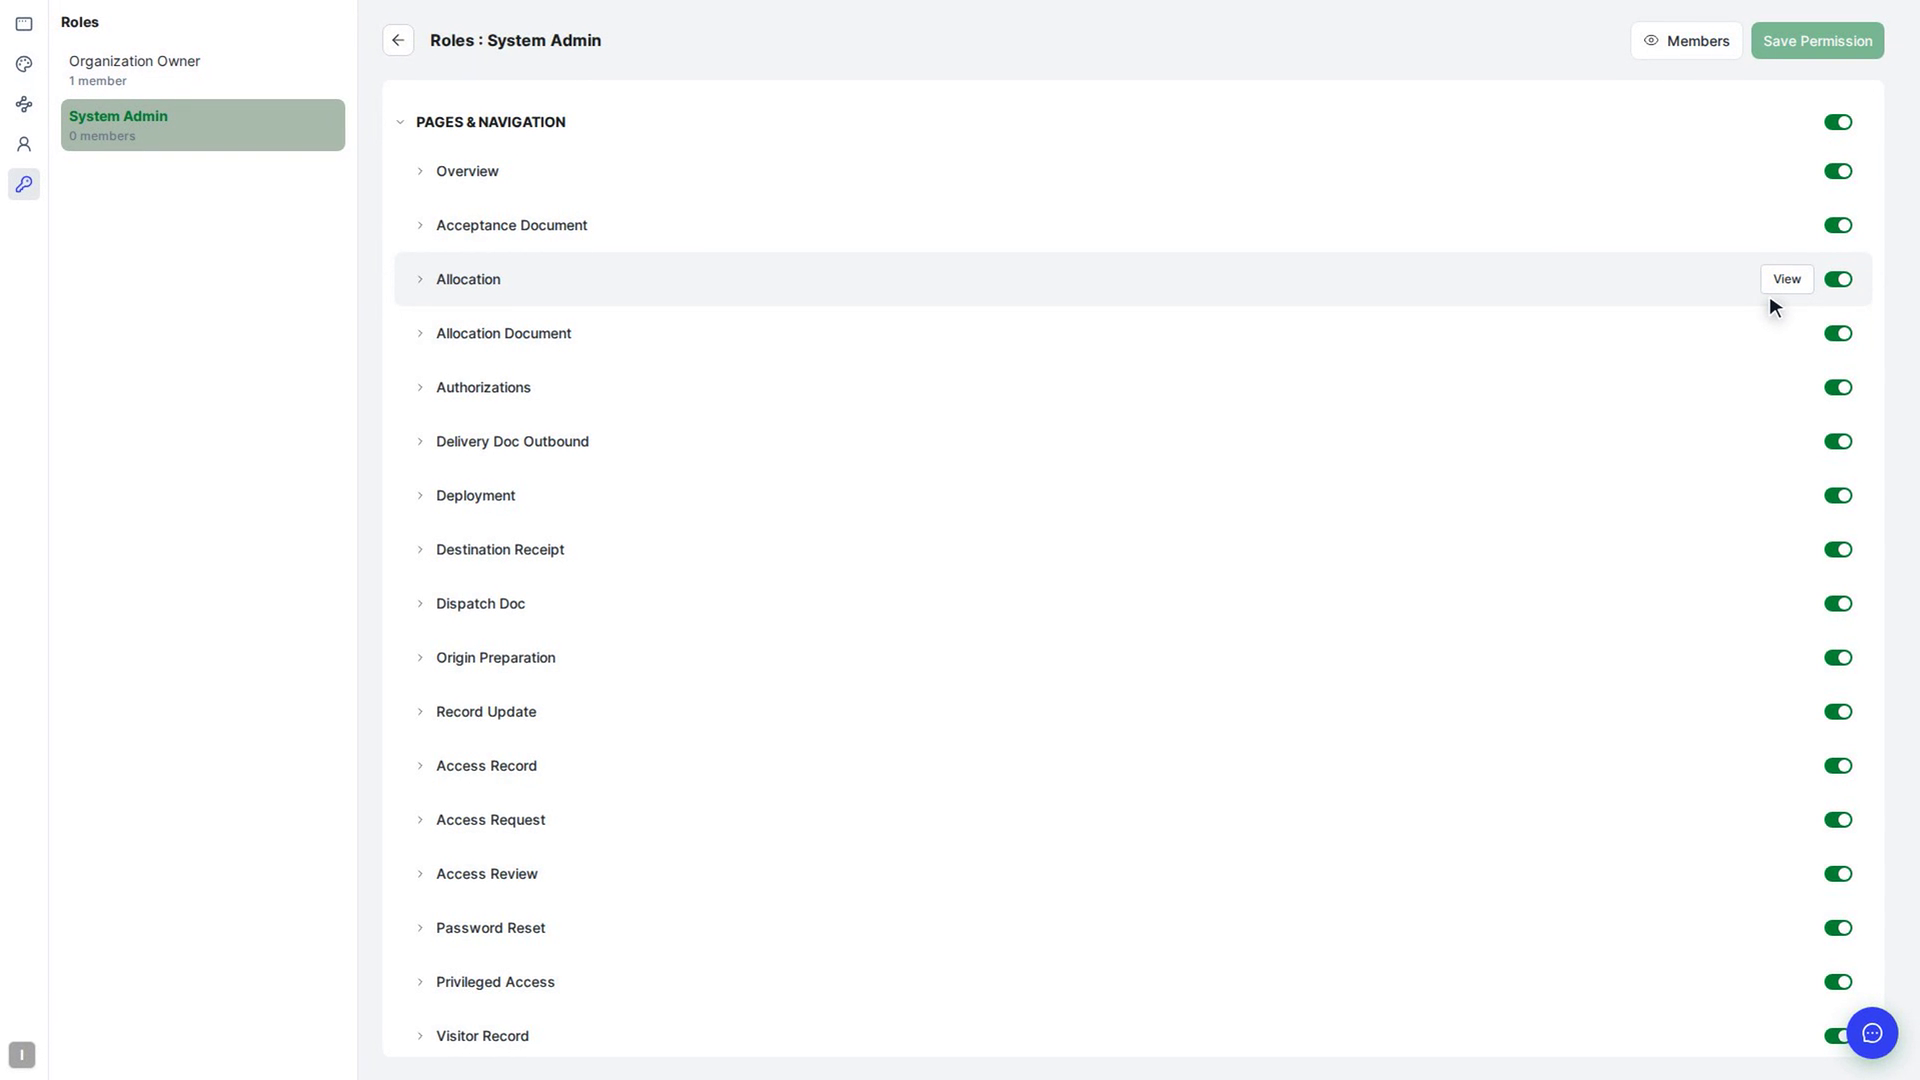
Open the role's ⋯ menu and select View, or select the role's row. The permission editor opens with **Roles : ** and the role's name at the top.
The list on the left shows every role and how many members it has; select one to switch to it. The back arrow returns to the roles list.
Choose which pages and elements the role can see
Pages & Navigation lists every page of the app. The switch at the end of each row turns access on or off for this role. The switch next to Pages & Navigation changes all pages at once.
Select the arrow next to a page to open it. Its protected elements are listed underneath, each with its own switch; a page with none shows No registered elements on this page. To hide only a button, open its page and turn off the button's switch instead of the page's.
Hover over a page or element and select View to preview the page, with the element outlined and tinted to show whether this role can see it.
When a page is switched off, the switches of its elements are greyed out. Their own settings are kept, so they come back when you turn the page on again.
Save your changes
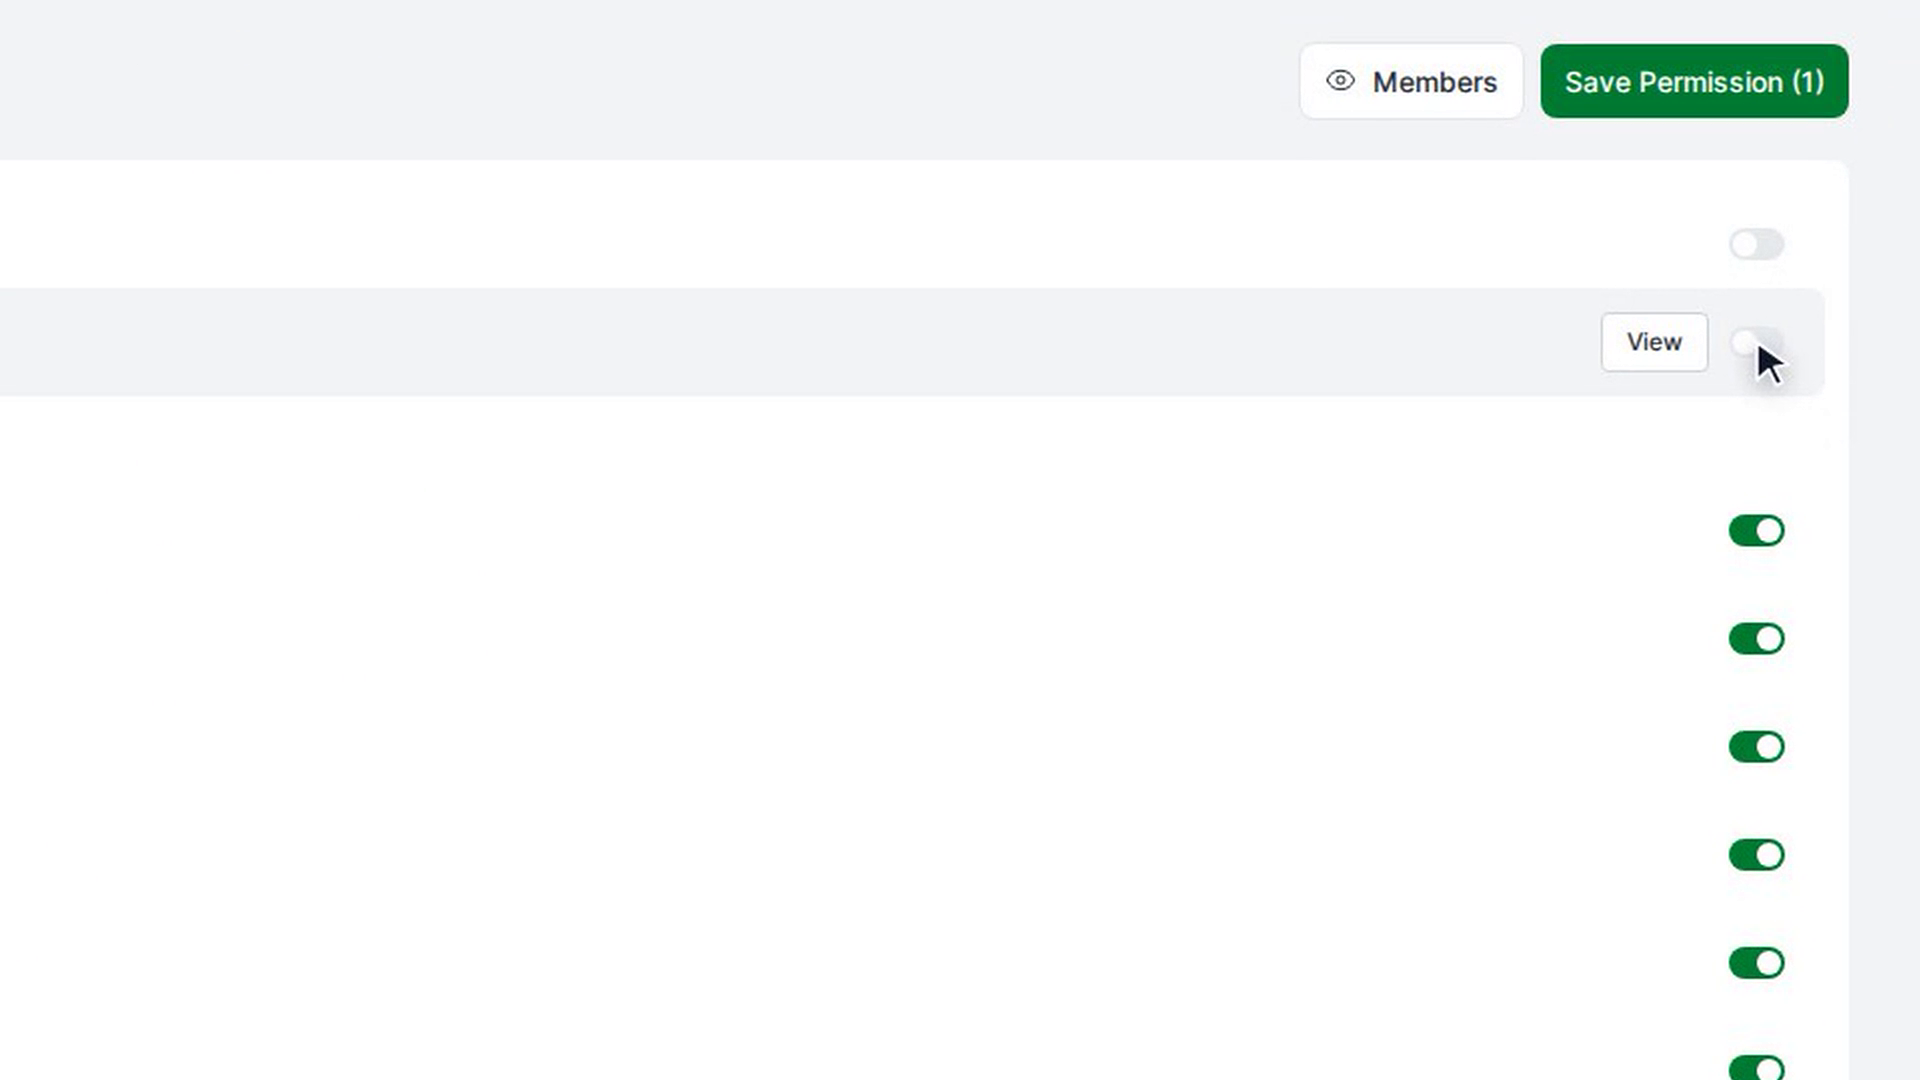
Your switch changes aren't stored until you select Save Permission. The button shows how many changes are waiting, for example Save Permission (3).
- If you switch to another role with unsaved changes, you're asked to Save & switch or Discard & switch.
- If a change also affects other roles, you see Some changes affect other roles with a list of what changes. Select Save anyway or Cancel.
To undo a change before you save, turn the switch back. When nothing is waiting, the button reads just Save Permission.
See who has the role
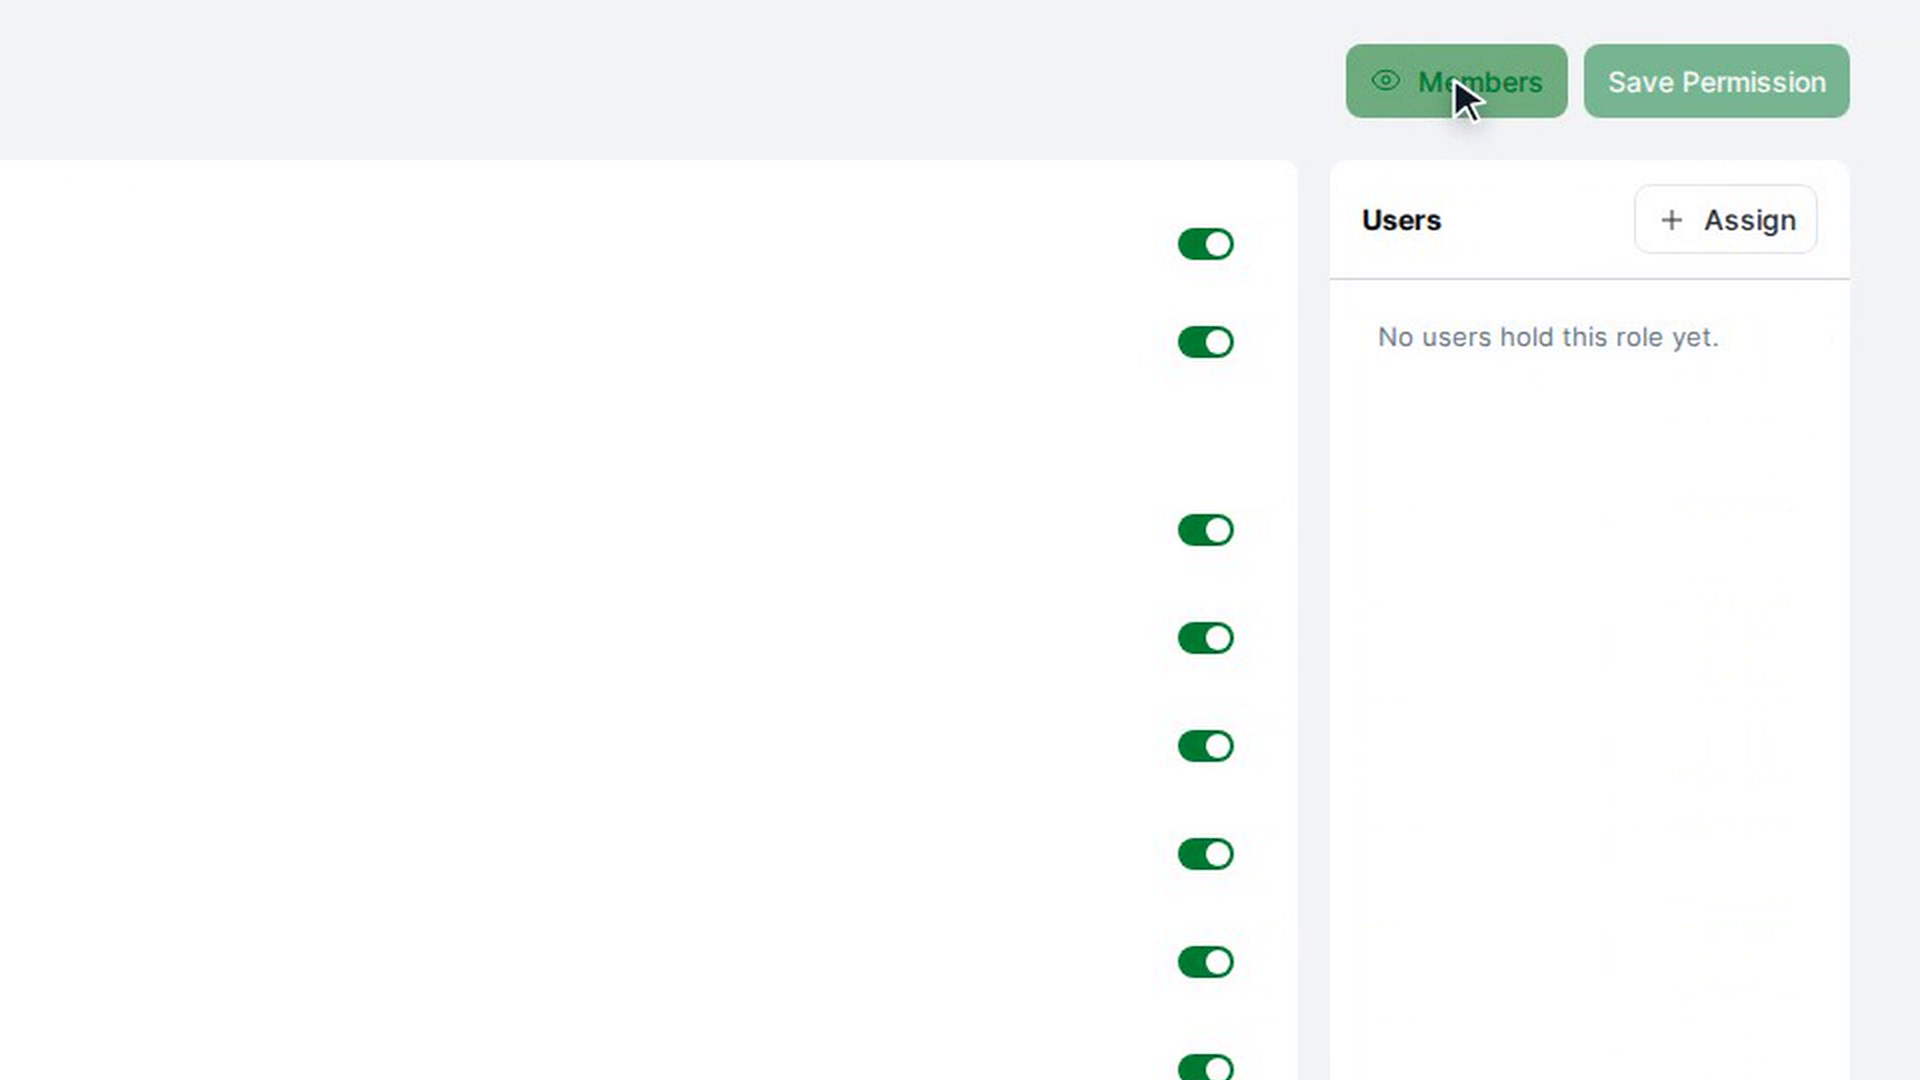
Select Members at the top. The Users panel lists everyone who has this role, or No users hold this role yet.
Select the cross next to a person to remove them from the role. A person's only role can't be removed; assign them another one first. Select Collapse panel to hide the panel again.
Assign people to the role
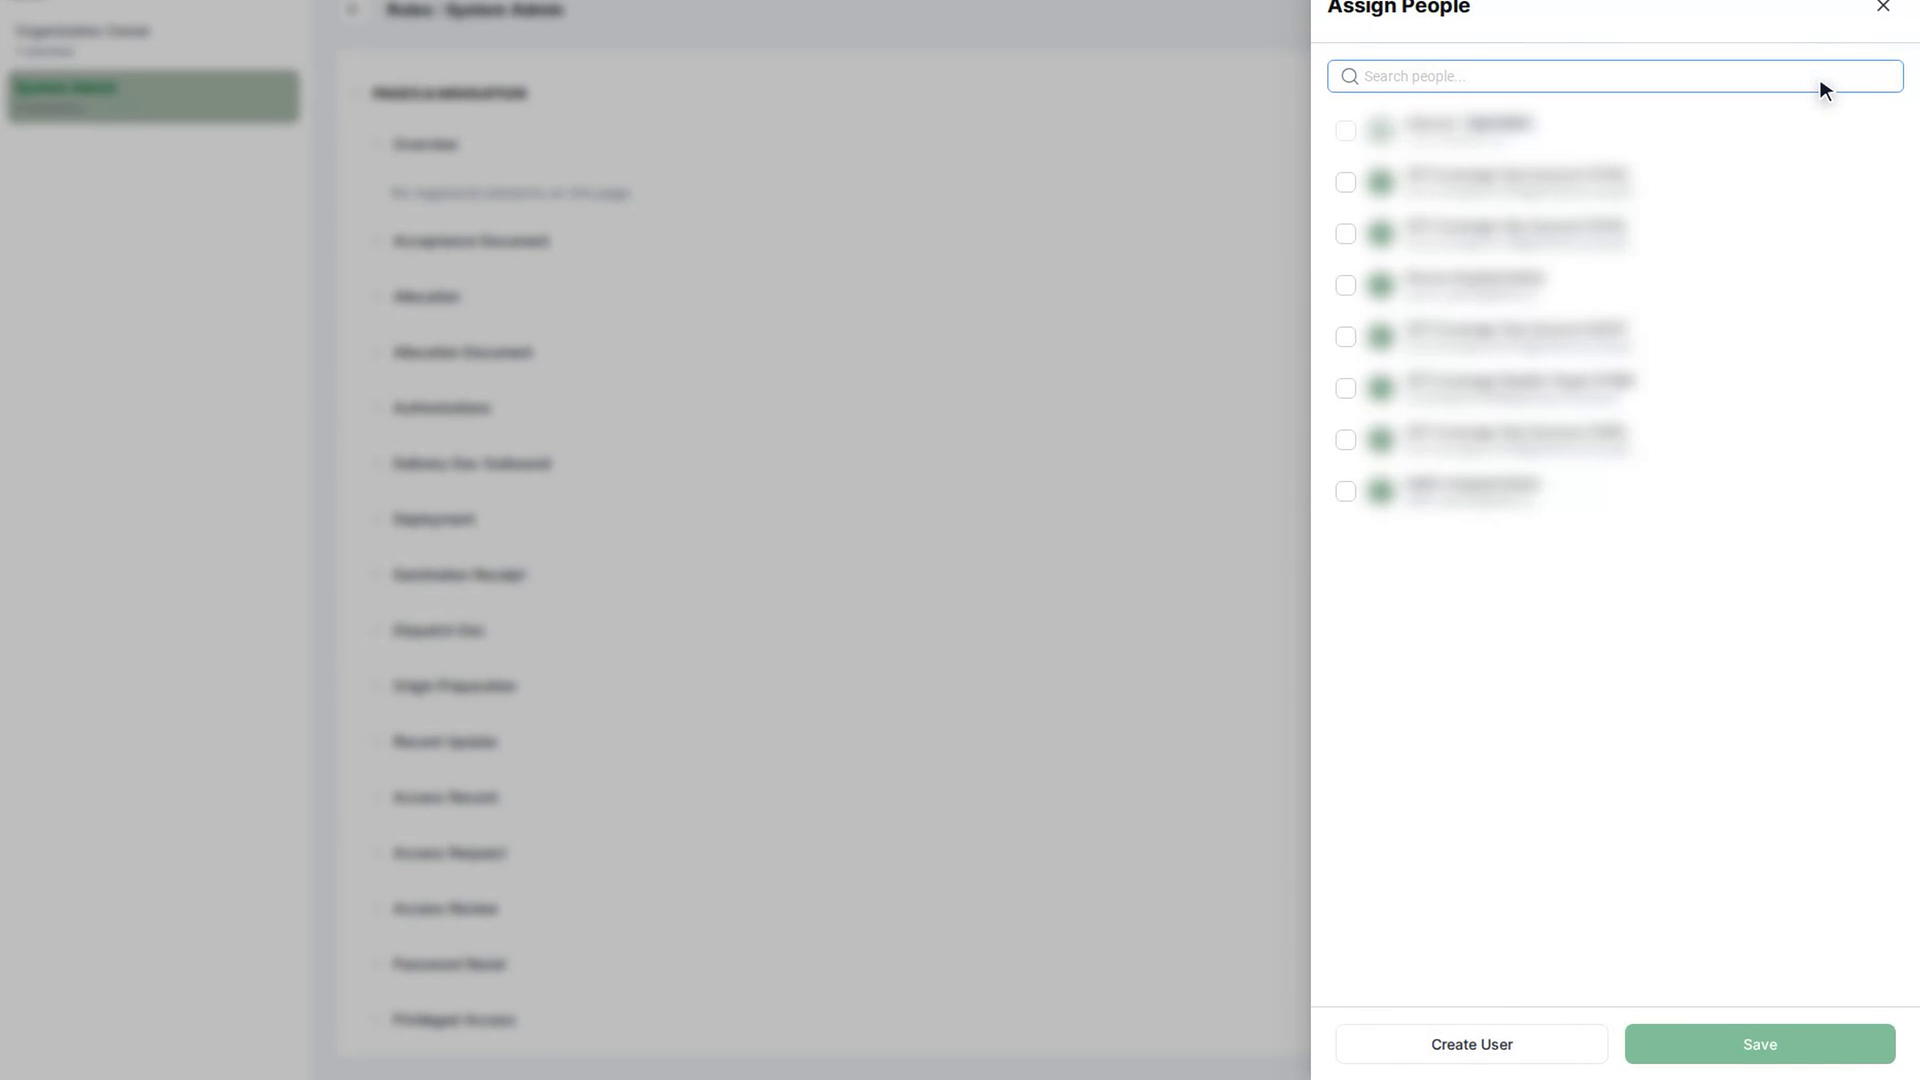
- In the Users panel, select Assign. The Assign People panel opens.
- Type in Search people... and tick the people you want to add.
- Select Save.
Select Create User to add someone who isn't in the list yet. Select the cross at the top to close the panel without changes.
Screenshots
Step 1: Open Roles and Permissions
Step 2: Find a role
Step 3: Create a role
Step 4: Open a role's permissions
Step 5: Choose which pages and elements the role can see
Step 6: Save your changes
Step 7: See who has the role
Step 8: Assign people to the role
Watch how
Tip: Roles and Permissions and the editor's Access tab change the same rules. Page switches here match Page Access, and element switches match Element Access.
Tip: The Organization Owner role always has full access, so there is nothing to switch off for it.