Use the Layers tab
The Layers tab shows the page as a tree of elements, one inside another. Use it to select elements that are small or hidden on the canvas, to see how a page is built, and to rearrange elements.
Before you start
- You need access to your app's Customize tab (usually a team admin).
- Open the page you want to work on (see Add pages and components).
Steps
Open the Layers tab
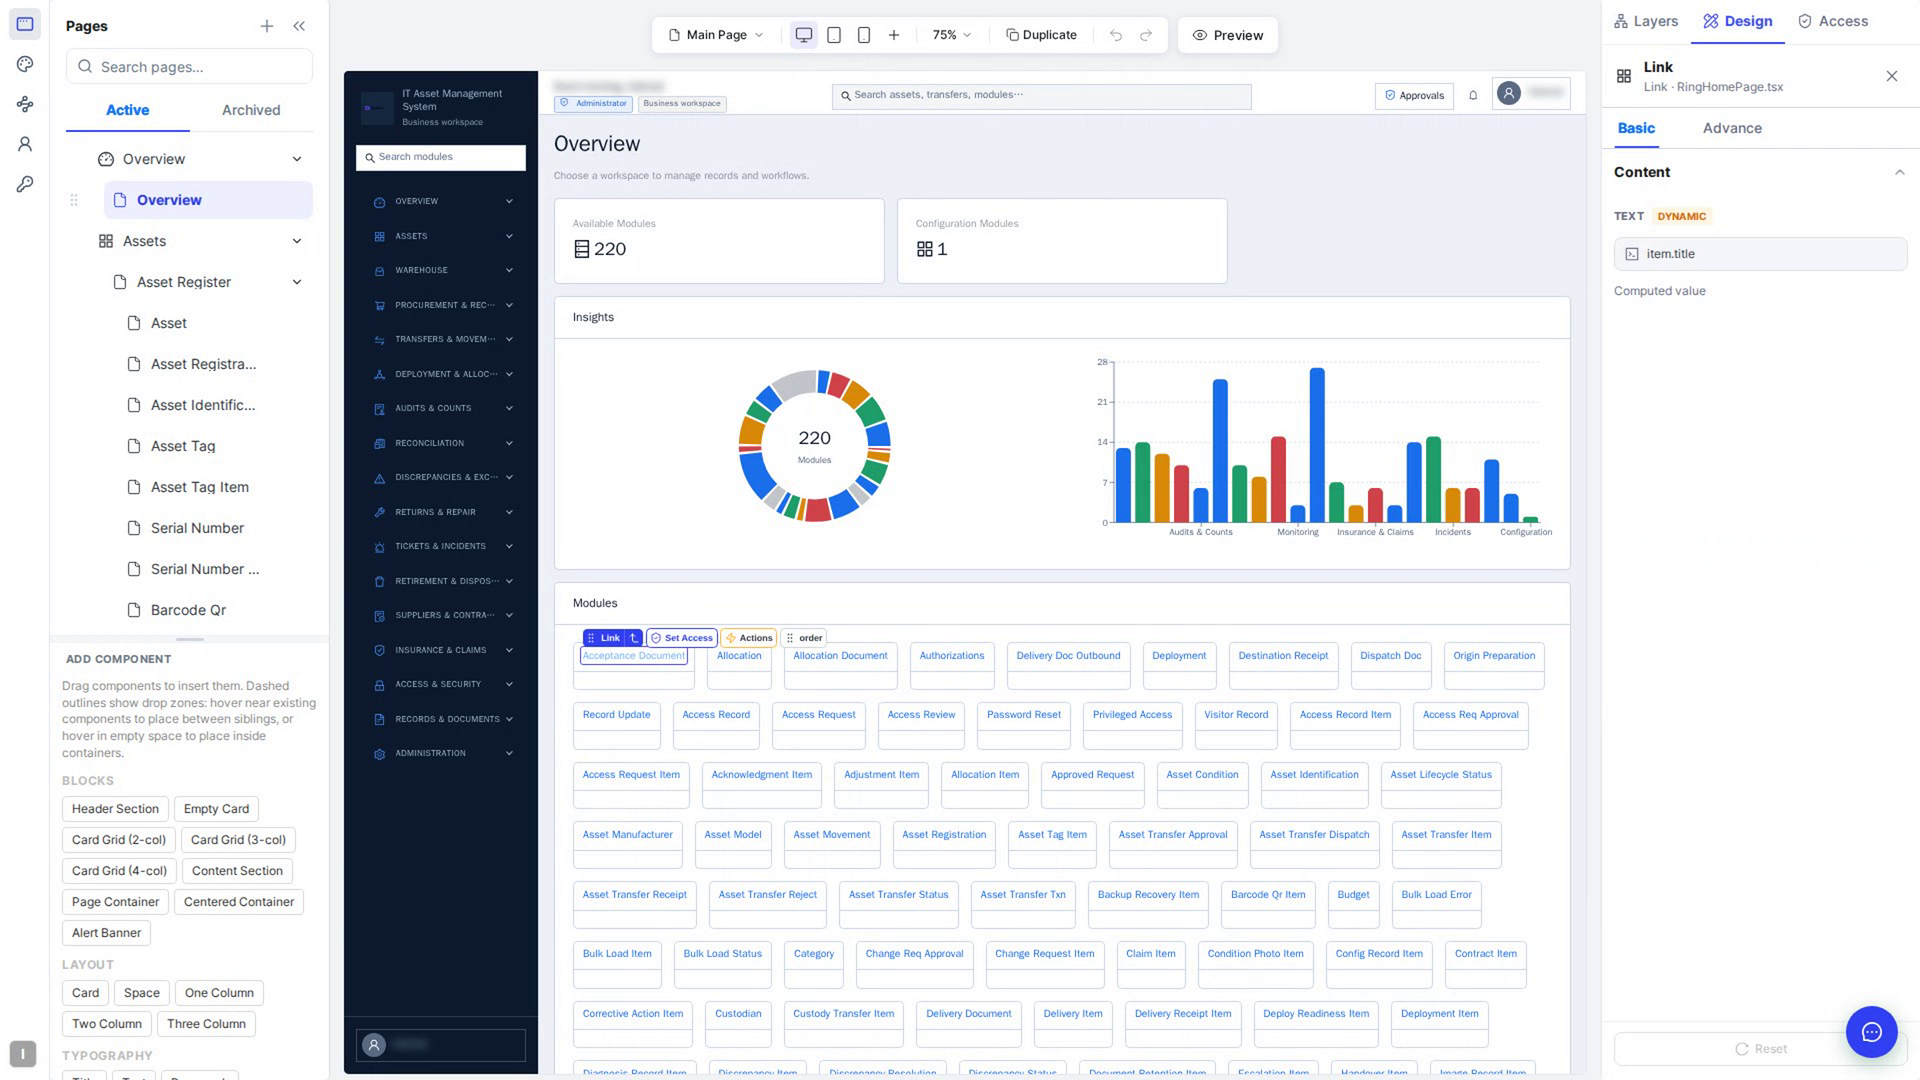
Click an element inside a container on the canvas, such as a button in a card. A Layers tab appears in the right panel, next to Design. Select it.
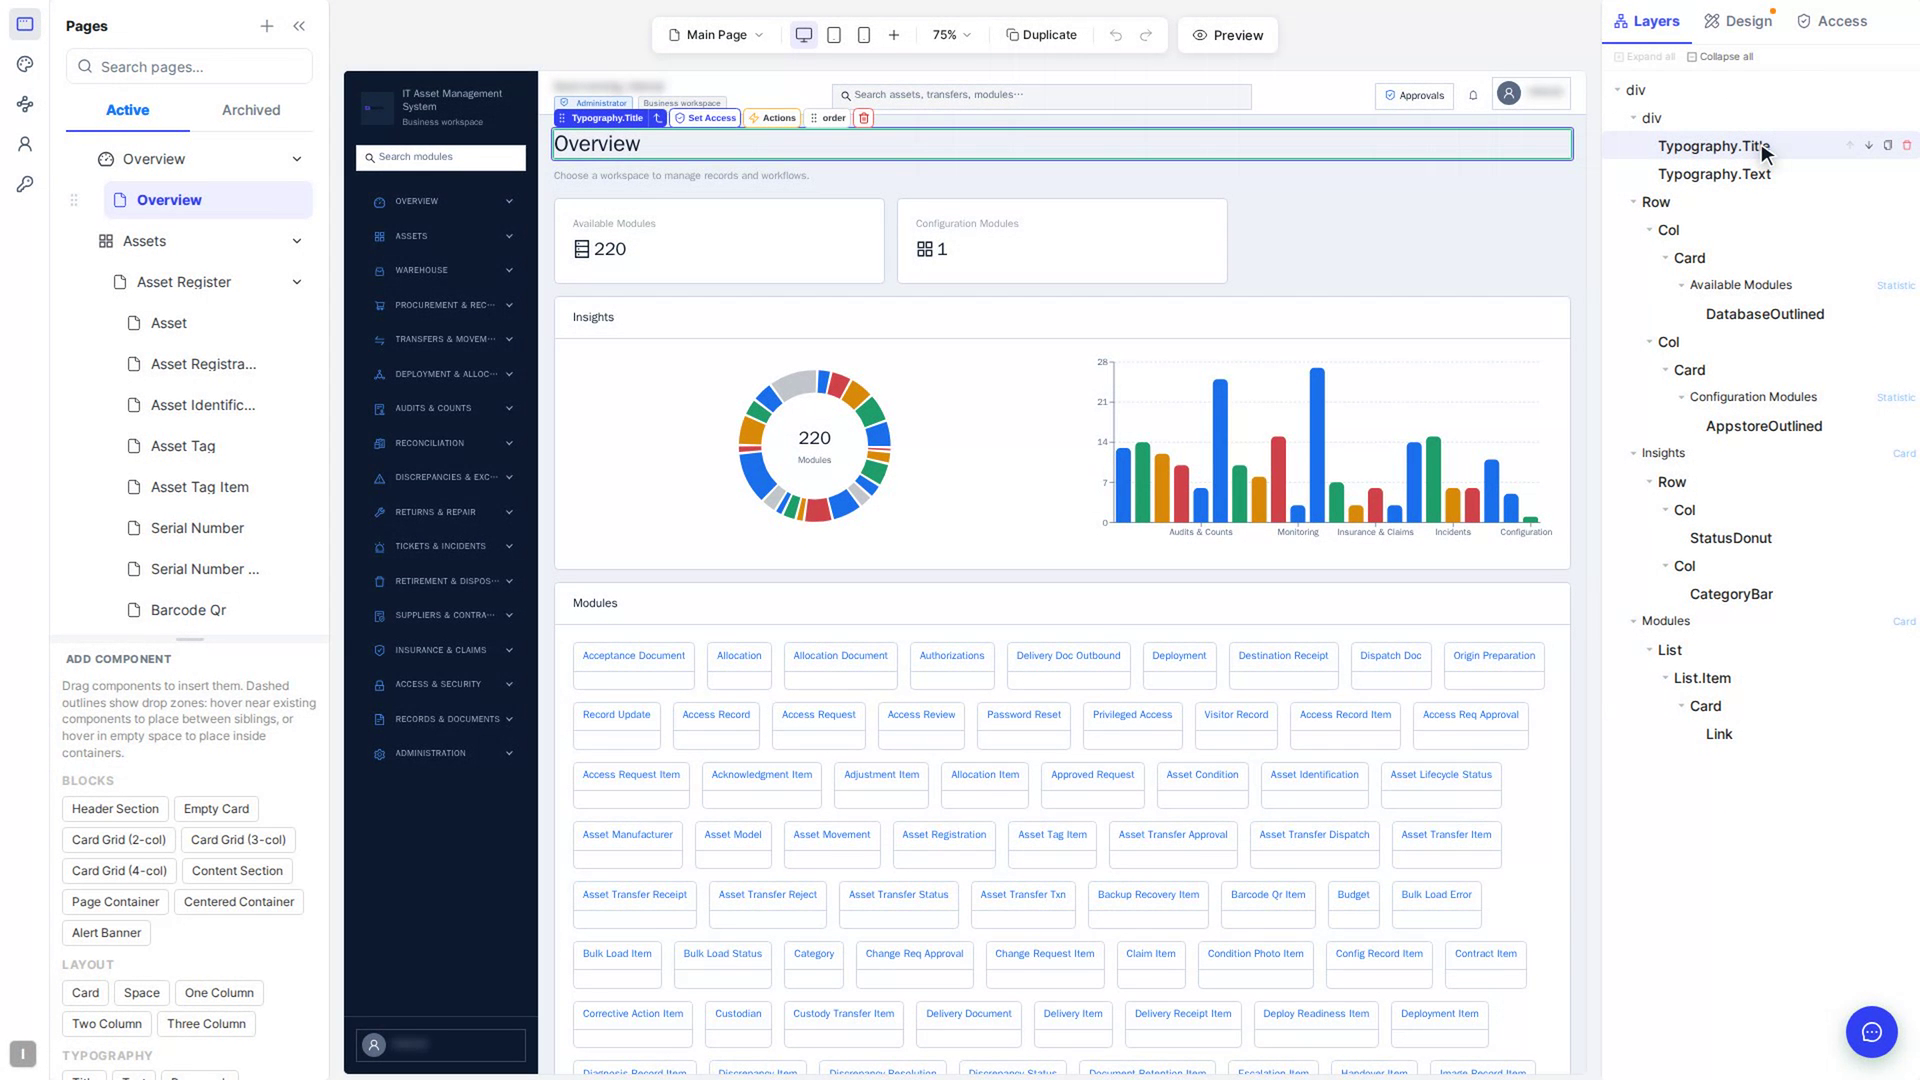
Select an element from the tree
Click a row to select that element. Select Design to change it. Grey labels at the right of a row, such as Card, show what kind of component a named item is.
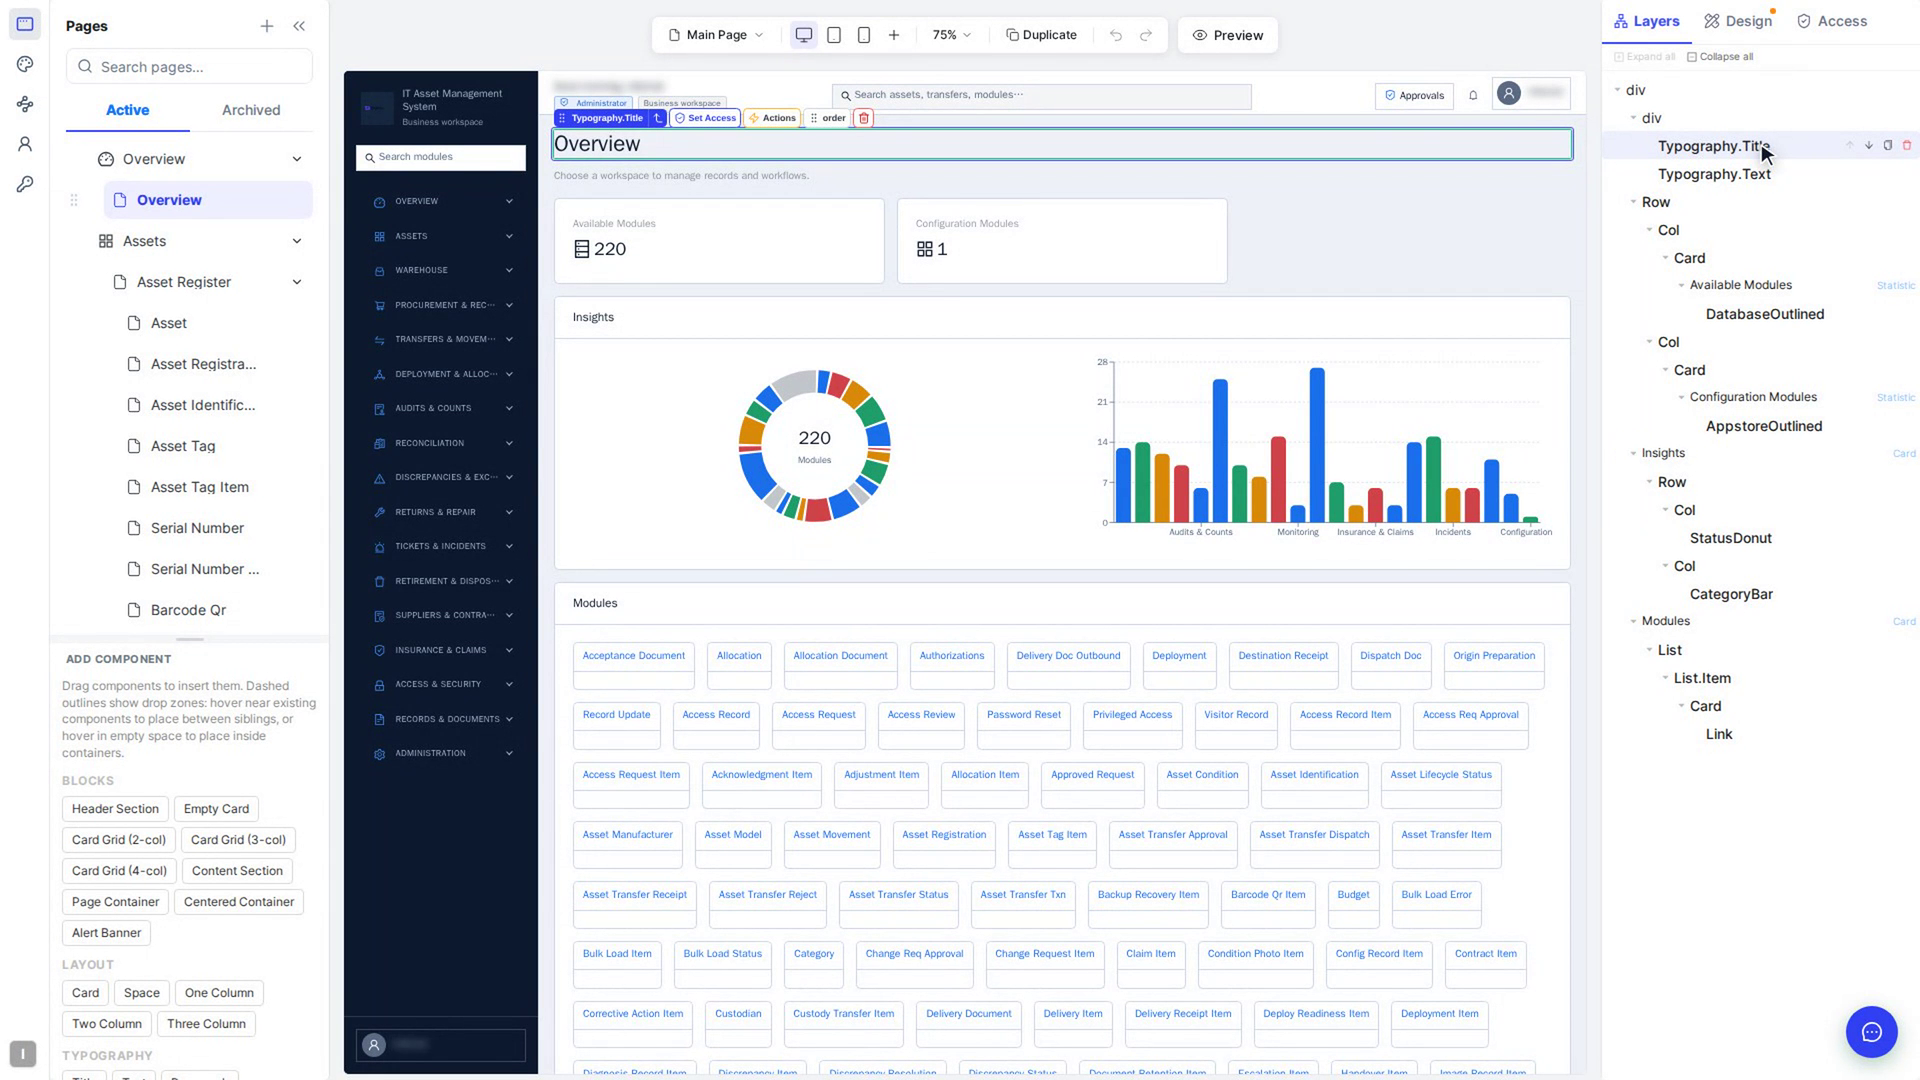
Open and close branches
Click the small triangle next to a row to show or hide what's inside it. Expand all and Collapse all open or close the whole tree.
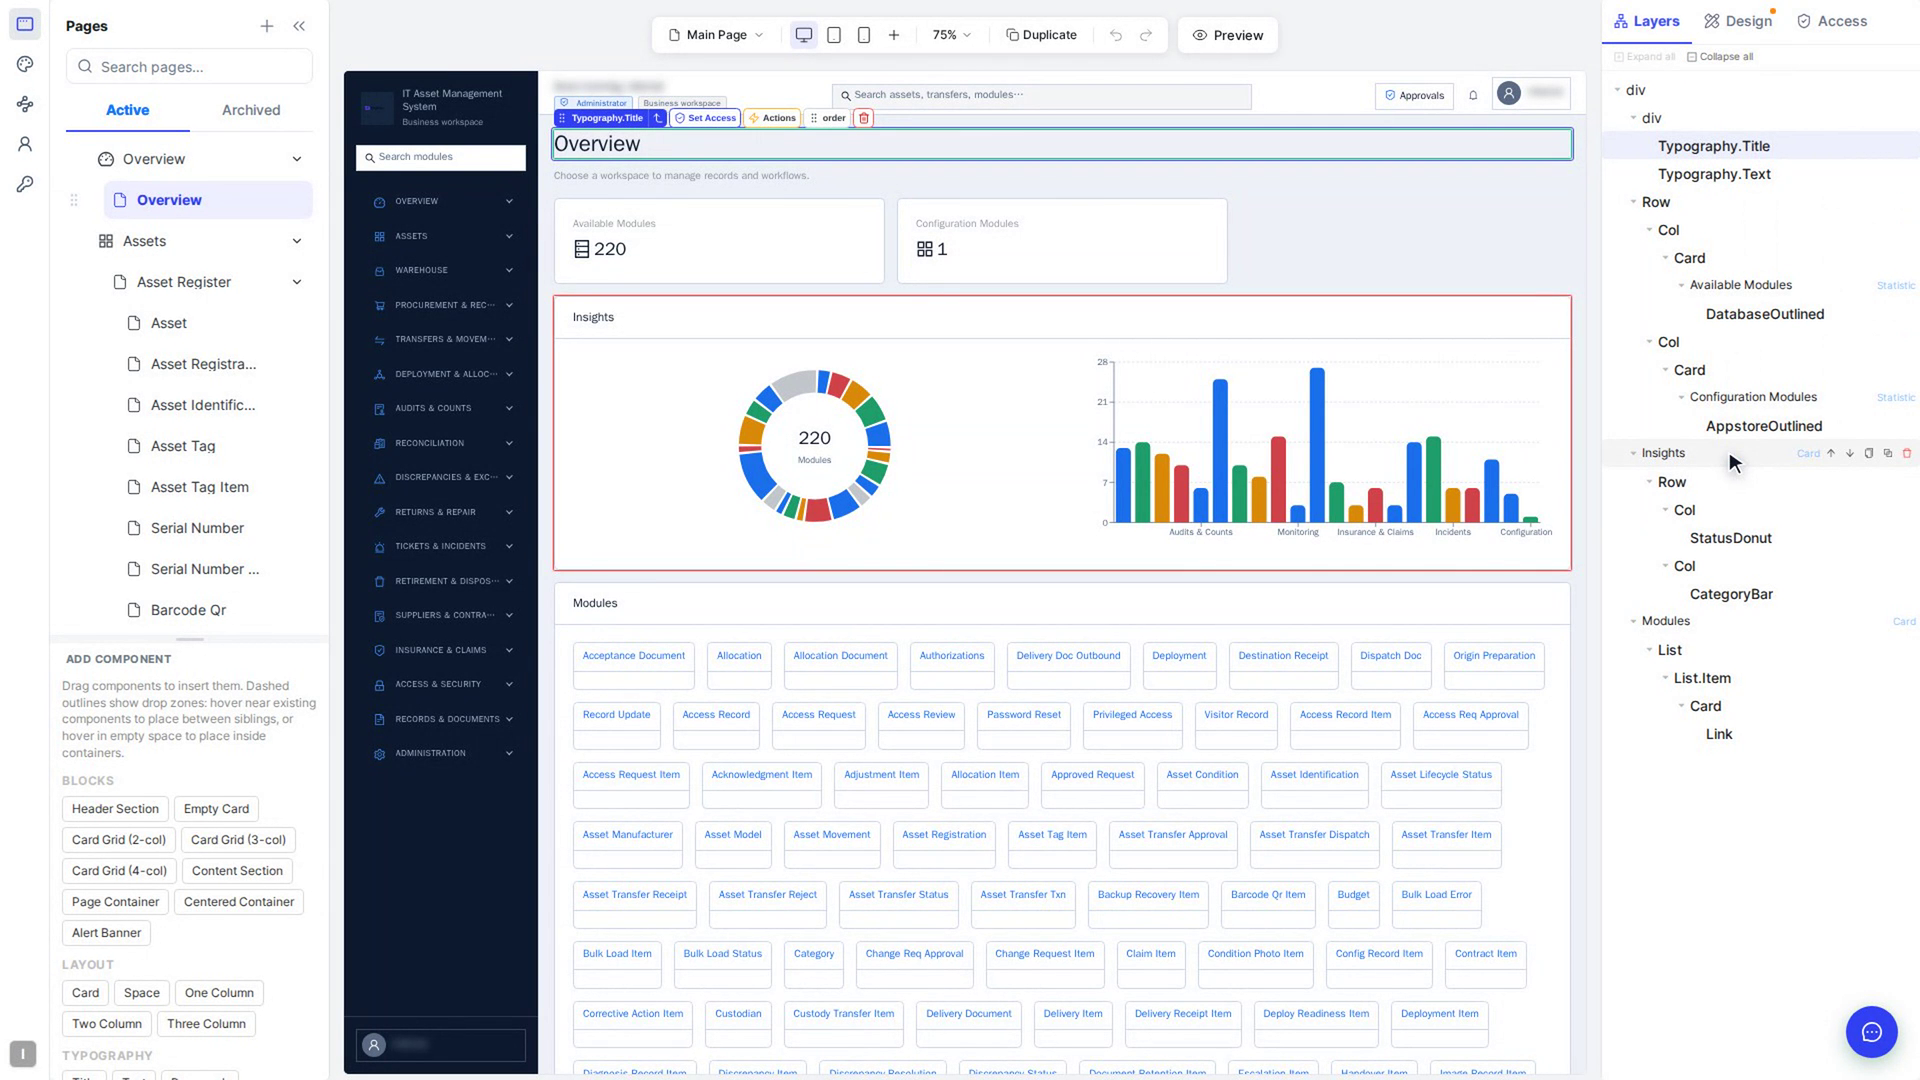
Rearrange elements from the tree
Hover over a row and use its icons: Move up and Move down move the element one place, Duplicate copies it, Ungroup (containers only) lifts out what's inside, and Delete removes it.
Screenshots
Step 1: Open the Layers tab
Step 2: Select an element from the tree
Step 3: Open and close branches
Step 4: Rearrange elements from the tree
Watch how
Tip: While an element is selected and you're looking at Layers, a small dot on the Design tab reminds you there's something to edit.
Delete removes the element from the page straight away. Press Ctrl+Z (⌘Z on a Mac), or select Undo above the canvas, to bring it back.