Open and set up the Agent Module
Open the Agent Module on your system, then choose how the agent works for you in Settings → General.
Before you start
- Your system must be generated and show in All Apps.
- For a tour of the workspace, see the Agent Module overview.
Steps
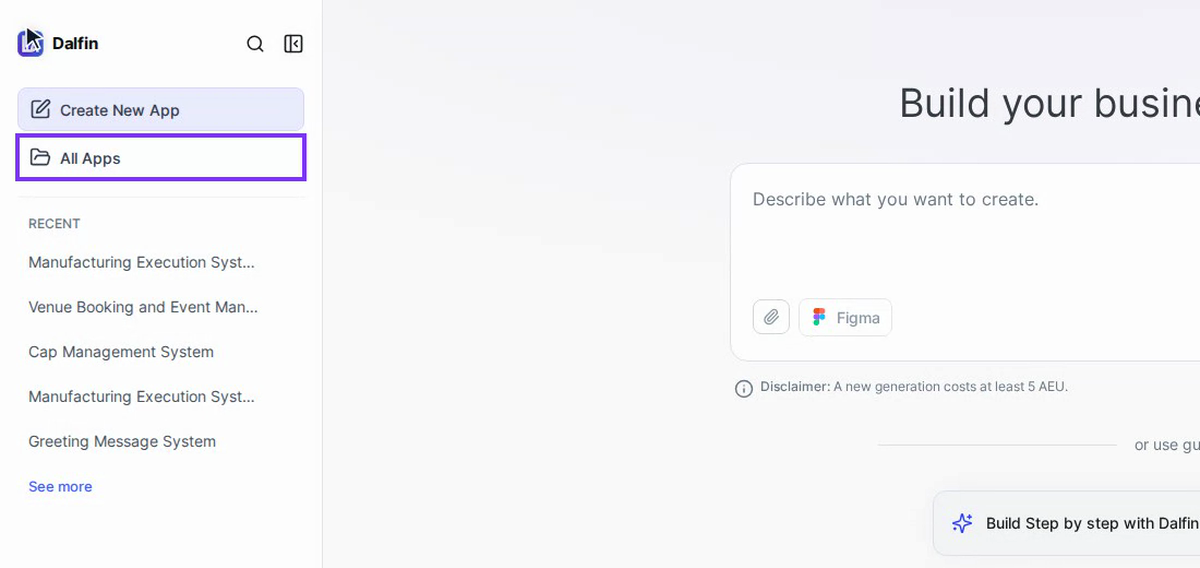
Select All Apps
On the Dalfin home screen, select All Apps in the menu on the left.
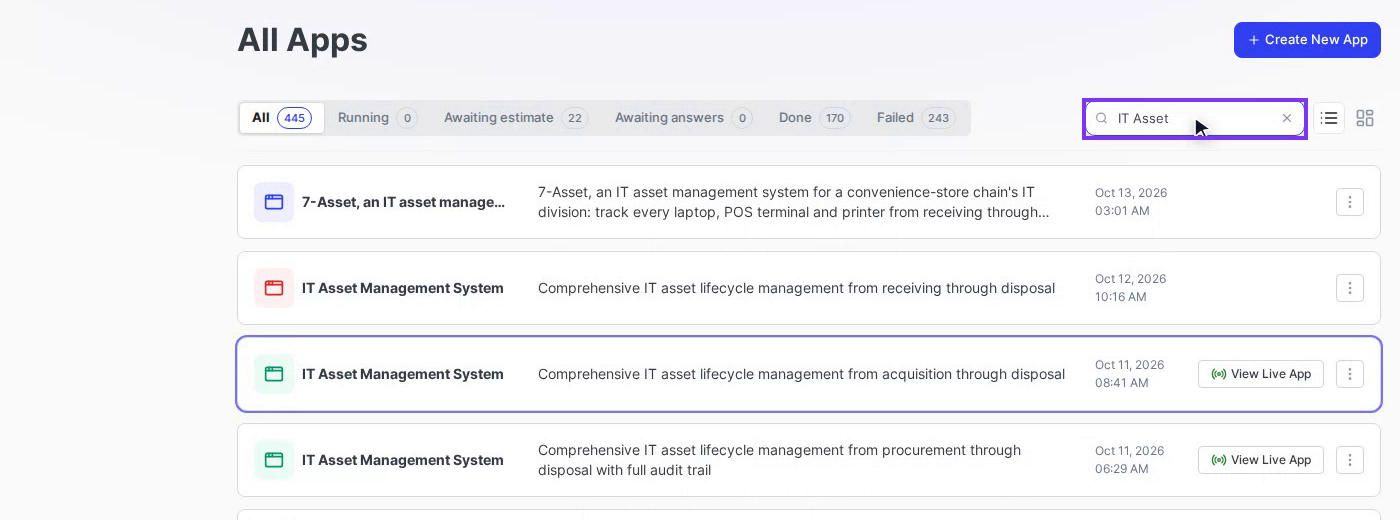
Find your system
Type part of its name, such as IT Asset, in the search box at the top right of the list.
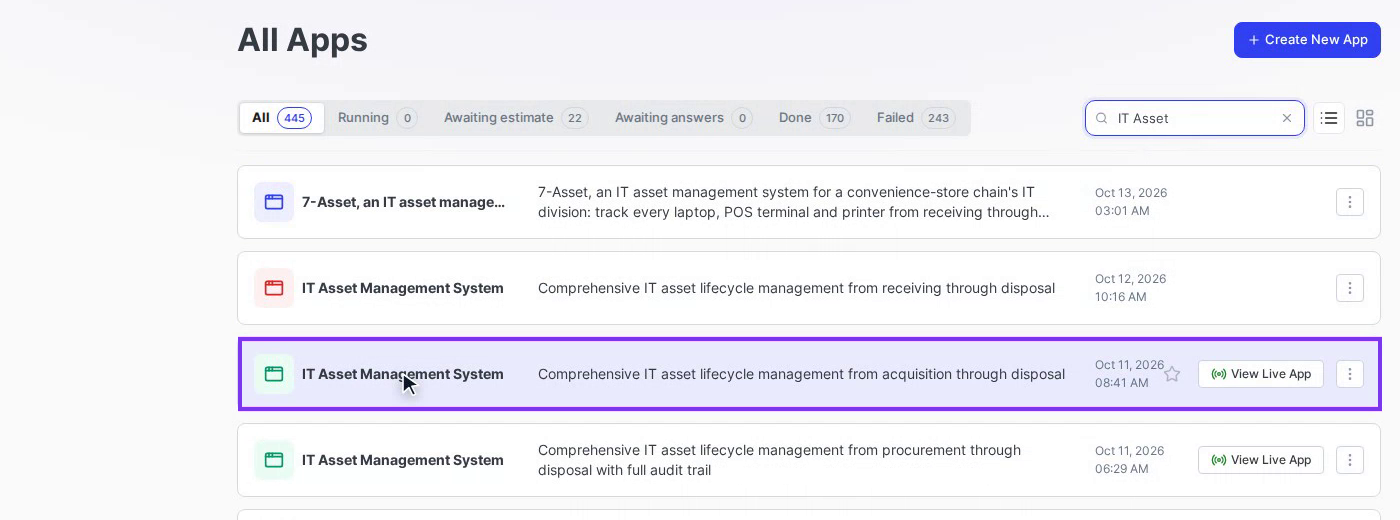
Open it
Select your system in the list. It opens on the Interface tab.
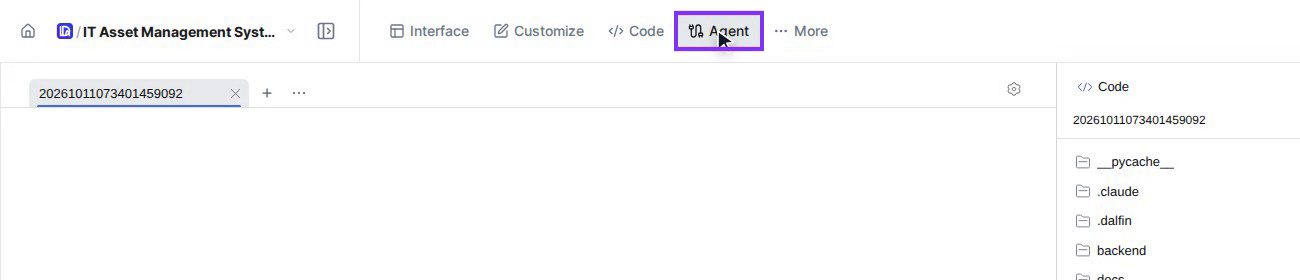
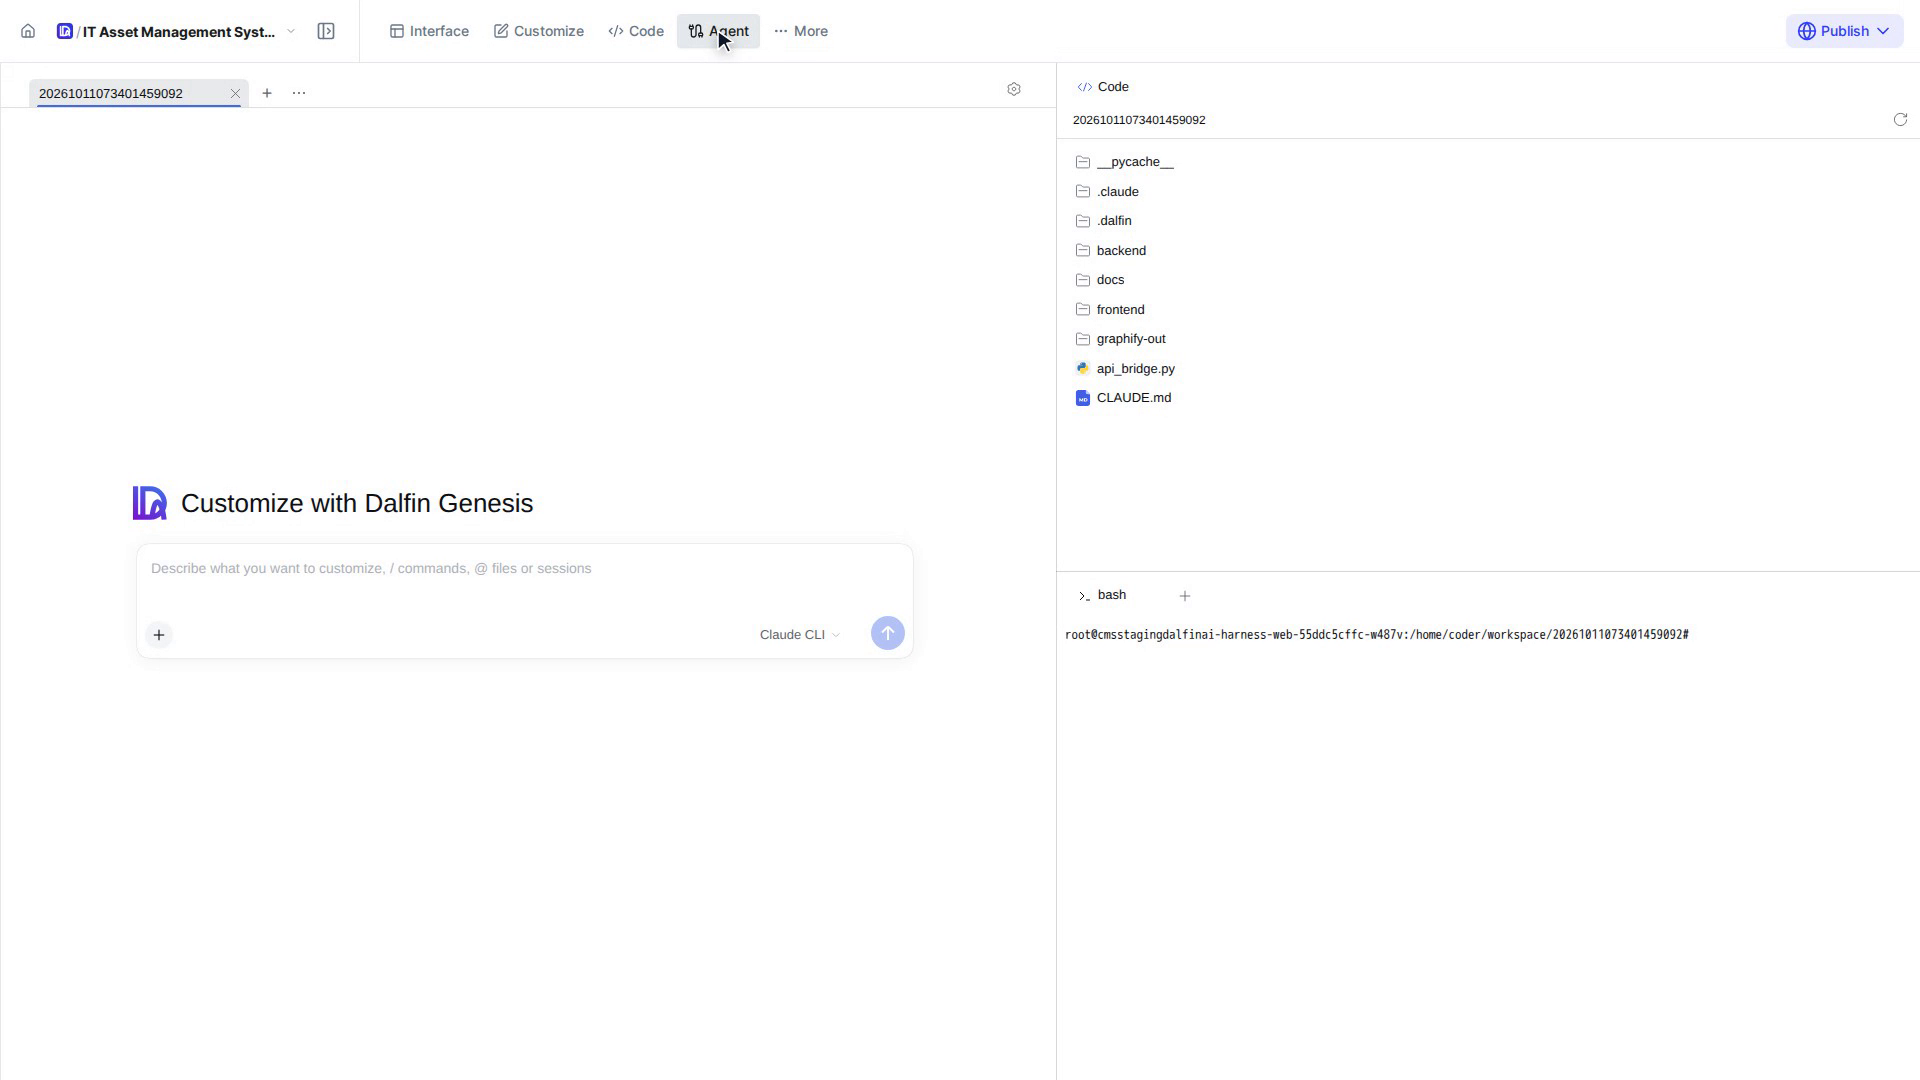
Select Agent
Select Agent in the top bar. The Agent workspace opens on your system's files, ready to work: the conversation on the left, Code at the top right and the terminal at the bottom right.
Open Settings
Select the gear at the top right of the conversation, then select General.
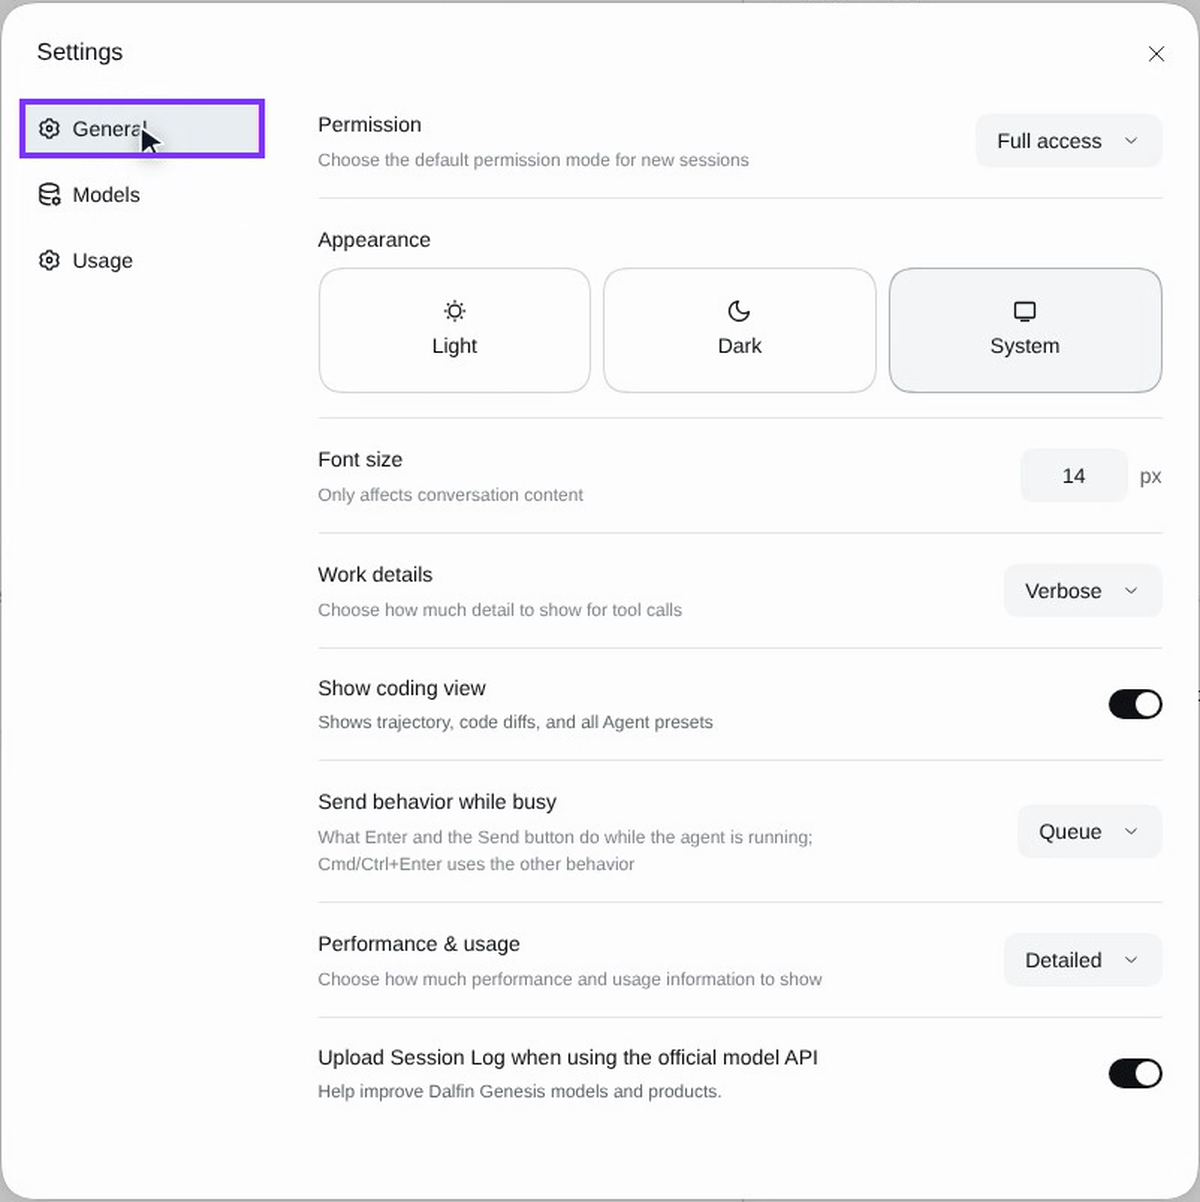
Choose the permission
Permission sets what the agent may do in new sessions without asking you first, from asking for your approval to Full access.
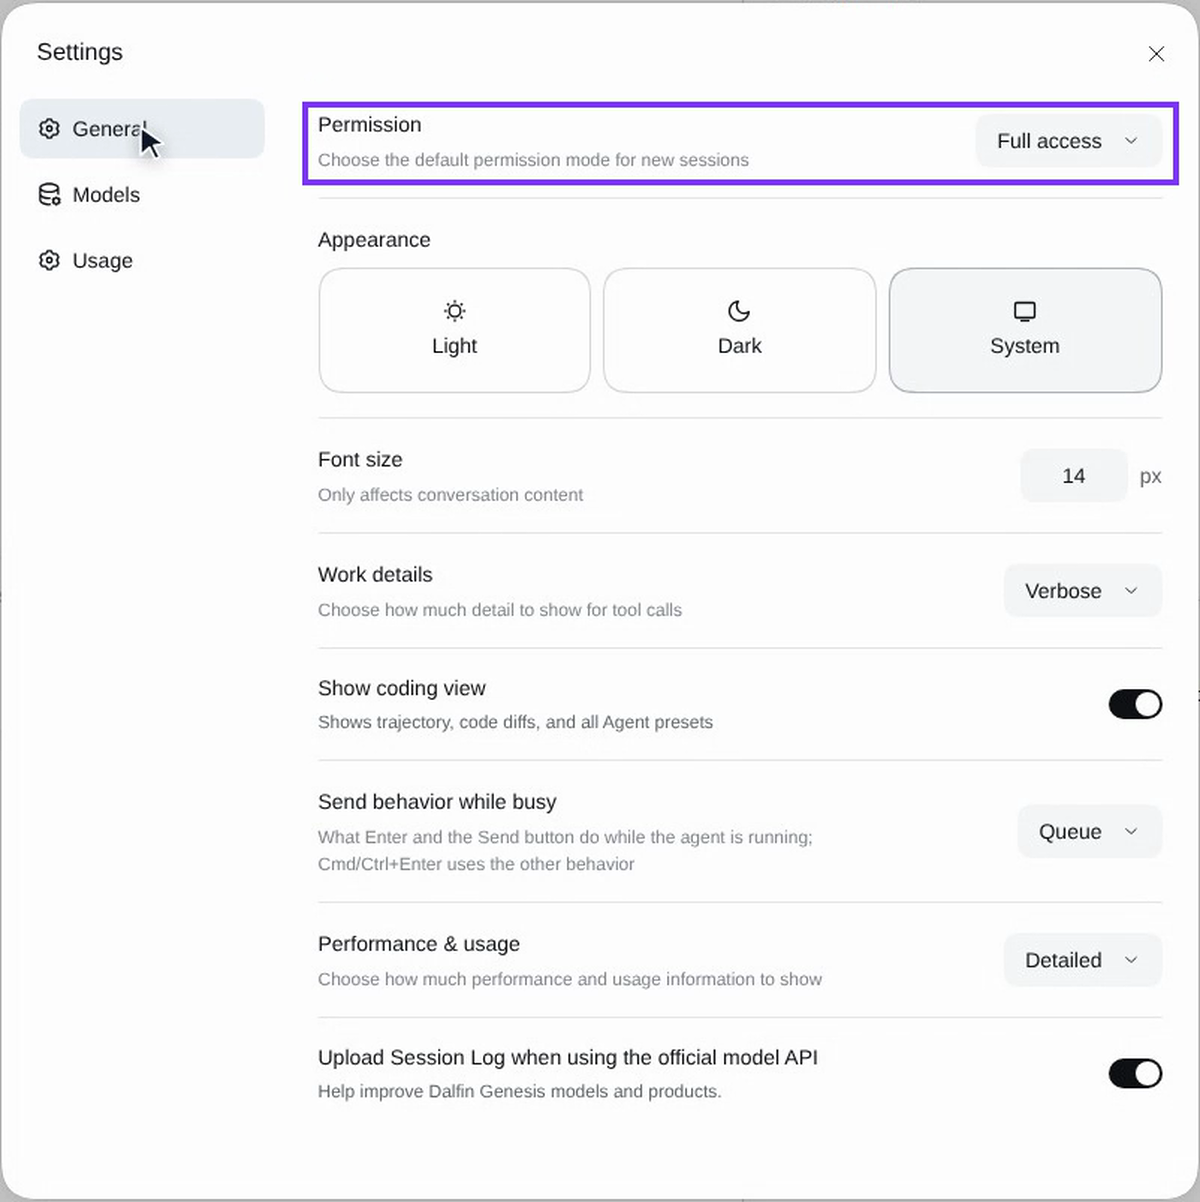
Change how the workspace looks
Appearance switches between Light, Dark and System. Font size changes the size of the conversation text.
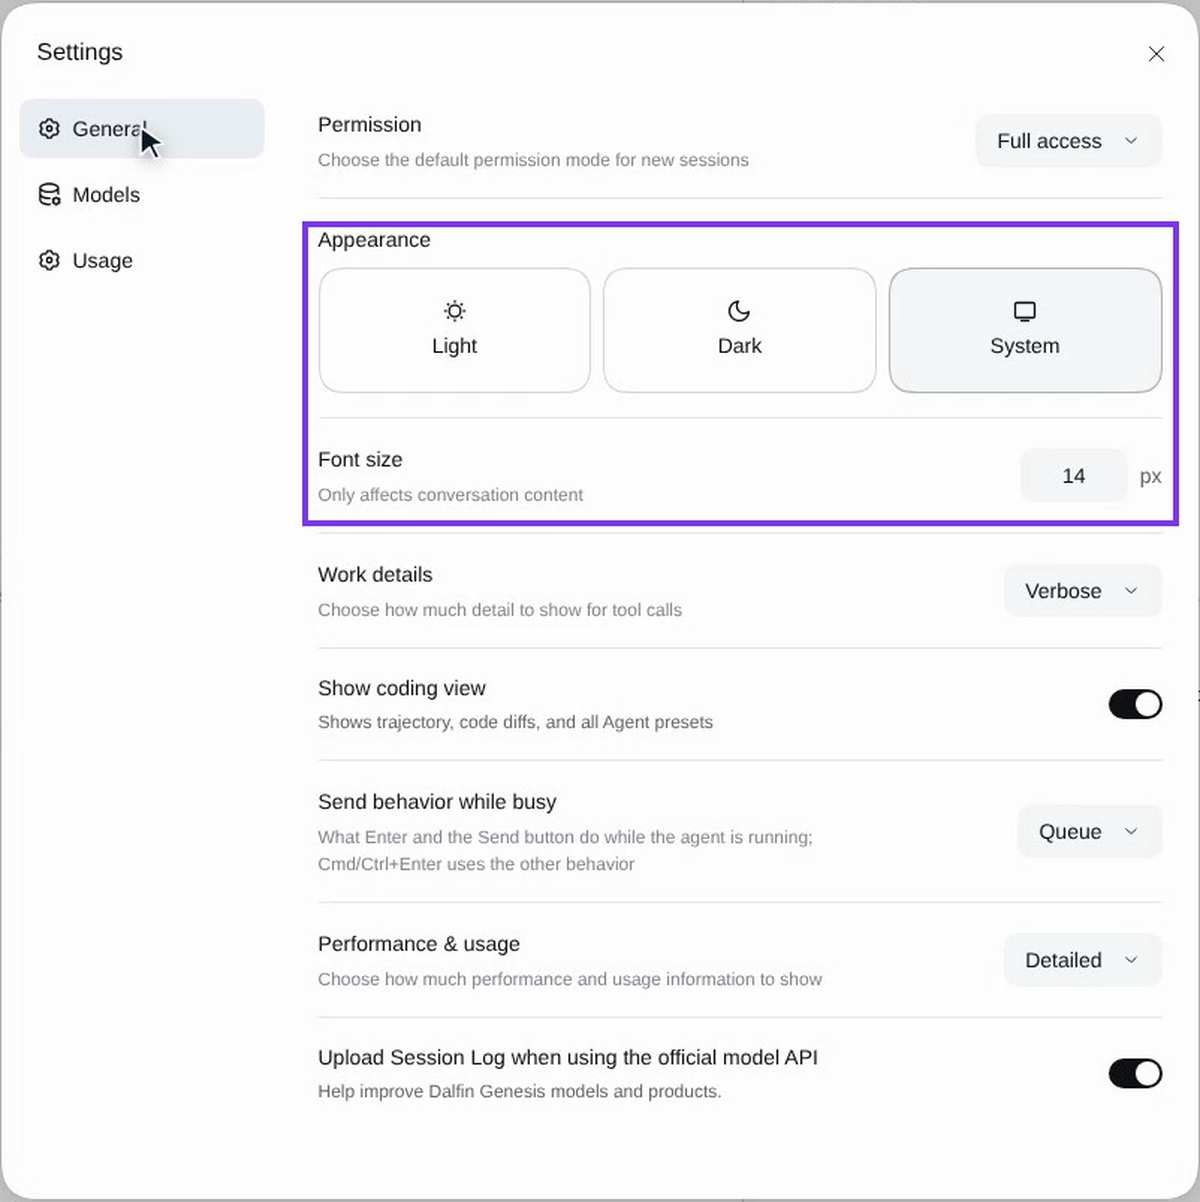
Choose how much of the agent's work you see
Work details sets how much detail you see about the agent's tool work (for example Verbose). Show coding view adds the agent's plan, code changes and presets to the conversation.
Choose what happens when you send while it works
Send behavior while busy decides what happens when you send a message while the agent is still working: Queue it for later, or interrupt the agent. Cmd/Ctrl+Enter does the other one.
Choose how much speed and token detail to show
Performance & usage sets how much detail about speed and tokens is shown (for example Detailed).
Changes apply right away. There is no Save button; close Settings with × when you are done.
Screenshots
Step 1: Select All Apps
Step 2: Find your system
Step 3: Open it
Step 4: Select Agent
Step 5: Open Settings

Step 6: Choose the permission
Step 7: Change how the workspace looks
Step 8: Choose how much of the agent's work you see
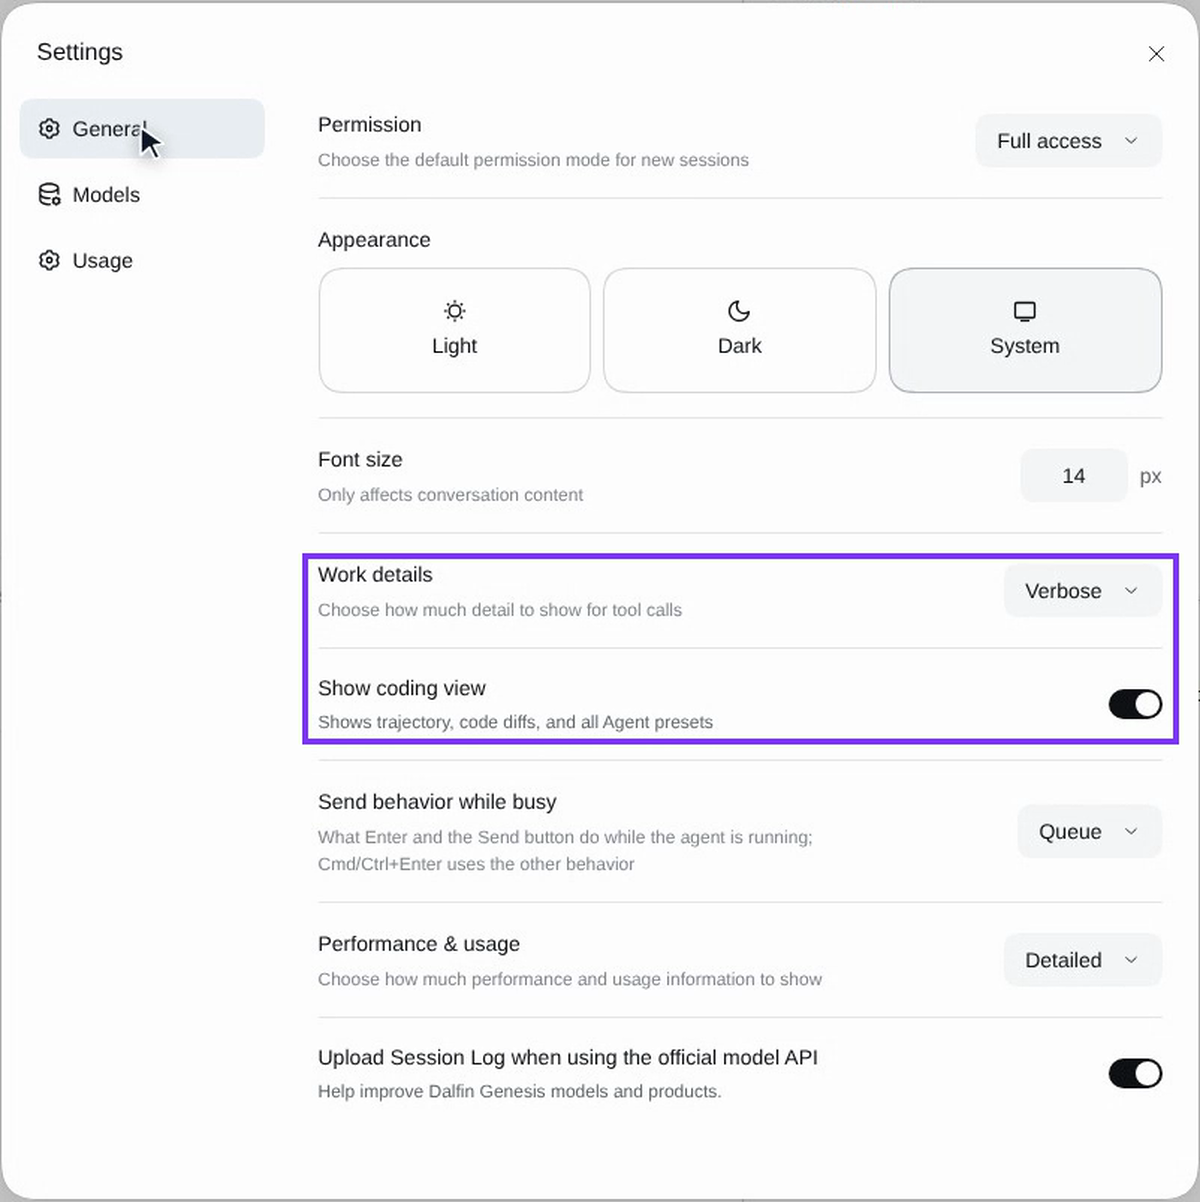
Step 9: Choose what happens when you send while it works
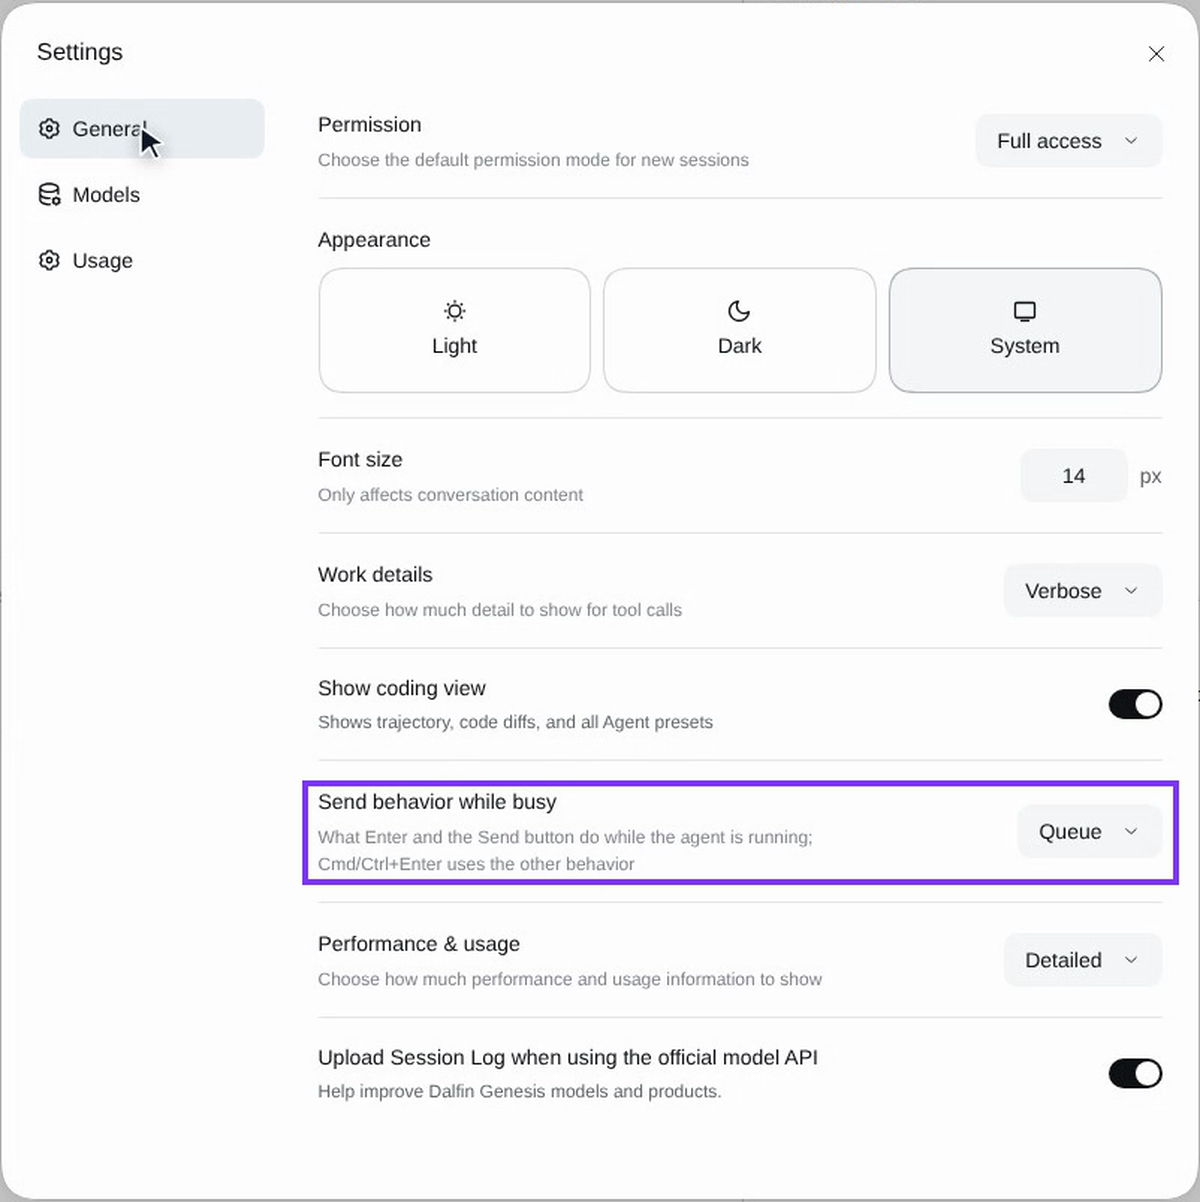
Step 10: Choose how much speed and token detail to show
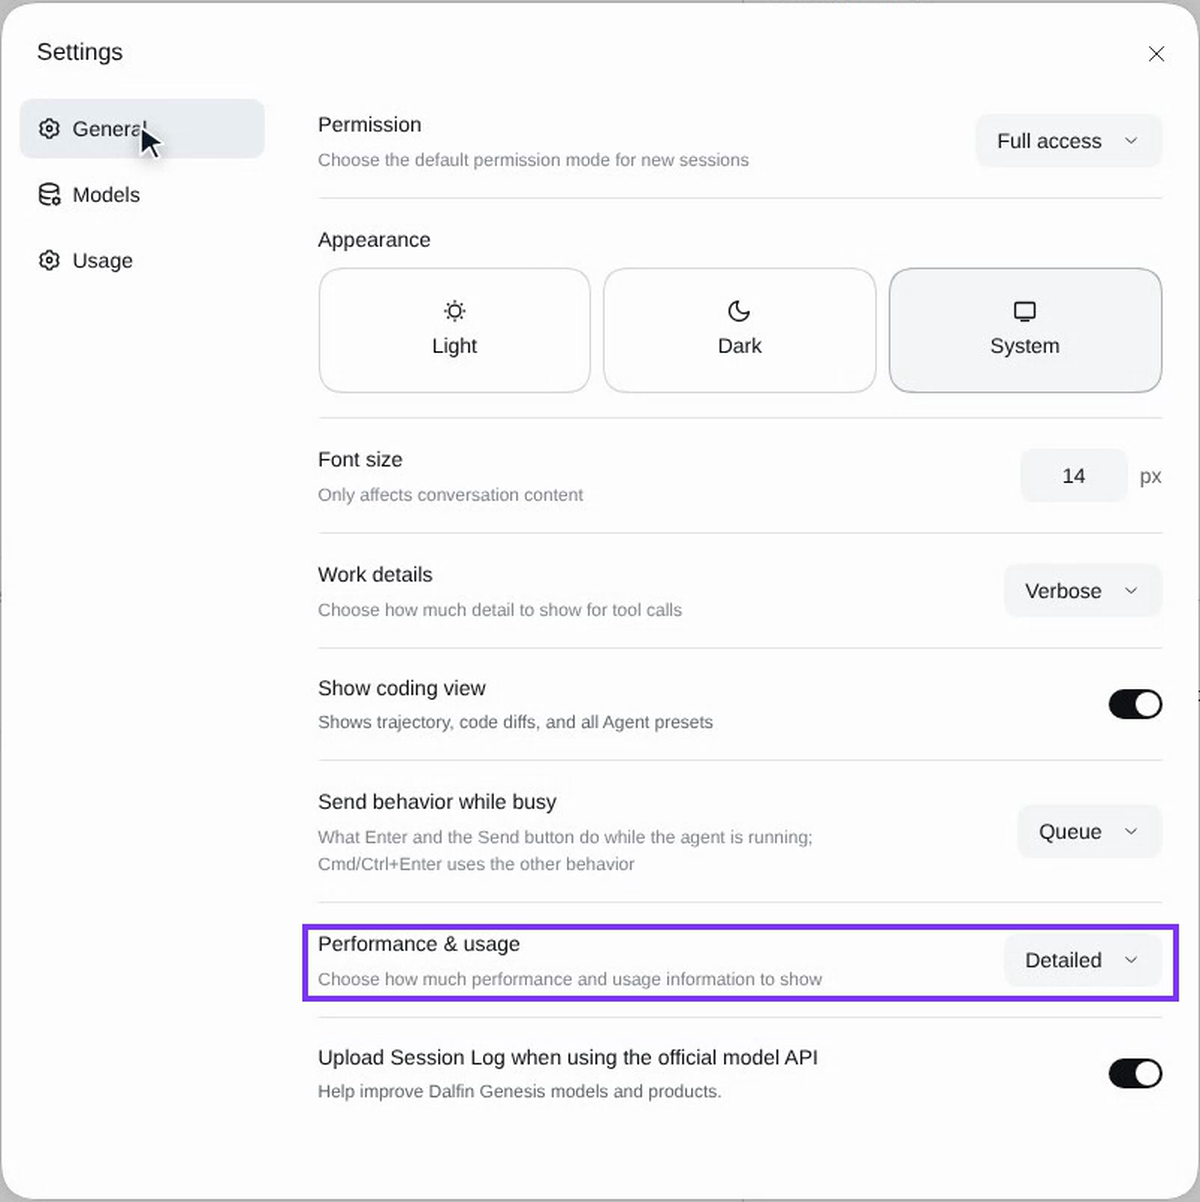
Watch how
Tip: The video leaves every setting as it is. The defaults suit most people; change Permission if you want the agent to ask before it acts.